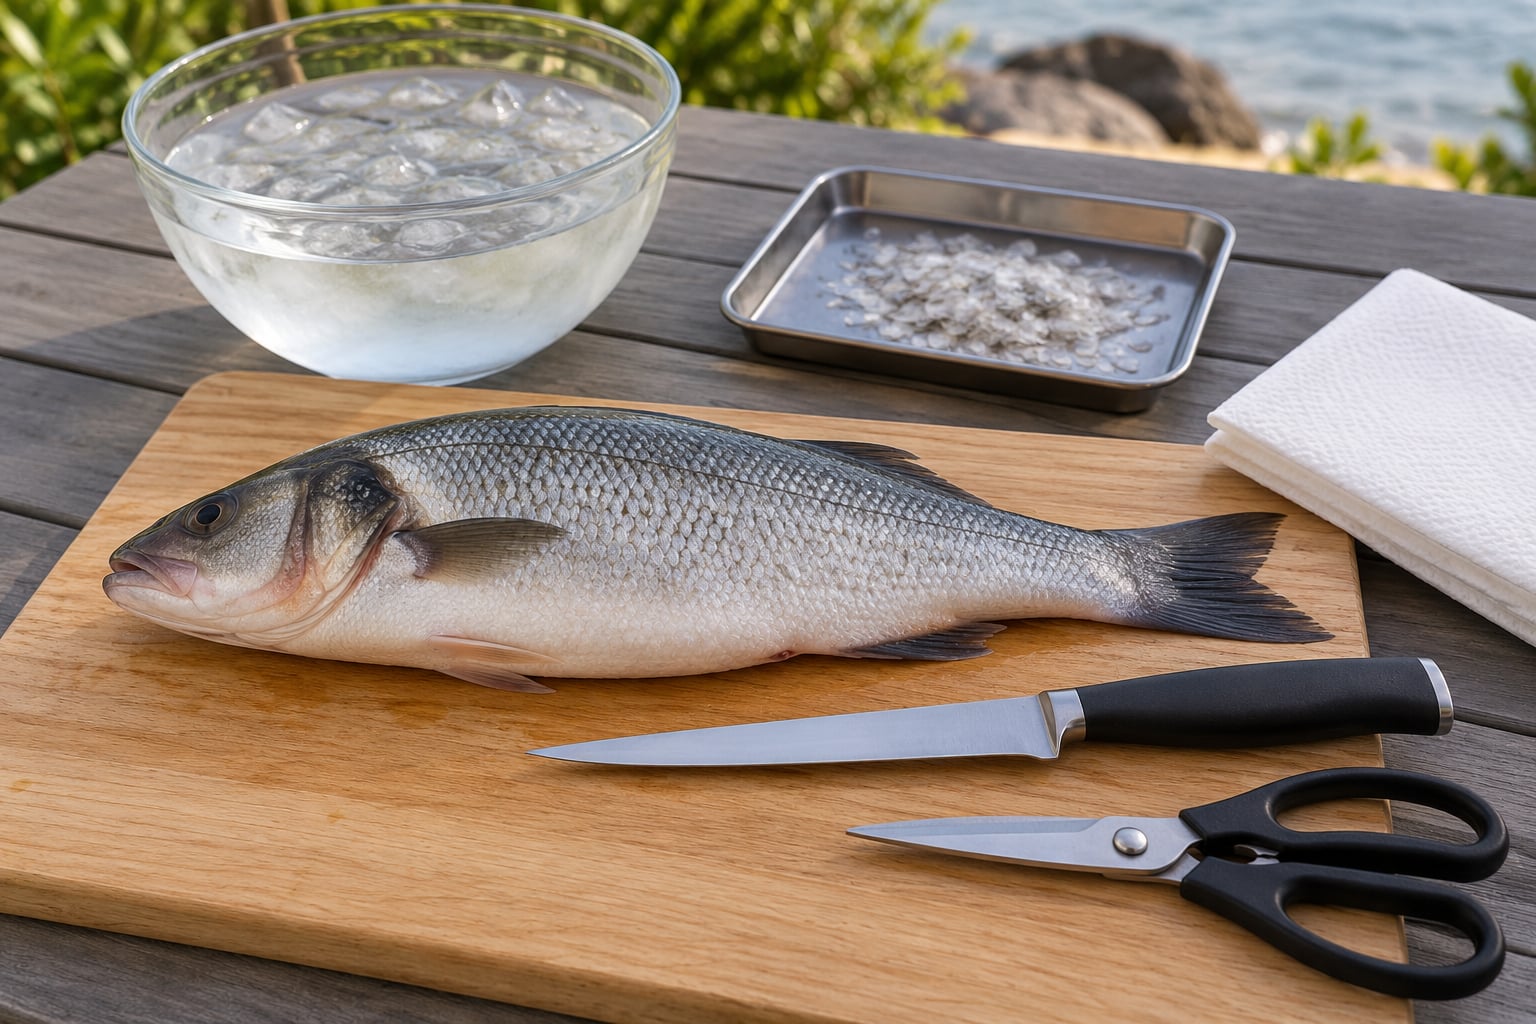
Learning how to clean and fillet a fish step by step takes about 20 minutes for a first-timer and gets faster fast. You scale it, cut out the guts, run a sharp knife down along the backbone, and end up with boneless fillets that taste better than anything out of a foam box. A fillet knife, a cutting board with something under it to stop sliding, and a bowl of cold water are genuinely all you need.
- Scaling first keeps loose scales out of the flesh.
- Name the landmarks: the vent, the gill plate, the lateral line, the ribs, the pin bones.
- Keep the blade flat against the backbone and let the bones guide your hand.
- Cold fish fillets faster than warm ones, so start chilled.
- Cook fish to 145°F (63°C) internal temperature, no matter how you prepare it.
Table of Contents
- What You Need
- Step-by-Step: How to Clean and Fillet a Fish
- 1. Prepare the fish and your work area
- 2. Scale the fish
- 3. Remove the fins and gills
- 4. Gut the fish
- 5. Rinse and dry the cleaned fish
- 6. Make the first cut behind the head
- 7. Slice along the backbone to remove the first fillet
- 8. Turn the fish and remove the second fillet
- 9. Skin and trim the fillets
- 10. Remove the belly section and pin out bones
- 11. Check, rinse, and store the finished fillets
- Common Mistakes
- Frequently Asked Questions
- Do you have to scale a fish before filleting it?
- How long can you wait to clean a fish after catching it?
- How do I know when I have removed all the bones?
- What is the easiest fish to fillet for beginners?
- Are you supposed to wash fish fillets before cooking?
- Can I fillet a fish without removing the head first?
- Conclusion
What You Need
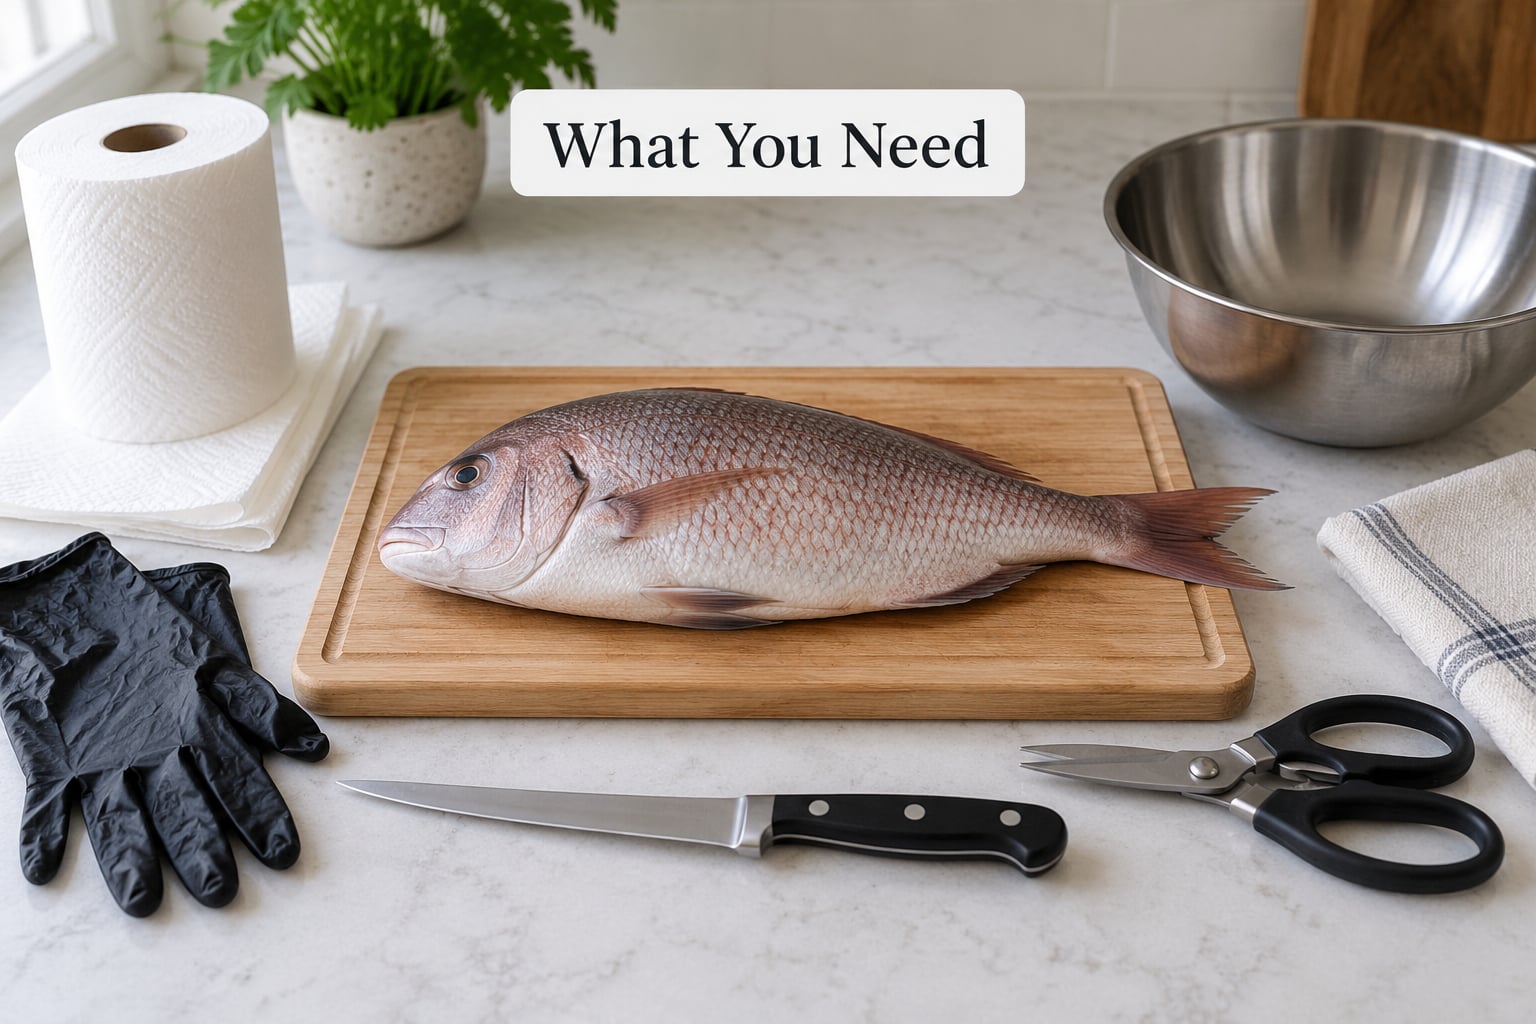
Get your gear together before the fish comes out of the cooler. Scrambling for a scaling tool with a dead fish in one hand is how beginners lose fingers.
- Fillet knife. A 8 to 10 inch blade with some flex, sharp enough to slice skin without sawing. A dull knife tears meat and drags the fillet with it.
- Cutting board. Big enough for the fish, ideally with a groove around the edge so nothing rolls off.
- Something to grip. A damp towel folded under the board, a sheet of outdoor carpet, or a cut-off plastic bottle cap. Fish on a wet board is a slipping hazard, and this is the single most common fix anglers pass around on fishing forums.
- Scaling tool or the back of a spoon. A scaler works, a butter knife edge works, the back of a spoon works fine.
- Kitchen shears. For fins, and for snipping rib bones when the knife tip feels risky.
- Cut-resistant gloves. Optional but cheap insurance, especially with catfish or a knife that has seen other fish.
- Bags or containers and paper towels. Fillets go straight into a bag so nothing sits out.
- A bowl of cold water and a brush or degreaser. For washing the board and knife when you are done.
Work near a sink or an outdoor table you can hose down, and sanitize the surface before and after. If you are cleaning fish at the lake, a portable fish cleaning station keeps the mess off the picnic table and off your truck bed.
Step-by-Step: How to Clean and Fillet a Fish
1. Prepare the fish and your work area
Rinse the fish under cold running water to wash off slime, then pat it dry. If a hook is still in it, remove that first with pliers or your fingers, working the barb out the way it went in.
Sanitize your board, lay your towel or carpet under it, and set out a bowl for the scraps so you are not reaching across the fish mid-cut. Learn the fish’s orientation before you touch it: head to the left, tail to the right, belly down, and the dorsal fin standing straight up along the top.
2. Scale the fish
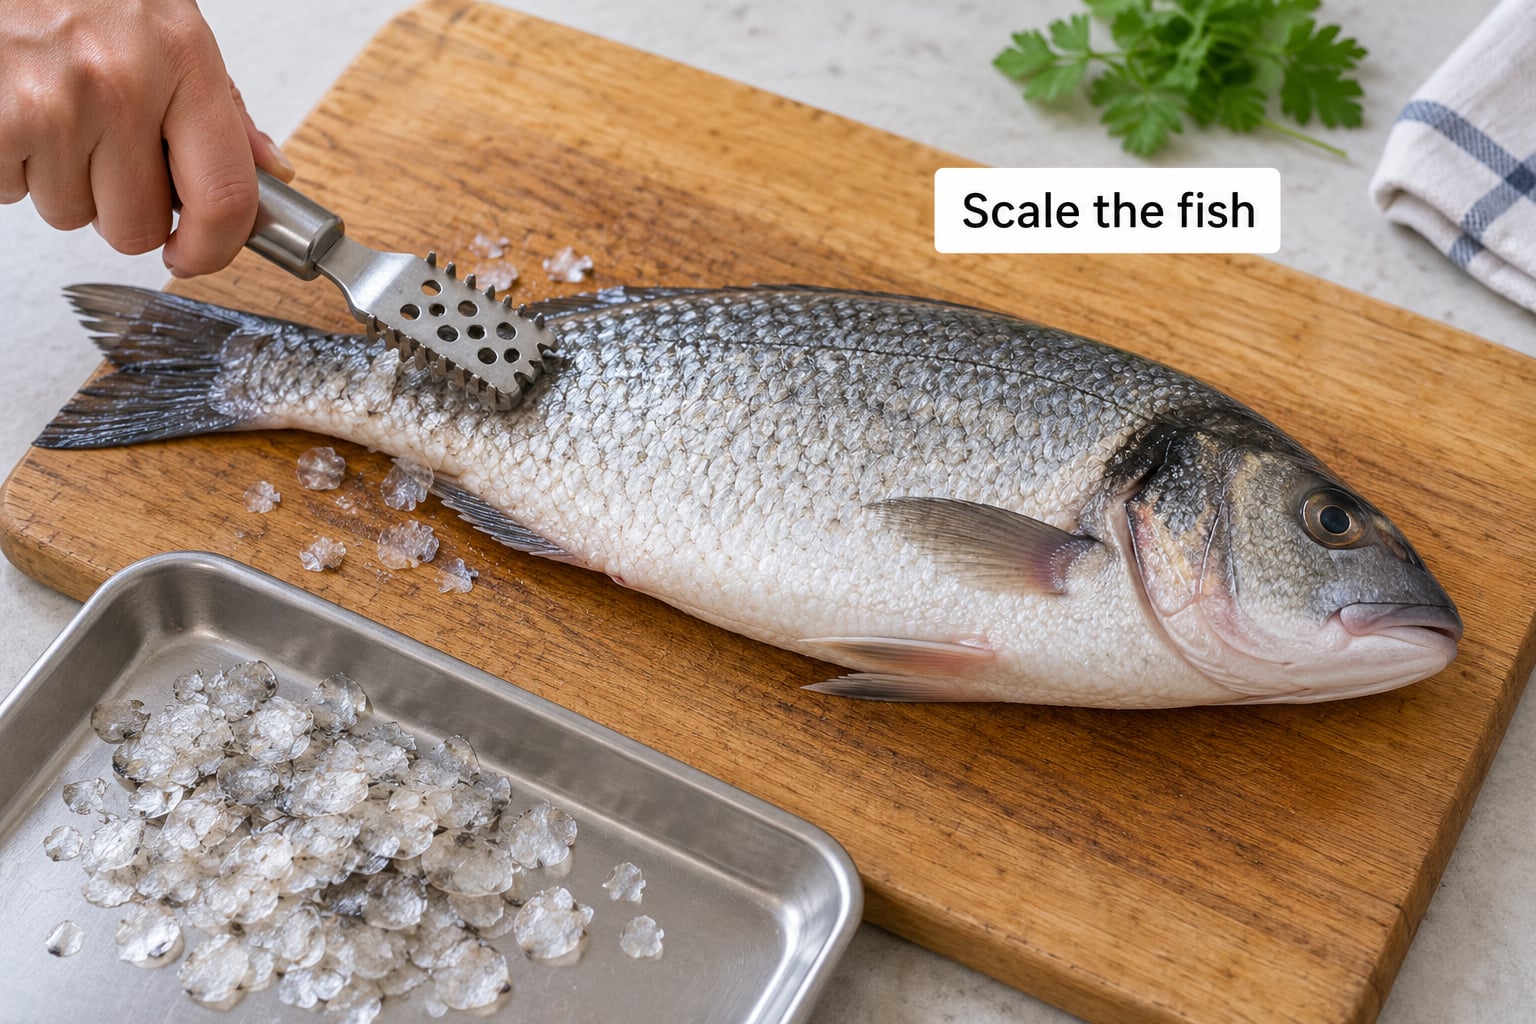
Hold the tail with a folded towel and scrape from tail toward head, against the grain. Scales lift far more easily that direction; going head to tail just pushes them under the skin and dulls your tool.
Work your way around the belly, under the pectoral fins, and up the throat area, since fish hide scales there and those are the ones you find later in the finished fillet. Rinse the body and run your fingertips over it. When the skin feels smooth and no scales come loose, you are done.
3. Remove the fins and gills
Snip off the dorsal, anal, and tail fins with kitchen shears, cutting close to the body. Leave the pectoral fins until later if they are small, since trimming them removes your best handhold for the gutting cut.
To take the gills, lift the gill cover with your fingers or slide the knife tip under the front edge, cut the membrane, and pull the red-brown feathery package out of the head cavity. Keep your fingertips on the outside of the plate and away from the fin rays and the fish’s mouth, which is where beginners take their first cut.
4. Gut the fish
Slide the knife tip into the vent, the small opening just before the anal fin under the tail, and cut only far enough to reach inside. Cut upward toward the head, following the belly line, then stop before the head. Cutting toward the head from the vent is the standard move; cutting down toward the tail tears the anal fin and wastes meat.
Reach in, grab the viscera, and pull. Then run your finger along the backbone to feel for the kidney line, the dark strip clinging near the spine, and scrape that out with the knife edge. Some organs stay behind, so look again. Finish by cutting around the rib cage and removing the gill package if you left it in.
Rinse the cavity briefly to clear blood and loose residue. Do not hose the fish down for a full minute; a short rinse is enough, and soaking pushes water and fishy flavor into the meat.
5. Rinse and dry the cleaned fish
Give the cavity and the outside a quick rinse, then pat the fish dry with paper towels. Dry fish grips better, and dry flesh stays firm while you cut.
Look the fish over once: any remaining scales, organs, or blood get cleaned now rather than discovered inside a finished fillet. When the cavity looks clean and dry, lay the fish on its side.
6. Make the first cut behind the head
Make a shallow cut just behind the gill plate, angling down toward the backbone and stopping when you feel bone. That first cut should not go all the way through; it is only marking where the fillet separates from the shoulder.
Angle the blade slightly downward as you go, not straight in. A straight-down cut works down into the meat above the shoulder instead of following the frame, which is how people end up with a ragged, boneless-looking chunk and lost yield.
7. Slice along the backbone to remove the first fillet
Turn the blade so the flat side rests against the backbone and the edge angles up toward the tail. Slice in one long, slow pull from head to tail, lifting the fillet away from the ribs as you go.
Let the bones guide the blade rather than forcing a fixed angle. Experienced filleters describe this as feel, not geometry; when the ribs push back, the knife is touching bone and should ride over it instead of cutting into it. Stop when the blade runs clear of the tail and the fillet lifts off in one piece.
8. Turn the fish and remove the second fillet
Flip the carcass over and repeat the same motion on the other side. You should feel the blade hug the backbone, follow the curve of the ribs, and exit near the tail.
The second fillet often comes away with the rib bones still embedded along its top edge and the belly strip attached underneath. Leave both on for now; they come off cleanly in the next steps.
9. Skin and trim the fillets
Lay a fillet skin-side down and pinch the loose end of the skin. Slide the blade horizontally between the skin and the flesh, blade flat, moving from tail to head while pulling the skin taut with your other hand.
If the blade starts to dig into the meat, you are angled too steeply; lift the tip and flatten it. A thin layer of meat left on the skin is normal. Trim dark or uneven edges with the tip of the knife, keeping the dark lateral line meat if you want the strongest flavor.
10. Remove the belly section and pin out bones
The thin rib section attached to the belly gets sliced off with the fillet held flat on the board. Set the blade just above the rib bones, slice through the thin meat, and flip the strip over so the bones stand up and can be pulled free without cutting into the meat.
For the pin bones, lay the fillet flat and run a fingertip down the center and along the area where the ribs were. Anything that feels like a small hard ridge is a bone. Lift it with the tip of a small knife or a pair of pin bone pliers and pull it out in the direction it points, then feel again until the whole fillet is smooth.
11. Check, rinse, and store the finished fillets
Check every fillet for scales and missed bones, especially near the shoulder where the big rib bone sits, then rinse briefly and pat dry. Getting that shoulder bone out cleanly is the thing beginners complain about most, and the answer is patience with a thin blade rather than force.
Bag the fillets or lay them in a container over ice and refrigerate them at 40°F (4°C) or below. Eat them within one to two days, or freeze them for longer. Cook fish to an internal temperature of 145°F (63°C), measured at the thickest part, which means it is opaque, separates into flakes, and no longer looks translucent in the center.
Common Mistakes
Almost every mistake below is a small adjustment to hand position or work order. The fix is usually easier than the habit.
Cutting down into the shoulder. The cut behind the gill plate needs to angle down toward the backbone, not straight down. Straight down and you sever meat instead of following the frame.
Pulling the knife upward. The blade should ride flat along the backbone with the edge angled toward the tail. Lifting the handle to “get more meat” means slicing into the top of the fillet.
Leaving bones behind. Feel for bones with a fingertip before cooking, not after. The pin bones sit near the center of the fillet, and the leftover rib bones live along the top edge. A second pass over both ends with the tip of the knife catches what the first pass missed.
Tearing the skin. Pinch the skin, keep it taut, and slide the blade between skin and flesh horizontally. If the skin tears, the blade was angled up into the meat or the skin lost tension.
Rinsing too long. A quick rinse clears blood and slime. Repeated rinsing or soaking washes away flavor and lets the flesh go soft and waterlogged.
Letting fish sit warm. Keep the catch on ice from the moment it is landed until you are done working. Warm fish spoils faster, and flesh that has started to break down is harder to fillet cleanly.
Fighting a slippery fish. Never try to hold a wet fish bare-handed with your palm flat. Use a towel, a glove, or a board grip, and cut away from your body rather than toward it.
Two habits make everything easier. Batch clean biggest to smallest, then species by species, so you are not switching setups mid-session. And know when not to fillet: small panfish like bluegill and sunfish are better fried or grilled whole, skin and all.
Frequently Asked Questions
Do you have to scale a fish before filleting it?
Not strictly, but scaling first makes a cleaner fillet. Loose scales work into the flesh as you cut and can press into the meat when you fry it. Scrape from the tail toward the head with a scaler or the back of a spoon, rinse the body, and pat it dry before the knife touches it.
How long can you wait to clean a fish after catching it?
Clean it as soon as you reasonably can. Most anglers gut a fish within a couple of hours of landing it and keep it on ice the entire time they are not working on it. Warmth speeds spoilage, and by the time the slime turns dull and the flesh smells sour, quality has already started to slide.
How do I know when I have removed all the bones?
Run a fingertip down the length of the fillet, especially along the center and where the ribs were attached. Anything that feels like a small hard ridge is a bone. Lift it with the tip of a small knife or with tweezers, pull it out in the direction it points, then feel the area again until it is smooth.
What is the easiest fish to fillet for beginners?
Panfish are the easiest starting point. Bluegill, sunfish and crappie are small, thin and forgiving, and most anglers cook them whole anyway because the skin and tail crisp up well. Practice the cuts on a panfish, then move up to trout and bass before taking on a heavy-shouldered fish such as a walleye or a catfish.
Are you supposed to wash fish fillets before cooking?
Rinse fillets briefly and pat them dry. A short rinse under cold water clears blood and loose scales, but soaking or repeatedly washing pushes water and fishy flavor into the flesh. Dry with paper towels, refrigerate or freeze promptly, and keep raw fish separate from food you plan to eat without cooking.
Can I fillet a fish without removing the head first?
Yes, and most filleters leave the head on. Cut just behind the gill plate, run the blade along the backbone to lift off the first fillet, then turn the fish and repeat. Keeping the head attached gives you a handle, stops the fish sliding around the board, and leaves the collar meat attached to the first fillet.
Conclusion
Start with the part most people rush: clean and thoroughly rinse the fish before any cutting, scaling from tail to head and pulling the guts and kidney line out through the vent. Once it is dry and laid on a board that does not slide, the rest is mostly feel.
Practice on something small like a panfish, keep the knife sharp, your hands controlled and your cutting surface stable, and the technique will settle in faster than you expect. Your third fish will take half as long as your first.