Checking trailer bearings before a trip takes about five minutes and needs no tools: spin the wheel by hand, wiggle it up and down, then look at the grease around the hub. A healthy bearing spins smoothly, feels almost no free play, and shows clean grease with no water or rust streaks.
If any wheel feels rough, clunks, or has visible slop, take care of it before you tow. A seized or worn bearing can heat up enough to ruin the hub and let a wheel go, and most trailer bearing failures happen far from a driveway because the trailer sits untouched for months between trips.
This guide covers the driveway check you do before every launch, plus what a full hub service looks like when the quick check says something is wrong. If you want the short version, do steps 4 and 5 below first.
Table of Contents
- 1What You Need
- 2Step-by-Step: How to Check Trailer Bearings Before a Trip
- 31. Position and Secure the Trailer Safely
- 42. Look for Leaks, Damage, and Loose Hardware
- 53. Check the Grease Condition
- 64. Test for Radial and Vertical Play
- 75. Rotate the Wheel and Listen
- 86. Verify the Hub, Bearing, and Seal Setup
- 97. Repeat the Check Before Departure
- 10Common Mistakes
- 11Frequently Asked Questions
- 12How much play is normal in a trailer bearing?
- 13Should trailer bearing grease be a particular color?
- 14How often should I check trailer bearings before a trip?
- 15Can I grease a boat trailer bearing myself?
- 16What bearing problems should stop me from towing the trailer?
- 17Conclusion
What You Need
For the pre-trip inspection you need very little, but each item below protects you or the trailer during the check.
- A working tongue jack to level and unload the trailer tongue.
- Rated support stands, one per side, so the weight of the trailer never sits on the jack alone.
- Wheel chocks to keep the trailer from rolling on any slope.
- A lug wrench in the correct size for your wheel studs, needed for removing a wheel to inspect the hub directly.
- Penetrating oil for a dust cap or hub cap that has been sitting for seasons.
- Brake cleaner and a rag, because brake shoes often need adjusting while the hub is open.
- A bright flashlight for looking behind the dust cap and under the fender.
- Nitrile or mechanic gloves. Grease gets everywhere and the old stuff is not clean.
- Your trailer manufacturer’s maintenance guidance for grease type and service intervals.
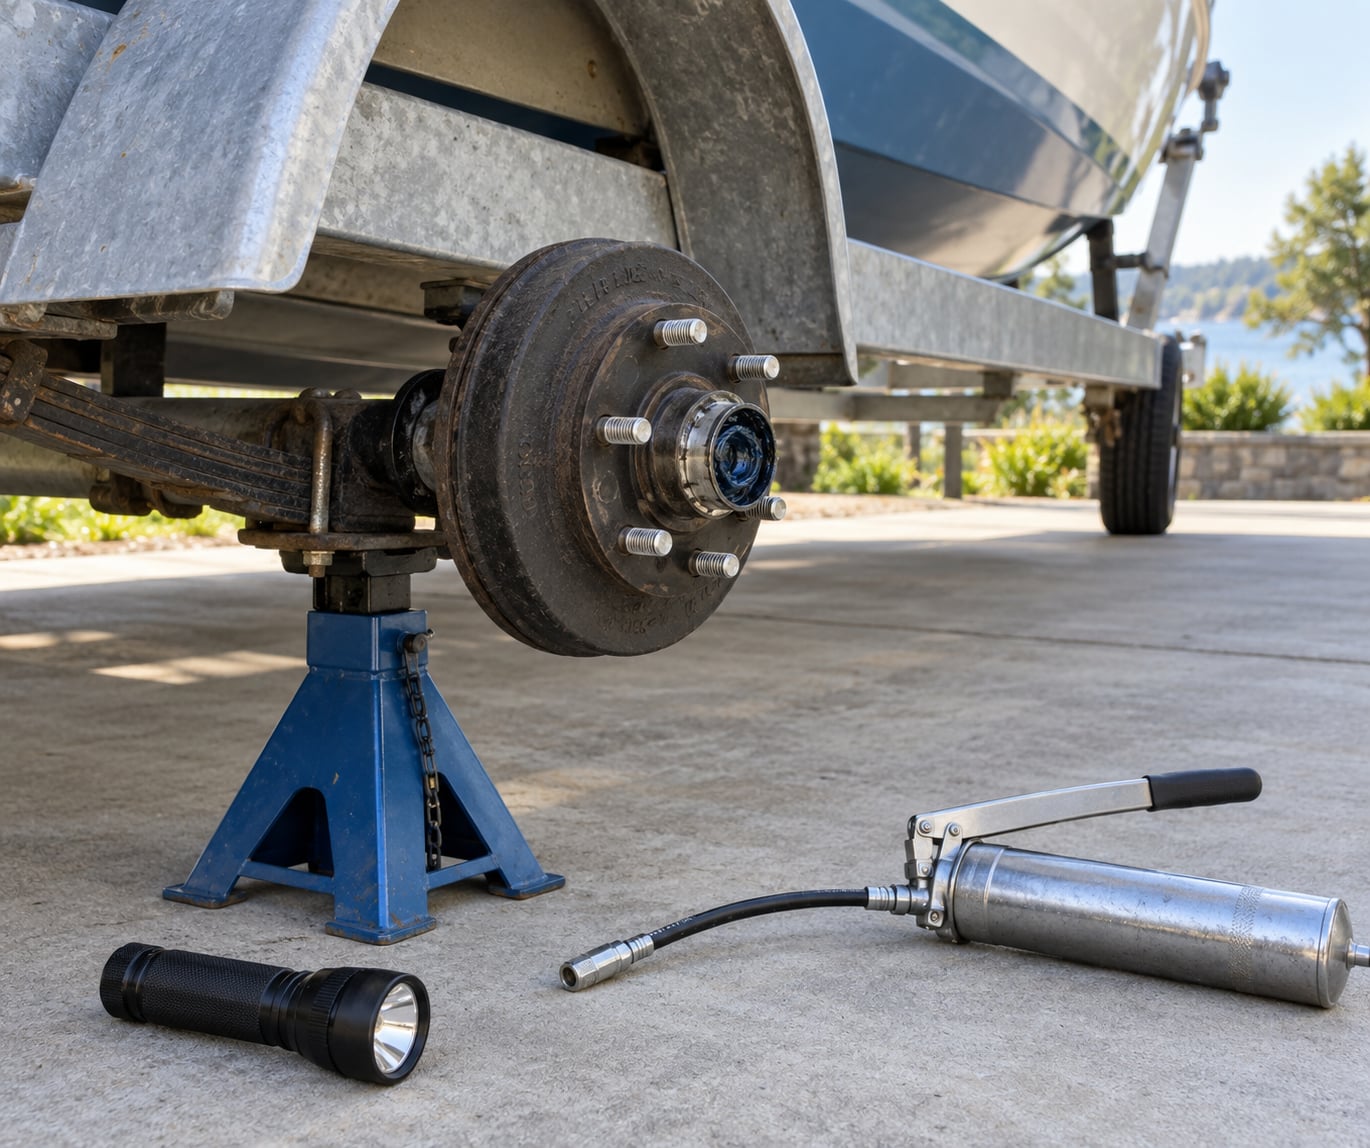
Add a grease gun and a fresh can of marine-grade waterproof grease if you intend to service the hub while it is supported. Do not mix grease types; ask the bearing and grease manufacturers whether the products are compatible.
Step-by-Step: How to Check Trailer Bearings Before a Trip
A bearing passes this inspection when it spins freely and quietly, shows no measurable play at the rim, and holds clean grease. Work through the seven steps in order on both sides of the trailer.
1. Position and Secure the Trailer Safely
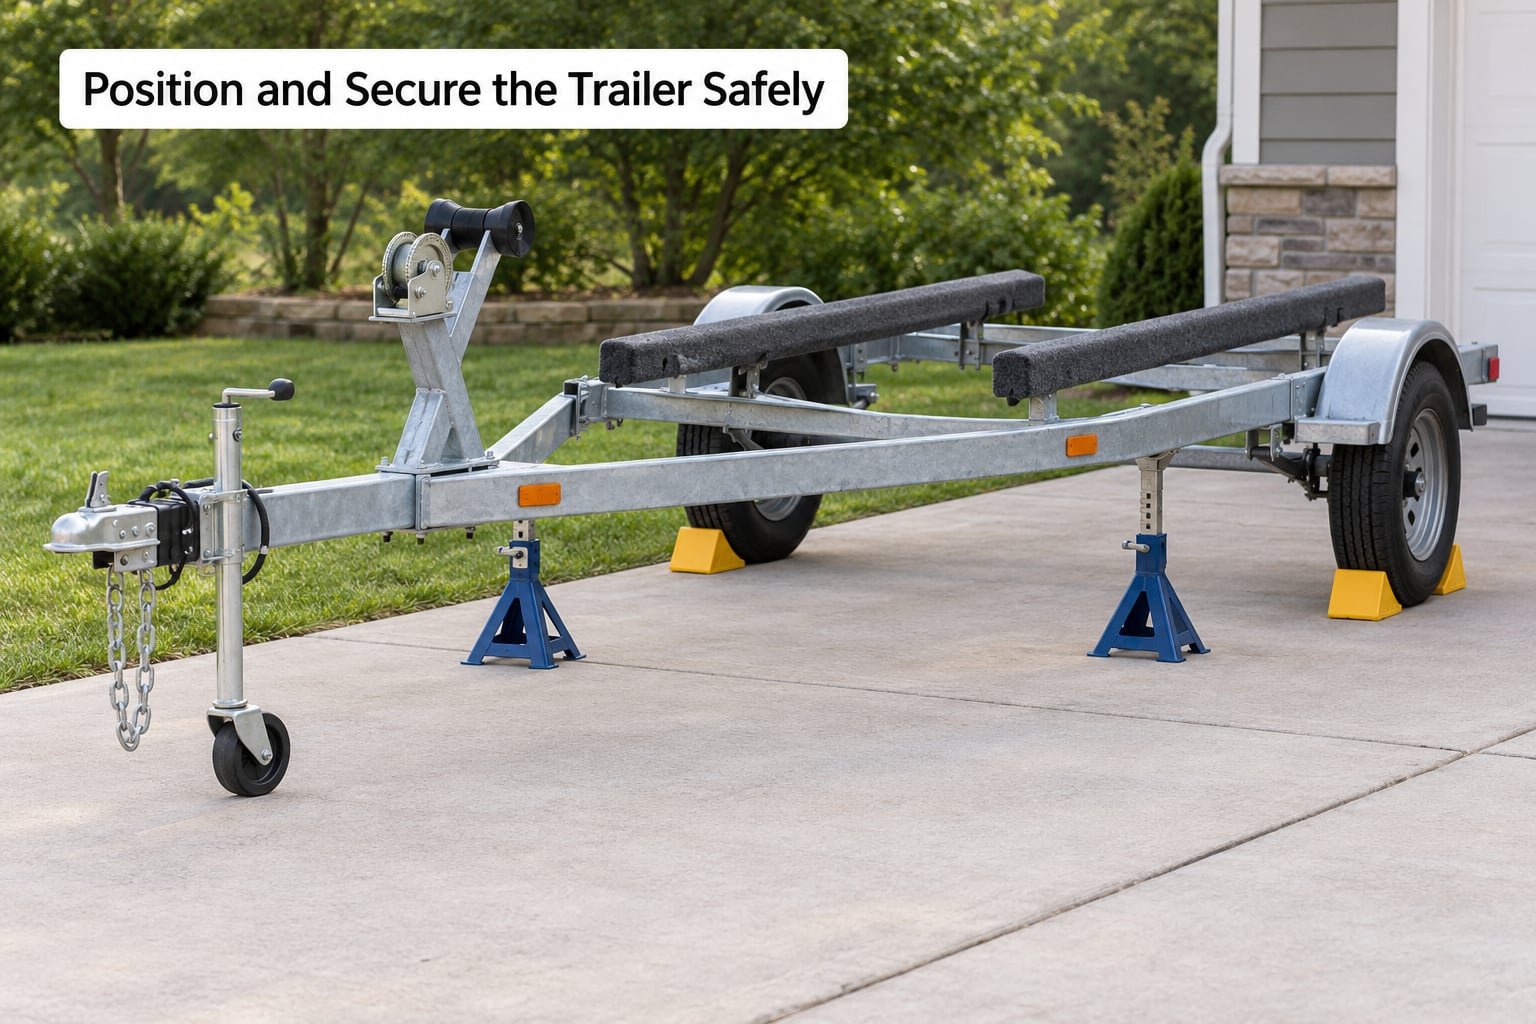
Level the trailer on firm, flat ground, then disconnect it from the tow vehicle so the hitch weight is fully on the tongue jack.
Drop the tongue jack, chock both wheels on the downhill side, and set one rated support stand under each side of the axle or frame near the wheel you are about to test. Now shake the frame; if the trailer rocks or shifts, the supports are not set properly and you need to fix that before applying any force to a wheel.
2. Look for Leaks, Damage, and Loose Hardware
A visual pass takes a minute and catches more problems than people expect.
Look at the hub, dust cap, and the ground under the wheel for fresh grease. New grease around a cap or at the seal can mean the seal is weeping or the cap is loose. Check the fender liner and tire sidewall for thrown grease, which points at a failed seal or badly worn bearing.
Scan for rust streaks, dented or scraped rims, cracked welds, and lug nuts that look stretched or rusted through. Grab the wheel and move it firmly; any shift at the axle, tube, or fender means hardware is loose, not that the bearing is fine.
3. Check the Grease Condition
Clean grease should look like amber or dark brown grease with an even texture, not a mix of colors.
Pull the dust cap off the grease fitting, or lift a hub cap if your axle uses one, and look inside with a flashlight.
| What you see | What it means | What to do |
|---|---|---|
| Amber or dark brown, even texture | Healthy, lubricated | Continue the check |
| Milky white or chalky | Water got in and mixed with the grease | Repack before the trip |
| Rusty brown and gritty | Corrosion from water intrusion | Repack and inspect the races |
| Mixed dark and clean grease | Unserviceable or overpacked | Strip and repack fully |
| Grease pushed past the cap onto the ground | Overpacked or a seal is failing | Clean it and watch for return |
Judge the grease by texture and contamination, not by color. Red, white, and black greases are all sold as products; what matters is that it is a waterproof marine-grade product compatible with the bearing manufacturer and that it is not mixed with a different type. Follow the compatibility requirements listed by the bearing and grease manufacturers.
4. Test for Radial and Vertical Play
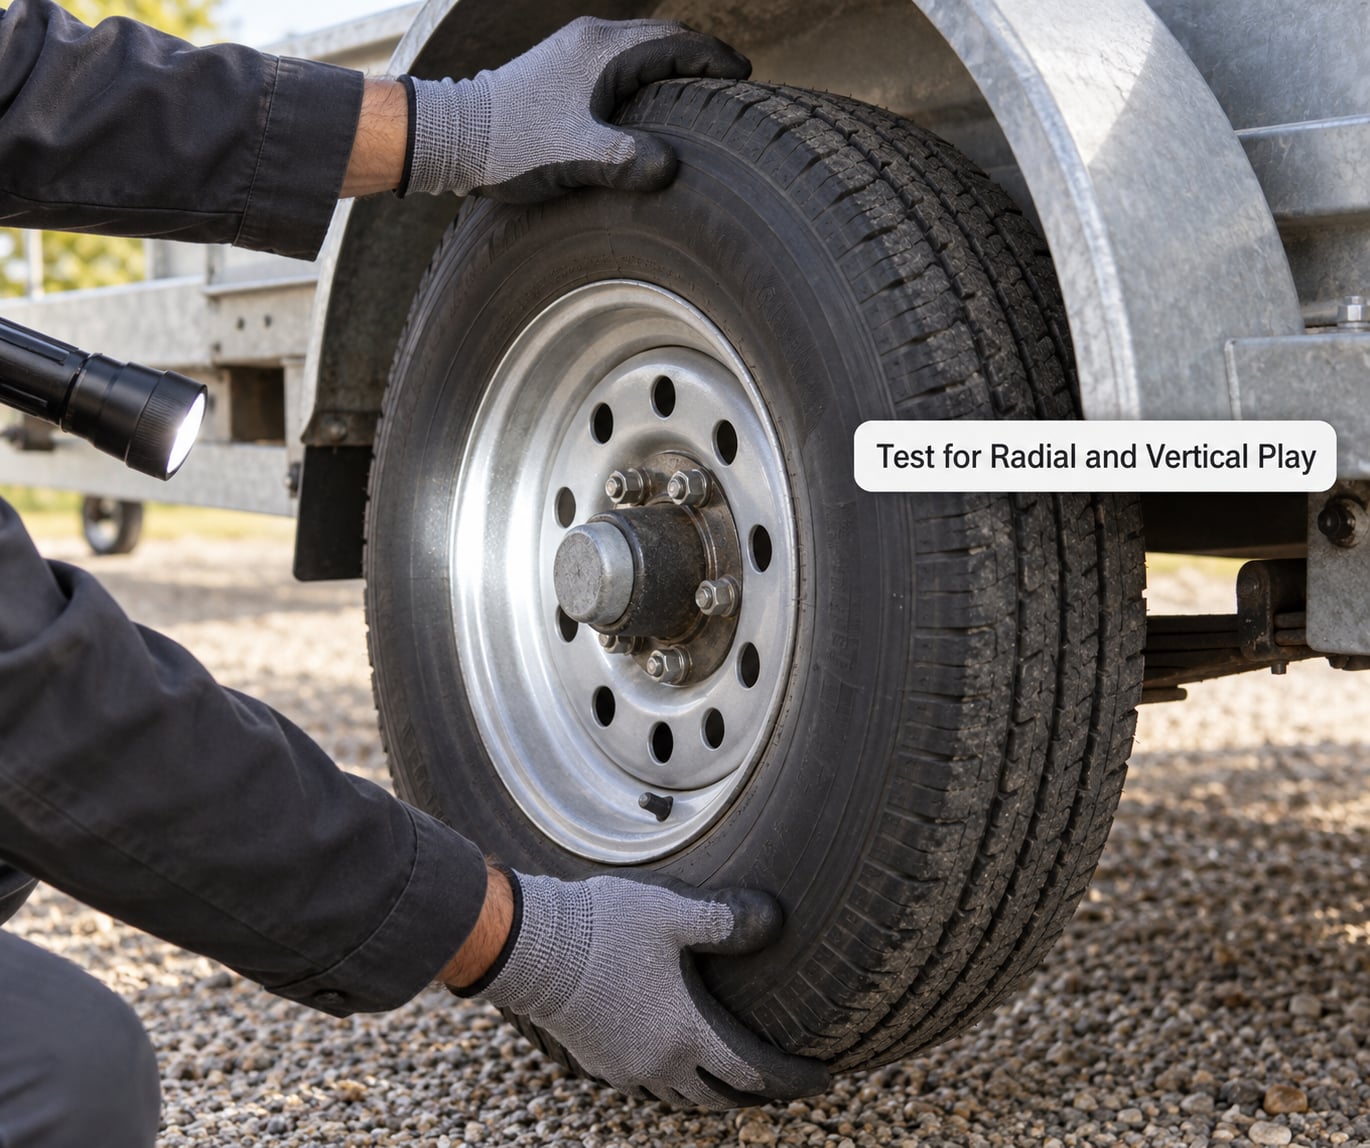
Grab the wheel at the twelve and six o’clock positions and move it gently up and down, then repeat at the nine and three o’clock positions. A healthy bearing shows little to no perceptible movement, and it should feel firm the whole way through the motion.
Use light, steady force. If you feel a distinct notch of free movement at the rim, you have measurable play, not a healthy bearing.
| Play at the rim | Verdict | Action |
|---|---|---|
| No perceptible movement | Within tolerance | Travel |
| Trace movement, no visible gap | Monitor | Recheck before every trip |
| Roughly 1/64 inch or more | Worn race or preload loss | Repack and set preload before towing |
| A notch you can feel and see | Advanced wear | Do not travel |
| Wheel will not turn by hand | Seized | Do not travel; replace the hub assembly |
Owners have been guessing at acceptable play for years. One thread on The Hull Truth had a trailer with virtually no play on one wheel and about 1/64 inch on the other from the same axle, which is exactly why you compare each side to itself and to the other wheel rather than trusting a number from memory.
5. Rotate the Wheel and Listen
Rotate the wheel slowly by hand through several full turns with your palm on the tire.
A healthy bearing spins smoothly, keeps turning a little past where you stopped it, and makes no sound. Scraping, grinding, clicking, or a rough spot that catches as it passes your hand means contamination or a pitted race. Hot, sharp smelling grease at the same time means the hub has been overheating, and that is a do-not-tow verdict.
6. Verify the Hub, Bearing, and Seal Setup
With the wheel off, confirm the hub, grease cap, and seal are all seated and undamaged.
Check that the grease cap engages fully and threads cleanly, and that a grease fitting or EZ Lube-style fitting is present if your axle uses one. Look at the spindle and castle nut for rust, thread damage, and a cotter pin that is intact and bent so it cannot back out.
Some hubs hold grease fittings and can be serviced with a grease gun. Others use sealed or press-in bearing cartridges, and pulling those apart in the driveway usually means new bearings, races, and seals, plus a preload set that takes practice. Check your axle type first.
7. Repeat the Check Before Departure
Reconnect the trailer, then run one more quick pass before you back down the ramp.
With the trailer on the hitch, do a last look for fresh grease on the ground, a loose hub cap, and any movement at the rim. Confirm the spare wheel and jack are secured, and that the lug nuts on the wheel you removed are torqued in the star pattern after refitting.
On a long haul, stop halfway and repeat the spin, wiggle, and heat check on both hubs. If the trailer sat in salt or brackish water, rinse the hubs with fresh water before and after the trip.
Common Mistakes
Most bearing problems trace back to one of a handful of shortcuts.
- Checking only one wheel. A failed bearing on one side says nothing about the other. Run the same test on both hubs every time.
- Pushing on the wheel while the trailer is unsupported. With the trailer still on the jack or hanging on a loose support, your push can tip it. Set rated stands and chocks first.
- Leaving the grease cap off after inspection. An open dust cap lets grit and water straight into the hub. Refit it before you move the trailer.
- Using the wrong grease. Mixing incompatible products or reaching for general-purpose grease in a wet environment is how water gets in and stays in.
- Blaming the bearing for looseness elsewhere. Play felt at the wheel can come from the ball joint, the spindle, or loose lug nuts. Recheck with the wheel straight on before condemning a bearing.
- Towing a questionable bearing. Owners on boating forums talk about the cost of a seized hub far less than they talk about being stranded on the shoulder.
Service the hubs at least once a year, and sooner if you cover more than roughly 1,500 miles a year or fish salt or brackish water often. A working rule of thumb circulating in owner groups is clean, inspect, and repack annually and use high-mileage seals. Carry a spare bearing set and a spare wheel, and lean on a trailer technician when a hub is seized, when the spindle is grooved, or when you are not confident setting preload. That service is cheap next to a stranded tow.
Frequently Asked Questions
How much play is normal in a trailer bearing?
A healthy trailer bearing shows little to no perceptible movement when you move the wheel up and down and side to side. Trace movement with no visible gap at the rim is worth monitoring, but roughly 1/64 inch or more means a worn race or lost preload and should be serviced before you tow. A notch you can clearly feel or see, or a wheel that will not turn by hand, means do not travel.
Should trailer bearing grease be a particular color?
No. Color is a brand choice, not a condition reading, and many good products start amber and turn dark with use. Read the grease by texture and contamination instead. Milky or chalky grease means water mixed in, gritty brown grease means corrosion, and grease of two colors layered together means the hub has not been serviced properly.
How often should I check trailer bearings before a trip?
Check them before every trip with the five-minute spin, wiggle, and look test, then open and repack the hubs about once a year. Move that full service sooner if you tow more than roughly 1,500 miles a year, launch into salt or brackish water, or store the trailer for months at a time with no use between trips.
Can I grease a boat trailer bearing myself?
If your axle has grease fittings, yes. Clean the fitting, pump in a compatible marine-grade waterproof grease until it appears at the seal, then wipe it off and hand-spin the wheel to spread the grease. Hubs with sealed or press-in cartridges cannot be serviced this way and need disassembly, new bearings, and a preload set.
What bearing problems should stop me from towing the trailer?
Stop and service before towing if a wheel will not spin by hand, if you feel a clear notch of play at the rim, if the hub is hot or smells of burned grease, if the wheel binds in one spot as it rotates, or if grease is being thrown onto the fender or tire. Any of those point to contamination, advanced wear, or a failing seal.
Conclusion
Support the trailer properly, then work both hubs: spin each wheel and listen, wiggle it up and down and side to side, and look for fresh grease, water in the grease, or a loose cap.
Little to no play with a smooth, quiet rotation means you can head to the lake. A notch of play, a rough spot, a hot hub, or milky grease means stop and repack the hubs or have a trailer technician handle it before the trailer is loaded. Five minutes in the driveway is a good trade for not hearing about a seized bearing from the side of the highway.