Mold in an RV needs three things at once: moisture, warmth, and something organic to feed on. So to prevent mold in an RV, you keep the relative humidity between 30% and 50%, find and fix the leaks and condensation that put water in the walls, and keep air moving through the unit and its hidden cavities. Most of it is a weekend of work plus a ten-minute weekly check.
That framing matters because most RV mold does not come from a dramatic roof leak. It comes from slow condensation against a cold aluminum wall, a damp mattress that never fully dries, or a closed-up unit sitting in humid air for a few months. Fix the moisture and the mold problem takes care of itself.
One more thing worth knowing up front: prevention is much cheaper than remediation. Mold also cuts into resale value, and most RV policies exclude mold and fungal growth, so a dealer or insurer will usually tell you the cleanup is on you.
Table of Contents
- 1What You Need
- 2Step-by-Step
- 31. Find and Fix Moisture Sources First
- 42. Clean Mold-Prone Surfaces Thoroughly
- 53. Dry the RV Completely
- 64. Improve Ventilation and Moisture Control
- 75. Protect and Monitor the RV
- 8Common Mistakes That Let Mold Grow in an RV
- 9Frequently Asked Questions
- 10What is the best way to prevent mold in an RV?
- 11How often should I check my RV for moisture and mold?
- 12Can I use a regular household bleach solution in my RV?
- 13How do I prevent mold while my RV is in storage?
- 14Why does mold keep returning in the same RV area?
- 15When should I have an RV mold problem inspected by a professional?
- 16Conclusion
What You Need
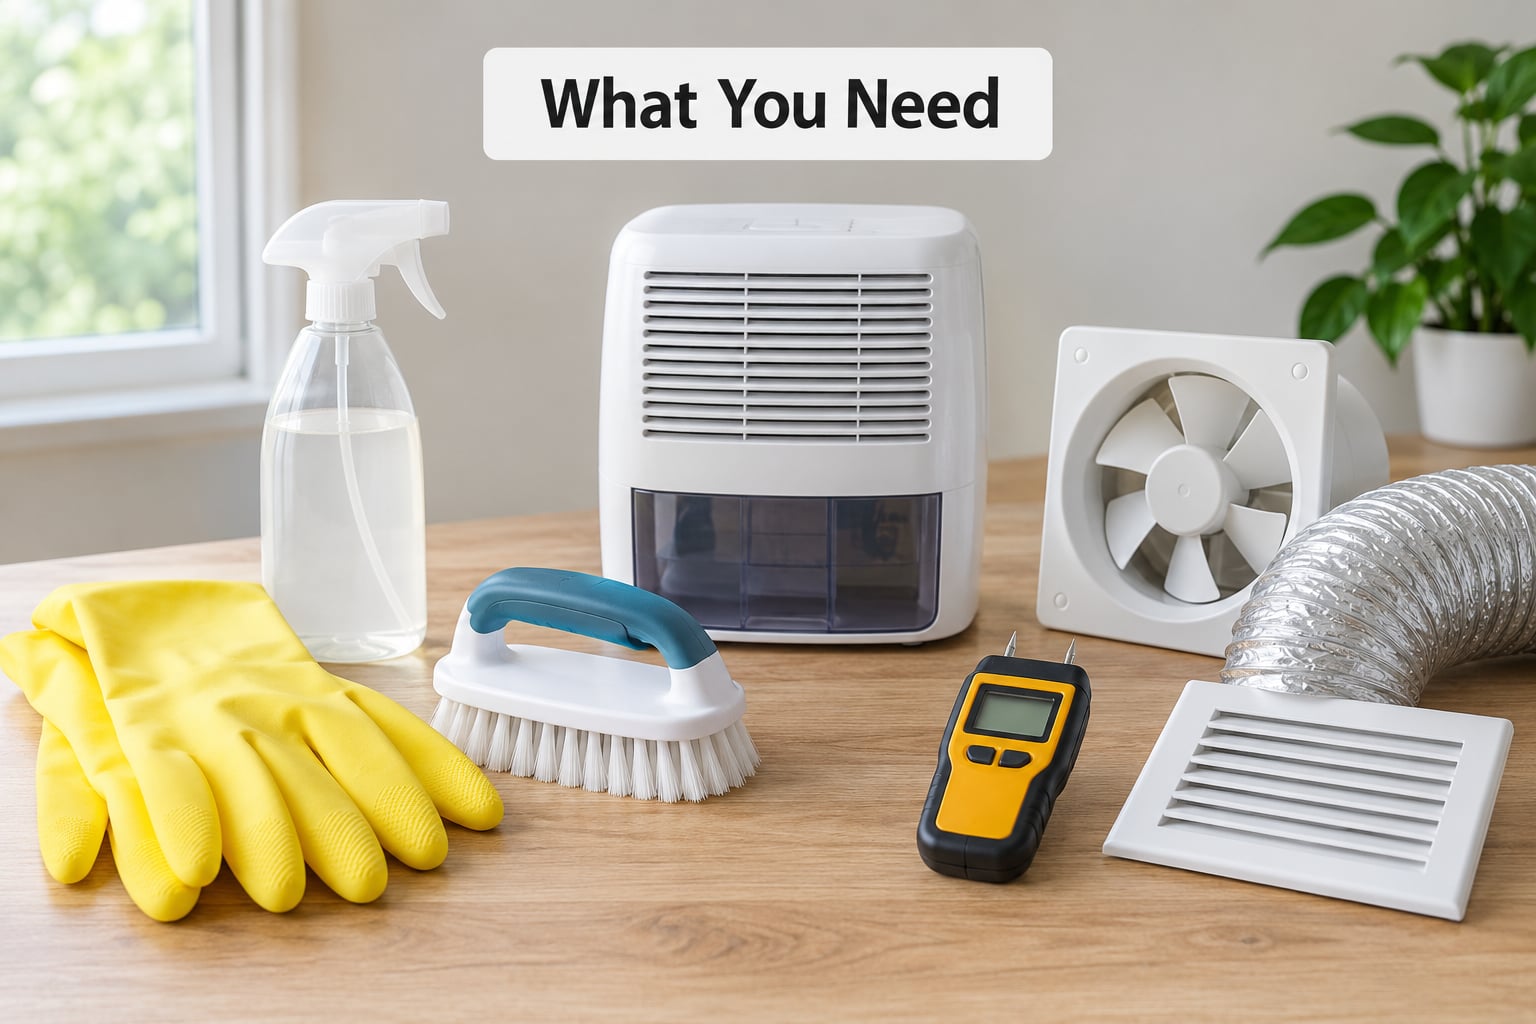
Gather everything before you start opening things up. Half-finished mold jobs usually happen because the person ran out of supplies halfway through.
- A pin-type or pinless moisture meter. This is the single most useful tool in the whole job, because it tells you whether wood is wet instead of guessing from a dark stain.
- A small digital hygrometer or a temperature and humidity monitor that logs a high and low reading for the day.
- Gloves, a N95-style respirator, and eye protection. Mold spores become airborne the moment you disturb growth.
- A stiff scrub brush, a HEPA vacuum, and microfiber cloths.
- An RV-safe cleaner or undiluted white vinegar for hard surfaces, plus a separate product approved for whatever flooring and upholstery you actually have.
- A compact dehumidifier — compressor for warm climates, desiccant for cold ones. Check its rated minimum temperature before you buy for winter use.
- A box of passive moisture absorber for closets, cabinets and the bed cavity.
- Exterior-grade sealant or RV caulk, plus painter’s plastic and foil tape for sealing off a cavity while it dries.
- A couple of small fans. Air movement is free, and it does more than most products people buy.
Step-by-Step
1. Find and Fix Moisture Sources First
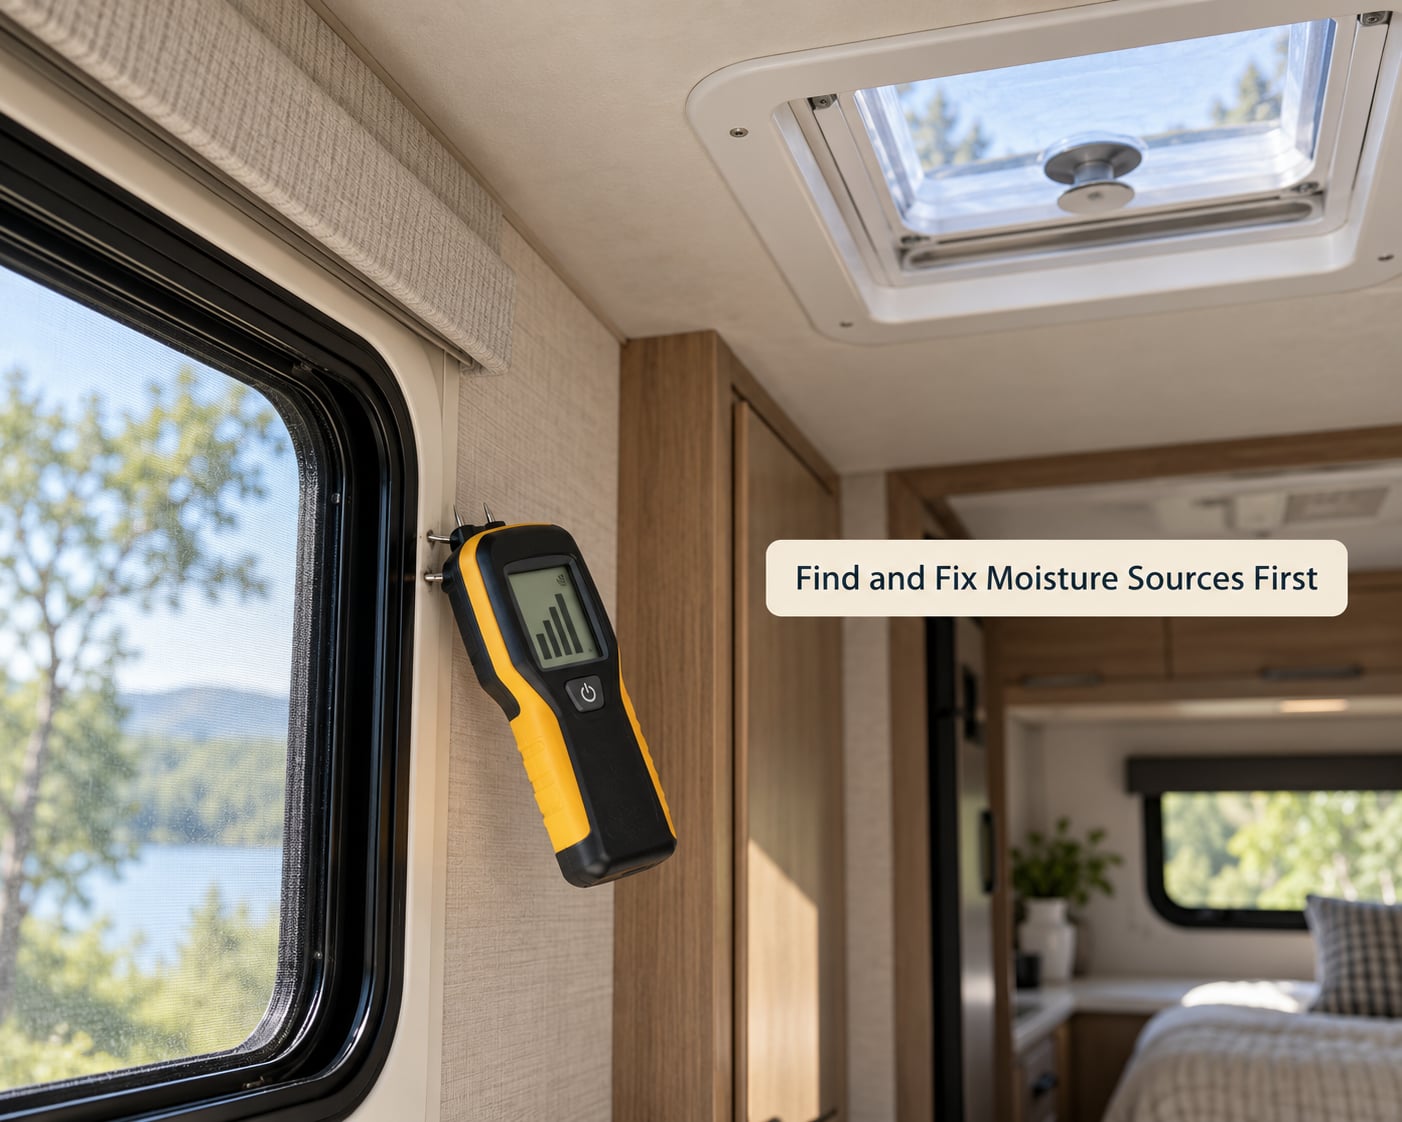
Start on the outside. Walk the roof, the seams, the A and B pillars, the window and door openings, and the plumbing penetrations, looking for caulk that has cracked, pulled away, or gone chalky. On the inside, press the meter to every suspect surface and note the readings.
Check the roof vents and the fridge vent panel too. Those are openings to the outside, so cold humid air enters through them and condenses on the first surface it touches. That is the single most common cause of soft flooring and mold at the front of a travel trailer.
Work through the usual suspects in this order: plumbing connections and the wet bay, window and door seals, roof and fridge vents, the shower pan and drain, the A/C or furnace condensate drain, and any place where two materials meet that can wick water from one to the other.
How do you know a source is fixed? Not by the stain disappearing. Take a moisture reading, repair the leak, then re-read the same spot 24 and 48 hours later. Readings that climb back up, or that stay high, mean water is still arriving. Readings in the teens that hold steady mean the area is genuinely dry.
Do this before you clean anything. Cleaning mold while the water keeps coming is the most common reason it comes back within a month.
2. Clean Mold-Prone Surfaces Thoroughly
Mold grows where you cannot see it. The shower pan, the floor under the vanity, the back corner of a cabinet, and the wall behind the mattress are the usual hiding places, and a surface wipe of the visible bathroom wall achieves almost nothing.
Put on gloves, the respirator, and eye protection before you start. Open a window or run the exhaust fan first, and work from the far end of the space toward the door so you are not breathing what you just stirred up.
HEPA-vacuum the dry growth before it gets wet. Then treat hard, non-porous surfaces with your chosen cleaner. Undiluted white vinegar sprayed on and left for about an hour works well on sealed hard surfaces; a diluted bleach solution works too, but never on tent canvas, on any flooring that bleaches, or on grout and caulk you would rather not lose. On porous material such as carpet, insulation, or wood paneling that has actually grown into it, cleaning rarely saves the piece. Replace it.
Bag everything you pull out and take it away from the RV before you go further. Leaving a bag of moldy carpet in the corner behind the slide is how you end up cleaning the same spot three times.
3. Dry the RV Completely
This is the step people skip, and it decides whether any of the rest worked. Every wet material you leave behind keeps feeding whatever did not get cleaned out.
Pull out soaked carpet, rugs, mattresses, bedding, and any insulation that stayed wet. Set them outside in sun and moving air, or discard them. A dehumidifier in a closed unit does almost nothing for a soaked mattress sitting in a cavity, so get those items out first.
Then dry what stayed. Run the dehumidifier with the windows and roof vents cracked a few inches, and place a fan in each closed area so air actually passes through it. Check the meter every day or two. When readings stop dropping, you are close; when they hold in the low-to-mid teens, the framing is dry enough to close up.
Open the cabinet and closet doors and leave them open while everything dries. Stacked-up fabric and a closed door is a mold greenhouse even when the rest of the unit is fine.
4. Improve Ventilation and Moisture Control
Airflow is the cheapest mold prevention there is. Run the bathroom exhaust fan during and for 20 minutes after every shower, and the range hood fan while you cook — cooking adds more water vapor to the interior than most people expect. Cross-ventilation beats a single opening: crack a roof vent on one side and a window on the other so air actually moves through the space.
Here is the rule experienced owners keep repeating: compare your indoor and outdoor humidity before you open anything up. If it is drier outside, cracking windows and roof vents clears moisture. If outdoor humidity is higher, you are inviting that moisture in, and the fan and dehumidifier do the work instead.
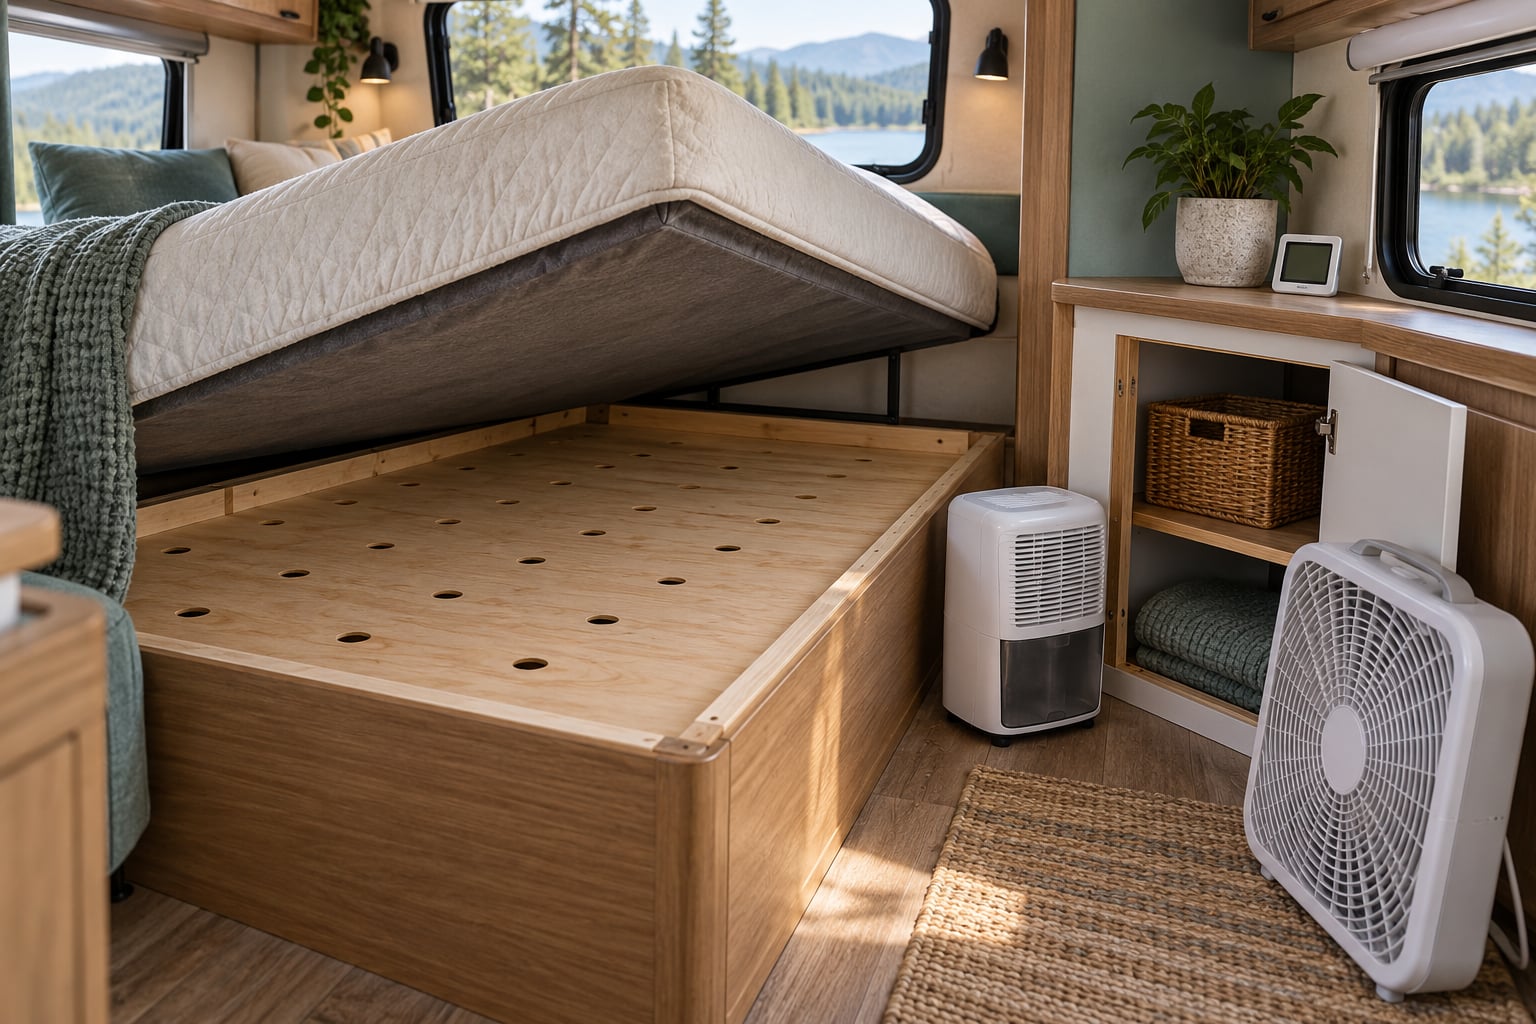
A powered dehumidifier and a passive absorber are not competitors. An electric unit controls humidity for a whole space and can run on a small solar panel or a 12V connection. A passive absorber only pulls moisture from the air in its immediate vicinity, so it works well inside a closed cabinet, a closet, or a bed cavity, and does nothing for the living area. Many owners run one of each.
Skip the shoe-box silica packets for anything longer than a few weeks. They are sized for a dresser drawer, not for a fiberglass box holding damp air for months.
On heat, be careful. Combustion heaters and propane appliances add water vapor as they run, so a propane heater fighting cold can leave you worse off than before. Prefer a heat pump or a fan-assisted unit if your rig has one, and always run ventilation alongside any heat.
5. Protect and Monitor the RV
Once everything is dry, put the defenses back in place. Reseal the roof, windows, and plumbing penetrations with exterior sealant, and check that sealants are continuous rather than running in patches. Store your belongings on shelves or in plastic bins so the floor can be inspected, and keep the lowest closet shelf and the under-bed cavity clear.
For the bed, the highest-risk spot in the whole rig, a vented mat or slatted platform that holds the mattress off the cold floor and lets air circulate underneath is a real improvement. Residents on r/RVLiving describe the same discovery over and over: black growth on the bed platform board found only after moving the mattress. Lift it and look on a schedule, not just when something smells off.
Then set a rhythm. Weekly while you are using the unit, check the hygrometer, run the fans, and wipe down the bathroom and shower pan. Monthly during storage, walk in, look under the mattress and inside the cabinets, and read the meter in the corners. People who store outside under a decent cover with an open container of passive absorber on the floor report the same consistent result, and a quick monthly visit is what makes the difference.
About running equipment in an unattended RV: a dehumidifier left in a closed unit is a real concern, particularly one with a drain hose that can back up. Use a unit with a rated auto shutoff, or a solar setup, and never leave a combustible space heater running while nobody is there. Check your rig’s manuals, and follow them.
Common Mistakes That Let Mold Grow in an RV
Covering mold before it is dry. Sealing up a damp, cleaned area traps the moisture and gives the spores a sealed, warm, wet box. Confirm the area reads dry with a meter before you reinstall trim, baseboards, or underlayment.
Cleaning only what you can see. The visible patch on the bathroom wall is the least of it. Always check the shower pan, under the vanity, the back of cabinets, behind the mattress, and the front floor under the beds and sofa.
Using too much water to clean mold. A soaking wet cleaning wets the substrate and drives moisture into the wall cavity. Use the lightest effective method — dry HEPA vacuuming first, then damp wiping — and dry the area completely afterward.
Storing damp fabrics. Mattresses, rugs, cushions, and bedding are the most common items stored with moisture still in them. Pull them out, let them dry in moving air, and cover them with something breathable rather than plastic.
Ignoring recurring condensation. If the same wall or window beads up every morning, the problem is a cold surface or a failed seal, not a cleaning job. Adding a vent mat, a small fan, or better insulation on that wall fixes the cause; cleaning fixes it for about three weeks.
Cracking windows in humid weather. On a muggy morning you are inviting that air in. Check your indoor and outdoor humidity first, and use fans and dehumidification when outside air is damper.
Frequently Asked Questions
What is the best way to prevent mold in an RV?
Control the moisture. Keep relative humidity between 30% and 50% with a hygrometer, fix leaks and failed seals before you clean anything, run a dehumidifier or passive absorber in enclosed spaces, and keep air moving with roof vents, exhaust fans, and a small fan in the bed cavity. Inspect under the mattress and inside cabinets monthly, because those hidden areas are where mold usually starts.
How often should I check my RV for moisture and mold?
Weekly while you are living in it, and monthly while it is in storage. A quick walk takes about ten minutes: read the hygrometer, lift the mattress, look behind the vanity and into cabinets, and check the corners of the flooring with a moisture meter. Most people find problems in the first year of ownership, and a monthly glance is what keeps a small spot from becoming a drywall replacement.
Can I use a regular household bleach solution in my RV?
Yes, on hard non-porous surfaces, diluted roughly one part bleach to ten parts water, and never mixed with other cleaners. Wear gloves and eye protection and ventilate while you work. Skip it on tent canvas, on vinyl or flooring that bleaches, and on grout or caulk you would rather keep, and use white vinegar on sealed surfaces if you prefer. Bleach does not fix a leak, so the mold returns without one.
How do I prevent mold while my RV is in storage?
Dry the unit thoroughly before it goes into storage, then leave ventilation cracked, a dehumidifier or passive absorber running, and cabinet and closet doors open. Use a breathable waterproof cover, or store indoors if you can, and keep a hygrometer inside so you are reading numbers rather than guessing. Never seal the unit airtight with no absorber, because trapped moisture has nowhere to go.
Why does mold keep returning in the same RV area?
Because the moisture source is still there. Most repeat offenders are a cold exterior surface shedding condensation, a failed window or roof vent seal, or a plumbing connection that drips slowly enough to keep the framing damp. Clean the area, then trace the water back to its entry point and repair it. If the surface is cold to the touch in the morning, add a vent mat, a fan, or extra insulation on that wall before you do anything else.
When should I have an RV mold problem inspected by a professional?
Get an inspection when mold reaches insulation, the subfloor, structural framing, or the plywood bed platform, or when the area is large enough that removing materials means removing part of the interior. Also bring in a professional if anyone in your household is pregnant, elderly, has asthma or a weakened immune system, or develops symptoms, and speak with a healthcare professional about any health concerns. Mold is rarely covered by RV insurance, so get documentation before you pay for remediation.
Conclusion
Start with the source, not the sponge. Find where the water is coming from, repair it, and confirm with a moisture meter that the area is actually dry before you close anything back up.
Then clean the hidden areas properly, get the whole unit dry with fans and dehumidification, and put the defenses back: sealed joints, elevated storage, air moving under the mattress and inside cabinets. A hygrometer in the unit tells you whether you are winning.
Most of the work is a weekend. Keeping it that way is a ten-minute weekly check while you travel and one visit a month while it sits.