You sharpen a fishing hook by stroking the outer faces of its point with a small diamond file, hook hone or sharpening stone, holding the same angle on both sides and always moving from the tip back toward the bend until the point becomes a fine, symmetrical wedge. Six to eight light strokes a side is usually enough.
That is genuinely all it takes, and if you have never done it, here is how to sharpen fishing hooks the way anglers who do it weekly do it. It takes about a minute per hook, costs almost nothing and fixes the single most common reason a lake angler loses a fish that was already on.
A blunt point does not need force to set, it needs a sharp edge to find the corner of a mouth. Fish feel that difference immediately, and so do you: a good point finds its way in and you feel the take, while a dull one drifts against a lip and the fish spits it. Sharpening is also the cheapest upgrade in fishing. A box of hooks costs the same whether the points are needle-sharp or rounded off from a month in the tackle box.
Start by testing the hook. Drag the point across the pad of your thumb or across a fingernail. If it catches and holds, it is fine. If it slides off without a grab, it needs work. That is the nail test every angler uses, and it takes two seconds per hook.
Table of Contents
- 1What You Need
- 2Step-by-Step: How to Sharpen Fishing Hooks
- 31. Inspect the Hook and Choose the Right Tool
- 42. Stabilize the Hook and File the Point
- 53. Refine the Tip and Check the Sharpness
- 64. Rinse, Protect, and Store the Hooks
- 7Common Mistakes When Sharpening Fishing Hooks
- 8Frequently Asked Questions
- 9How to sharpen a dull fishing hook?
- 10What is the best file for sharpening fishing hooks?
- 11What is the correct way to use a sharpening stone?
- 12How do I test if a hook is sharp enough?
- 13Is it better to sharpen a hook or replace it?
- 14Conclusion: Keep Your Hooks Ready to Fish
What You Need
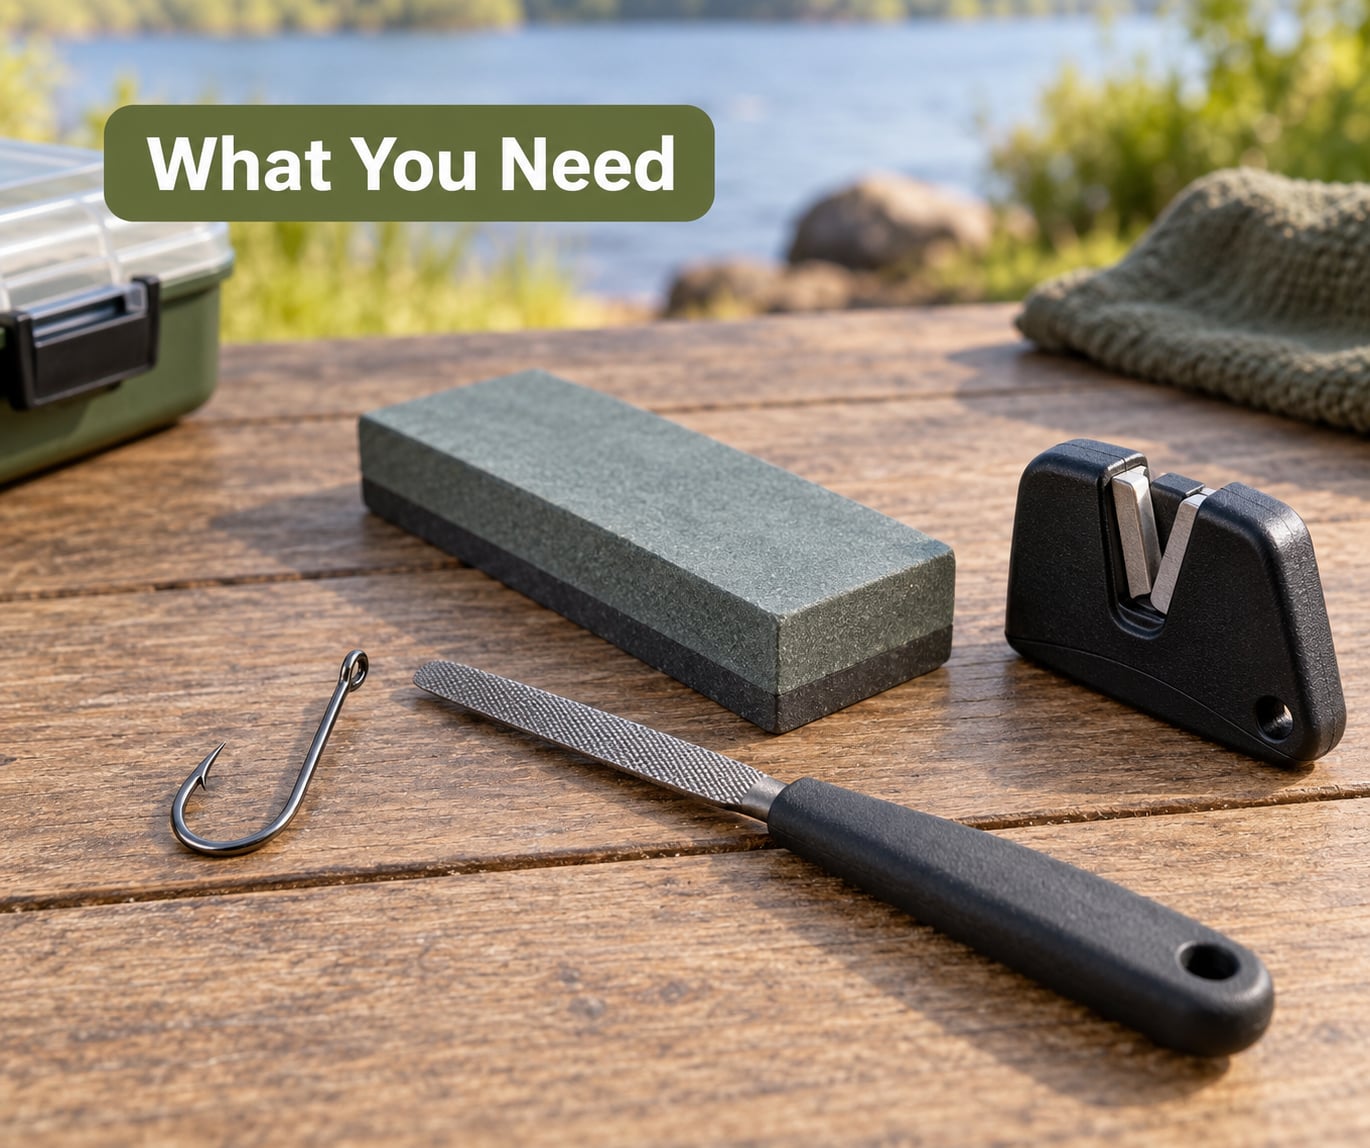
The tool list is shorter than the forums make it sound. You need an abrasive to shape the point, something to hold the hook steady, and a way to keep the fresh metal from rusting in the wet.
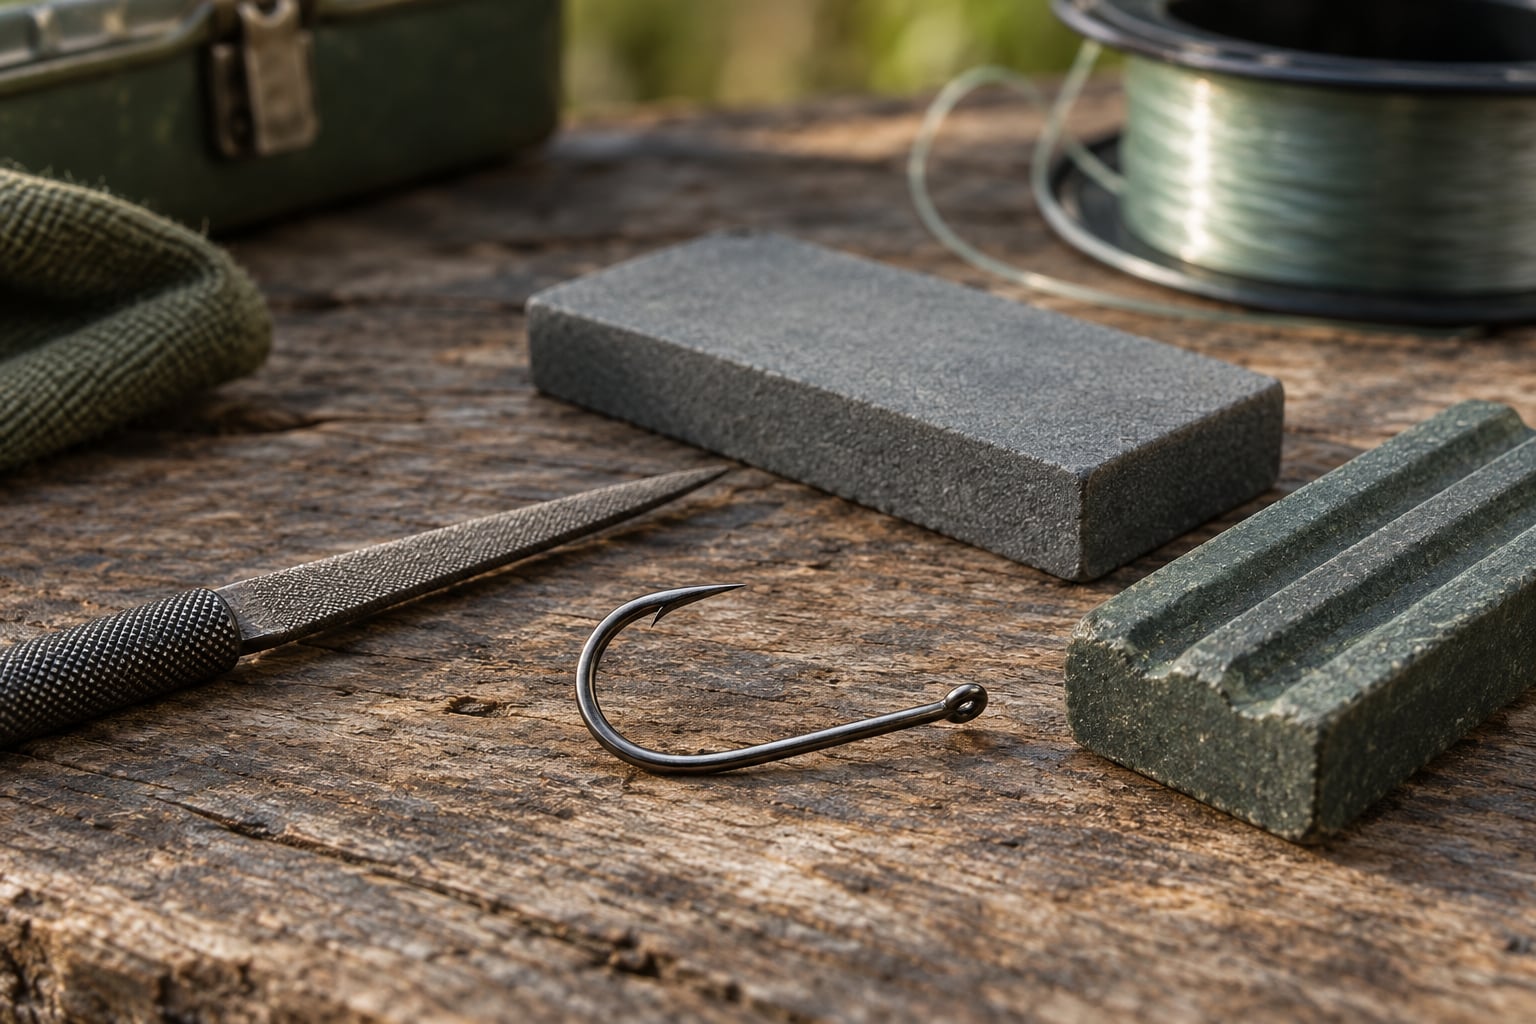
- A small diamond file. Four to six inches long with a fine, tapered surface. This is the one I would buy first and the one most anglers end up carrying.
- A hook hone or grooved hand stone. A palm-sized stone with a groove for the shank. Slower than a file but it fits a tackle box better than anything else on this list.
- A whetstone. A 1000 to 3000 grit stone, useful for wide-shank hooks and baits where a file feels too fine.
- A rotary tool with a small cone-shaped diamond bit. Optional. Worth it only if you are sharpening dozens of hooks for a season of bait fishing, and it needs a light touch.
- Hook oil or a corrosion inhibitor. Any light oil that stays on steel. A cheap pen-style oil applicator is ideal because it treats one hook at a time.
- A soft cloth and a small bowl of water. For rinsing filings off before the hooks go back in the box.
- Reading glasses or a loupe. Optional but they turn a guess about point symmetry into something you can actually see.
If you are buying exactly one thing, buy the small diamond file. It is fast, it is cheap, it works on every hook size from a size 12 trout hook to a heavy muskie hook, and a light stroke on a hard point takes a couple of seconds rather than a couple of minutes.
Grit is the other thing people get wrong. Very coarse abrasive removes metal fast and leaves a rough, catching point. Fine grit shapes the point slowly and leaves it smooth, which matters more than speed once the point is properly aligned. For general lake work, a fine diamond file or a 1000 to 3000 grit stone is the useful middle ground.
| Tool | Typical grit | Relative cost | Speed | Skill needed | Best for |
|---|---|---|---|---|---|
| Diamond file | Fine to medium | Low | Fast | Low | Everyday hooks, any size |
| Hook hone or grooved stone | Medium to fine | Low | Slow | Low | Touch-ups in a tackle box |
| Whetstone | 1000 to 3000 | Medium | Slow | Medium | Wide-shank and heavy hooks |
| Rotary tool and cone bit | Medium | Medium to high | Very fast | High | Batches of hooks, bait rigs |
| Rod, stone and thread | Any stone | Very low | Very slow | Medium | Emergency field repairs |
That last row is the one nobody buys on purpose. A flat stone and a length of heavy thread lets you press the hook against the abrasive without holding it, which is genuinely useful if you are on a bank with nothing but what is in your pocket.
Step-by-Step: How to Sharpen Fishing Hooks
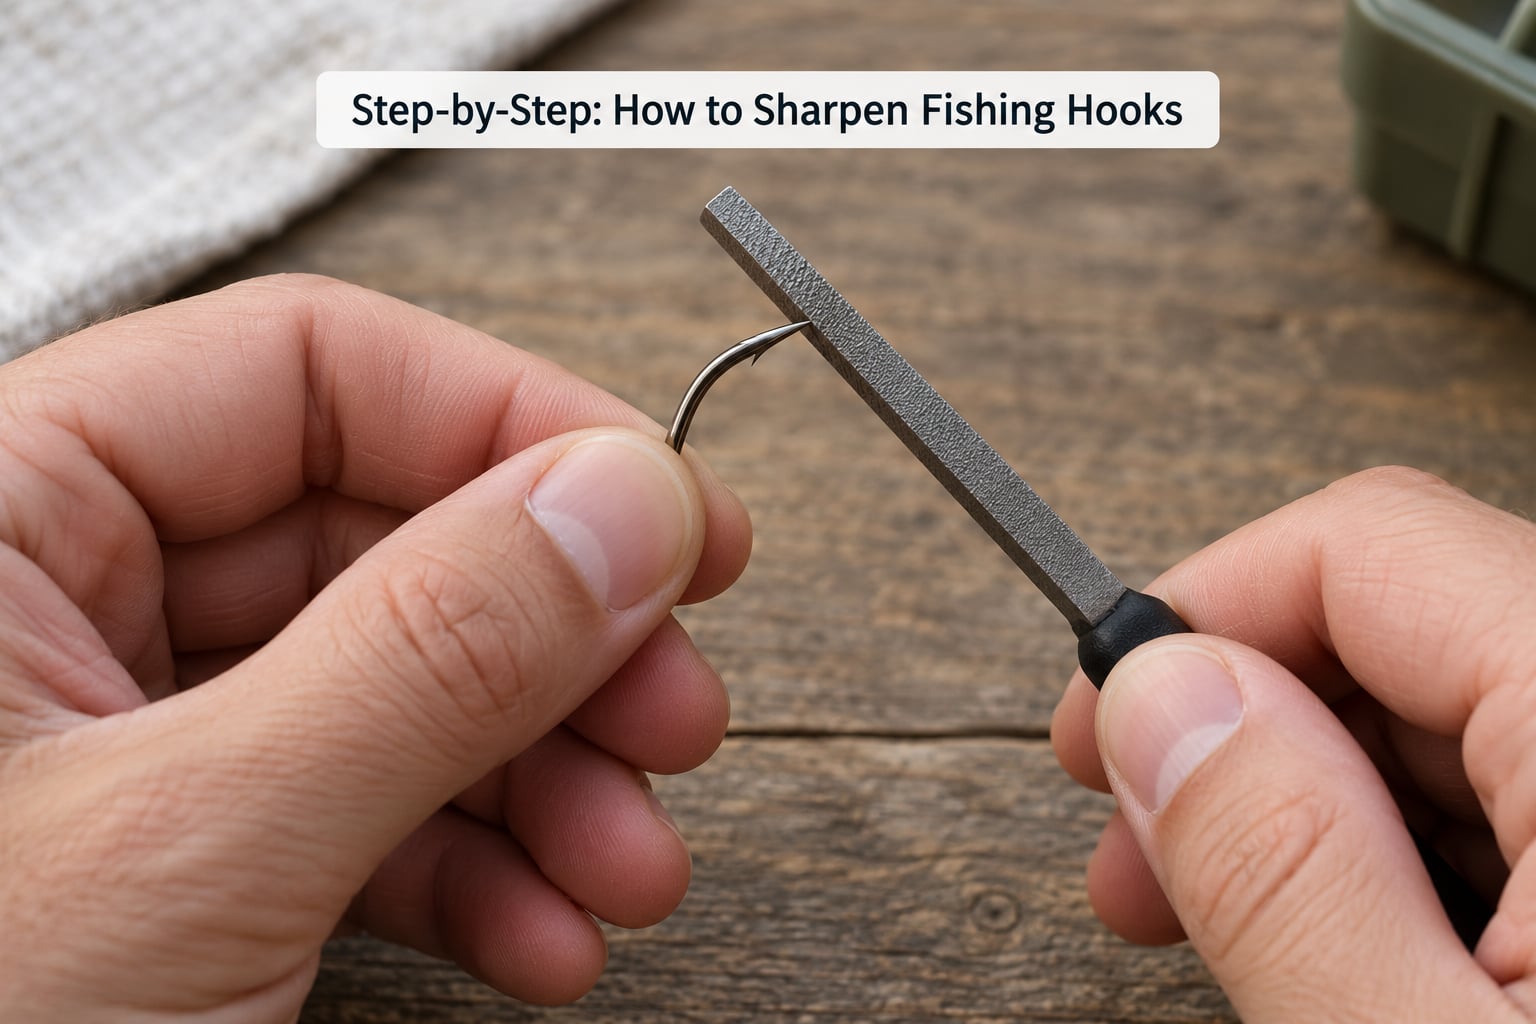
The whole method in one line: form a symmetrical triangle at the point by working both faces at the same angle, then take a couple of finishing strokes on the back to centre the tip. Everything below is just that, done slowly and checked as you go.
1. Inspect the Hook and Choose the Right Tool
Put the hook under decent light and look at the point before you touch an abrasive to it. You are looking for three things: a rounded or hooked-over tip, a blunt or flattened section just behind the point, and any rust or pitting on the metal itself.
Run the point across your thumbnail first. Sharp catches and holds. Dull slides. Then run it very lightly across a soft material such as a rubber grip handle or a plastic zip tie. If it skips across both, the point is gone rather than merely blunt, and a different tool is needed.
A heavily rusted, pitted hook is finished. The pitting is below the surface, so you are not removing rust, you are grinding the hook down to reach clean metal, and the point snaps off the first time it takes a fish. A hook with a soft, brown or grey corroded point gets replaced, not filed. So does a hook that has been bent in the shank or at the bend, because reshaping it changes the way the hook sits in a fish’s mouth.
Chemically sharpened hooks, where the point has been treated to dull itself after a fish has been hooked, can be re-formed with a fine file, but the chemical surface comes off as a slightly different colour and many anglers simply swap them. Freshwater bass and panfish hooks in a closed tackle box are usually fine to touch up. Saltwater hooks corrode fast enough that by mid-trip they often need a pass more than once.
2. Stabilize the Hook and File the Point
Hold the hook between your thumb and forefinger, gripping the shank near the eye, and rest the point on the abrasive. Or lay the hook flat on a table and work with the file held at a fixed angle. Stability is the whole game. A hook that moves while you file gets an uneven point no matter how careful you are.
Stroke from the point back toward the bend, always. Never from the bend out to the tip. Filishing away from the point drags loose metal toward the fine tip and can leave a burr that feels worse than the dull point you started with. Anglers who reverse the direction usually end up back at the file five minutes later.
Set the angle at roughly 20 to 25 degrees between the face of the file and the flat of the point, and hold that same angle on the other side. Symmetry is what makes a point hold, and the simplest way to check is to look at the hook head-on: the two bevels should look the same width, which gives the triangular cross section most anglers aim for.
Use light pressure. You are removing slivers of metal, not shaping a knife. Six to eight strokes on the first side, then the same number on the other, is plenty on a hook that has been used a few times. On a badly blunted point you might do fifteen, checking after every few strokes. The moment the point starts to look thin, stop. The most common way beginners snap a point is filing a small jig hook or a fly hook the same way they would a large bass hook.
Keep the barb in mind. The barb is the small backward-facing ridge just behind the point on many baits, and it is the first thing to disappear if you file from the wrong direction or too far back. If the barb looks shorter after filing, you went too far. A hook with no barb still works on soft baits, but it is a sign you should stop.
For a treble hook, work one point at a time and hold the cluster by the shank so the other two points do not swing into the file. For a jig or a fly, hold the head in a small vise or a soft-jaw pliers, which stops the jig spinning and keeps your fingers away from the point. For a soft plastic worm hook, do the filing before the bait goes on, not after, because a hard plastic worm tears as soon as you start pushing a file against it.
3. Refine the Tip and Check the Sharpness
Once both faces match, take two or three light finishing strokes down the back, or spine, of the point, still moving toward the bend. This centres the tip so the point is straight rather than leaning to one side. An off-centre point still catches, but it feels different on the fingernail and it deflects more when the fish pulls.
Now test it. Drag the point across your thumbnail again. The same hook that slid away before should now catch and stay caught. A second, useful check is a piece of thin plastic or a rubber grip: a properly shaped point bites in and holds, a rough or burred point skates along the surface and catches at the end.
Look at the point from directly above with the eye close to it, or put on reading glasses. What you want to see is a long, even taper that narrows to a single line. If the tip is visibly short and stubby, add a few more strokes. If it is very fine but still slides, the bevels are probably uneven, so go back and even up the wider side.
The forum phrase for this is that the hook should feel grabby. If it is not grabby, it gets a once over. That check takes two seconds and it is the reason anglers run a thumb over every hook in the box rather than trusting the packet.
4. Rinse, Protect, and Store the Hooks
Filings are sharp enough to cut your fingers and they stay in the bottom of the tackle box, so rinse each hook under water and dry it on a cloth before it goes anywhere near a hook box. Do not blow the filings off and call it done; a compressed-air blast just puts the dust somewhere harder to reach.
Then seal the fresh metal. A sharpened point exposes steel that was previously protected, and anglers report it starting to spot with rust within days, faster in saltwater than in freshwater. A small drop of hook oil on the point is enough. For hooks that live in the boat or the trailer, an oil pen or a corrosion inhibitor applied with a lint-free cloth works well and takes seconds per hook.
Some anglers run a permanent marker over the point to seal it. It works, but the paint builds up on the very tip and changes the feel, so keep it away from the last millimetre. If you do it, mark the shank just behind the point instead.
Store sharpened hooks dry, in a box with a tight lid, away from the wet rag people often dump into the bottom of a boat compartment. A small compartment of sharpened hooks kept separate from the working box is a good habit; the first hook you tie in the morning should not be one you sharpened last season and forgot about.
Common Mistakes When Sharpening Fishing Hooks
Nearly every ruined point traces back to one of a handful of mistakes, and all of them are avoidable. Here is what goes wrong and what to do instead.
- Stroking toward the tip. This is the big one. It drags metal toward the point and leaves a burr. Always stroke from the point back toward the bend.
- Using too much pressure. A file does not need force, it needs consistency. Heavy pressure removes the taper and snaps the point off small hooks, especially fly hooks and light wire hooks.
- Sharpening only one side. One-sided sharpening gives you a hooked, lopsided point that catches unevenly and deflects. Bevel both faces at the same angle and finish on the back.
- Filing against the hook curve. Taking the file along the outside of the bend instead of along the straight taper of the point changes the hook’s geometry. Keep the strokes on the point itself.
- Ignoring a bent or pitted hook. A hook whose shank is bent, or whose point is pitted from rust, will not be saved by filing. You are shortening the point to reach clean metal. Replace it.
- Heat and power tools. A rotary tool with a cone-shaped diamond bit is a genuine time-saver for batches of hooks, but it still needs a light touch. Hold the bit moving, keep it light, and keep it off the hook shank. Heat weakens the point and a stationary bit gouges it.
- Leaving burrs and metal dust behind. A burred point feels blunter than a plain dull one, and the dust ends up in your hands, your lap and your reel seat. Rinse and dry.
- Forgetting the new metal. Sharpening removes the passivated surface, so a sharpened hook rusts faster than the one that came out of the packet. Oil it, and check it again after a wet week on the boat.
A couple of habits keep the whole job small. Do a quick pass over your hooks at the end of a trip, not the morning of the next one, because a hook that was fine on Friday is usually the one that snagged on a weed on Saturday. And sharpen a small batch of the sizes you actually use rather than the whole box, so the next trip starts with work already done.
For fly fishing, sharpen the hook before the fly is finished if you can. Once thread and head material are on the point, a file is more likely to damage the fly than the hook. And when a fly has been a fish’s meal once, treat the hook as chemically dulled and replace it rather than trying to file the treatment off.
Frequently Asked Questions
How to sharpen a dull fishing hook?
Hold the hook by the shank, rest the point on a fine diamond file or hook hone, and stroke from the point back toward the bend at roughly 20 to 25 degrees. Repeat on the other face at the same angle, then take two light strokes on the back to centre the tip. Finish with a thumbnail test. A dull hook needs six to ten strokes a side, not more.
What is the best file for sharpening fishing hooks?
A small fine-grit diamond file, four to six inches long with a tapered surface, is the most useful single tool for most anglers. It works on every size from small trout hooks to heavy muskie hooks, cuts fast enough to be a two-second fix, and fits in a tackle box pocket. Very coarse files remove metal too quickly and leave a rough point that needs extra finishing work.
What is the correct way to use a sharpening stone?
Wet the stone if the manufacturer calls for it, then lay the hook in the groove if your stone has one, or hold it flat against the stone with the shank supported. Stroke the outer face of the point from the tip back toward the bend, using the side of the stone rather than its corner, and keep the same angle on both faces. Rinse the stone periodically so the slurry does not turn to paste.
How do I test if a hook is sharp enough?
Drag the point across the pad of your thumb or a fingernail. A sharp hook catches and holds, a dull one slides straight off. The test is less reliable on calloused or very soft skin, so check against a second surface such as a rubber grip or a thin piece of plastic. A hook that bites into rubber and holds has a usable point even if the thumbnail felt uncertain.
Is it better to sharpen a hook or replace it?
Sharpen a hook that is simply blunt from use, straight, and free of pitting. Replace one that is rusted and pitted, bent in the shank or bend, so thin the point is flexing, or chemically treated after a fish has been hooked. Filing a pitted hook means grinding it down to reach clean metal, and the point usually snaps at the first solid bite.
Conclusion: Keep Your Hooks Ready to Fish
Start with the thumbnail test. Check a hook, and if it slides instead of grabbing, pin the shank, stroke the point toward the bend at about 20 to 25 degrees, do the same on the other face, centre the tip, and test again. Ten minutes of that before a trip sets the standard for every hook in the box.
Pick a small batch of the sizes you use most, oil the sharpened points, and keep the batch dry. Bending or pitting means replace, not repair. Then run the same thumb test again after a heavy day, because that is when points start to go dull on the water rather than in the packet.