To drill a hole with a hand auger, clear the surface, plant the bit on your mark, and turn the handle in steady short strokes until the ice or soil breaks through. A hand auger will cut through roughly 8 to 12 inches of ice in a couple of minutes once the blade bites. The whole job takes about five minutes per hole, and the hard part is keeping the blade straight rather than the strength it takes.
Hand augers show up everywhere from ice fishing and campsite firewood to garden posts and fence lines. The tool itself is simple: a spiral shaft with cutting teeth at the bottom and a handle on top. What separates a clean hole from a ragged one is setup, not muscle.
This guide covers the three materials people actually use a hand auger on, wood, soil and ice, and the bit you need for each. It also covers the mistakes that cause most injuries, which are almost always about a moving handle and an unsecured workpiece rather than the drilling.
Table of Contents
- 1What You Need
- 2Step-by-Step: How to Drill a Hole With a Hand Auger
- 31. Identify the Material and Choose the Right Bit
- 42. Mark the Hole and Secure the Workpiece
- 53. Start the Bit Straight and Apply Light Pressure
- 64. Turn the Auger While Controlling the Drill
- 75. Check Depth and Finish the Hole
- 8Common Mistakes
- 9Frequently Asked Questions
- 10Can you use a hand auger to drill wood?
- 11What bit should I use for a hand auger?
- 12How do I keep a hand auger from binding?
- 13How deep can I drill with a hand auger?
- 14Can a hand auger be used for ice fishing?
- 15What should I do if the auger gets stuck?
- 16Conclusion
What You Need
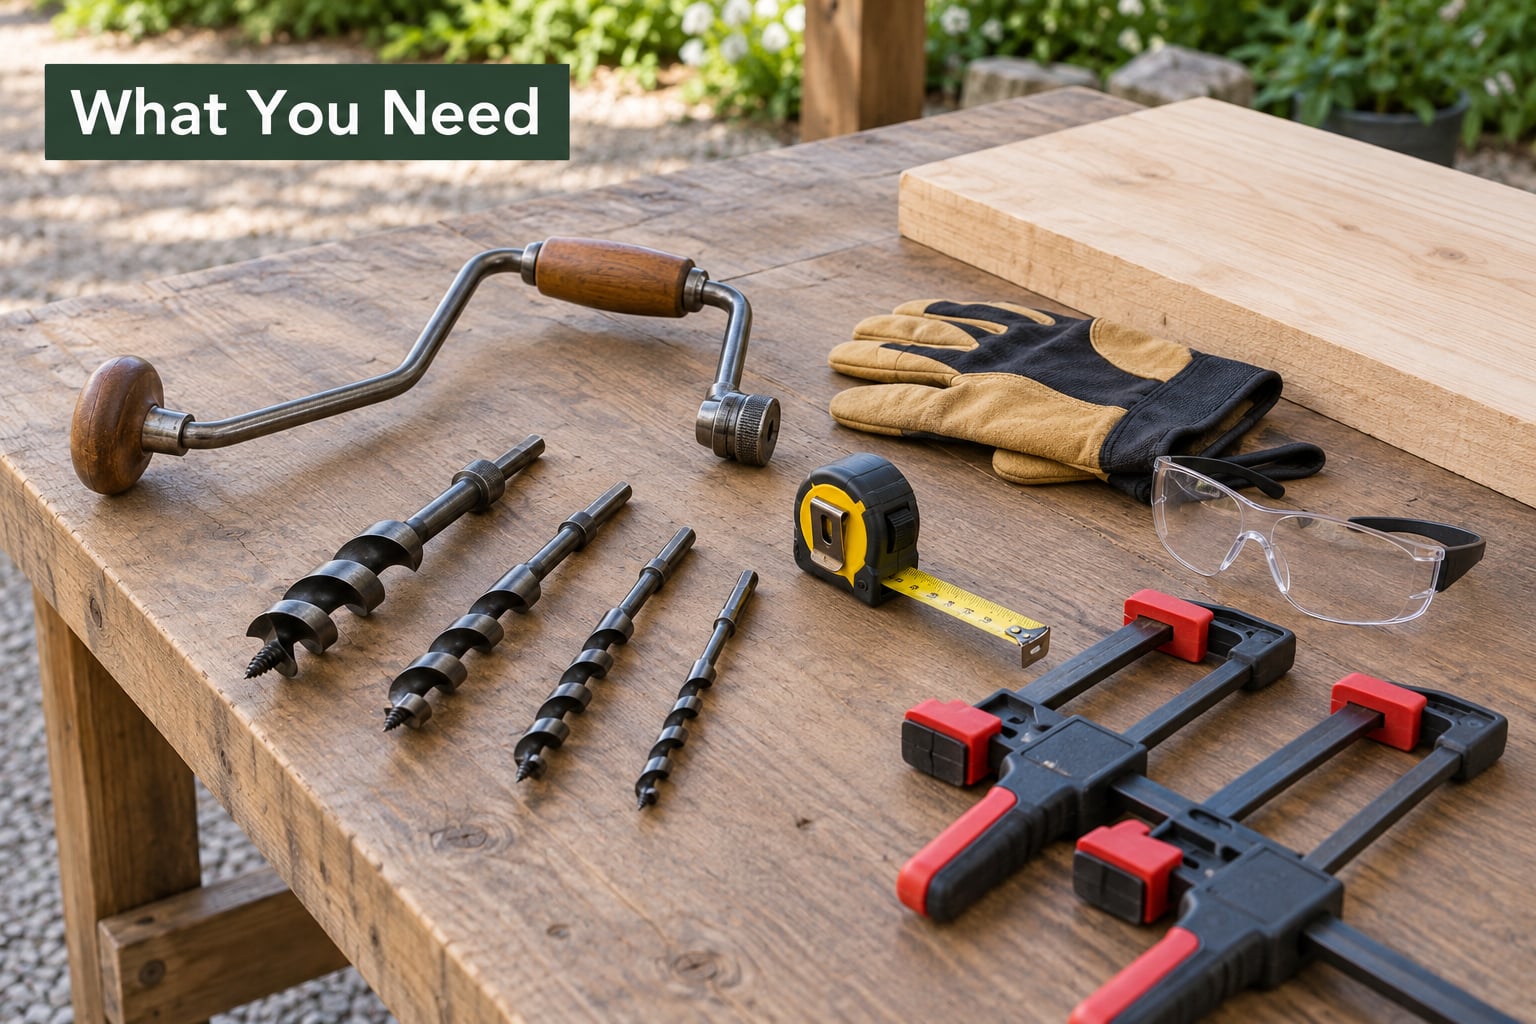
The auger itself comes down to the bit, the shaft and the handle, and each part matters for a different reason. Start with the bit, because the wrong teeth on the wrong material is the single biggest reason a hole never gets drilled.
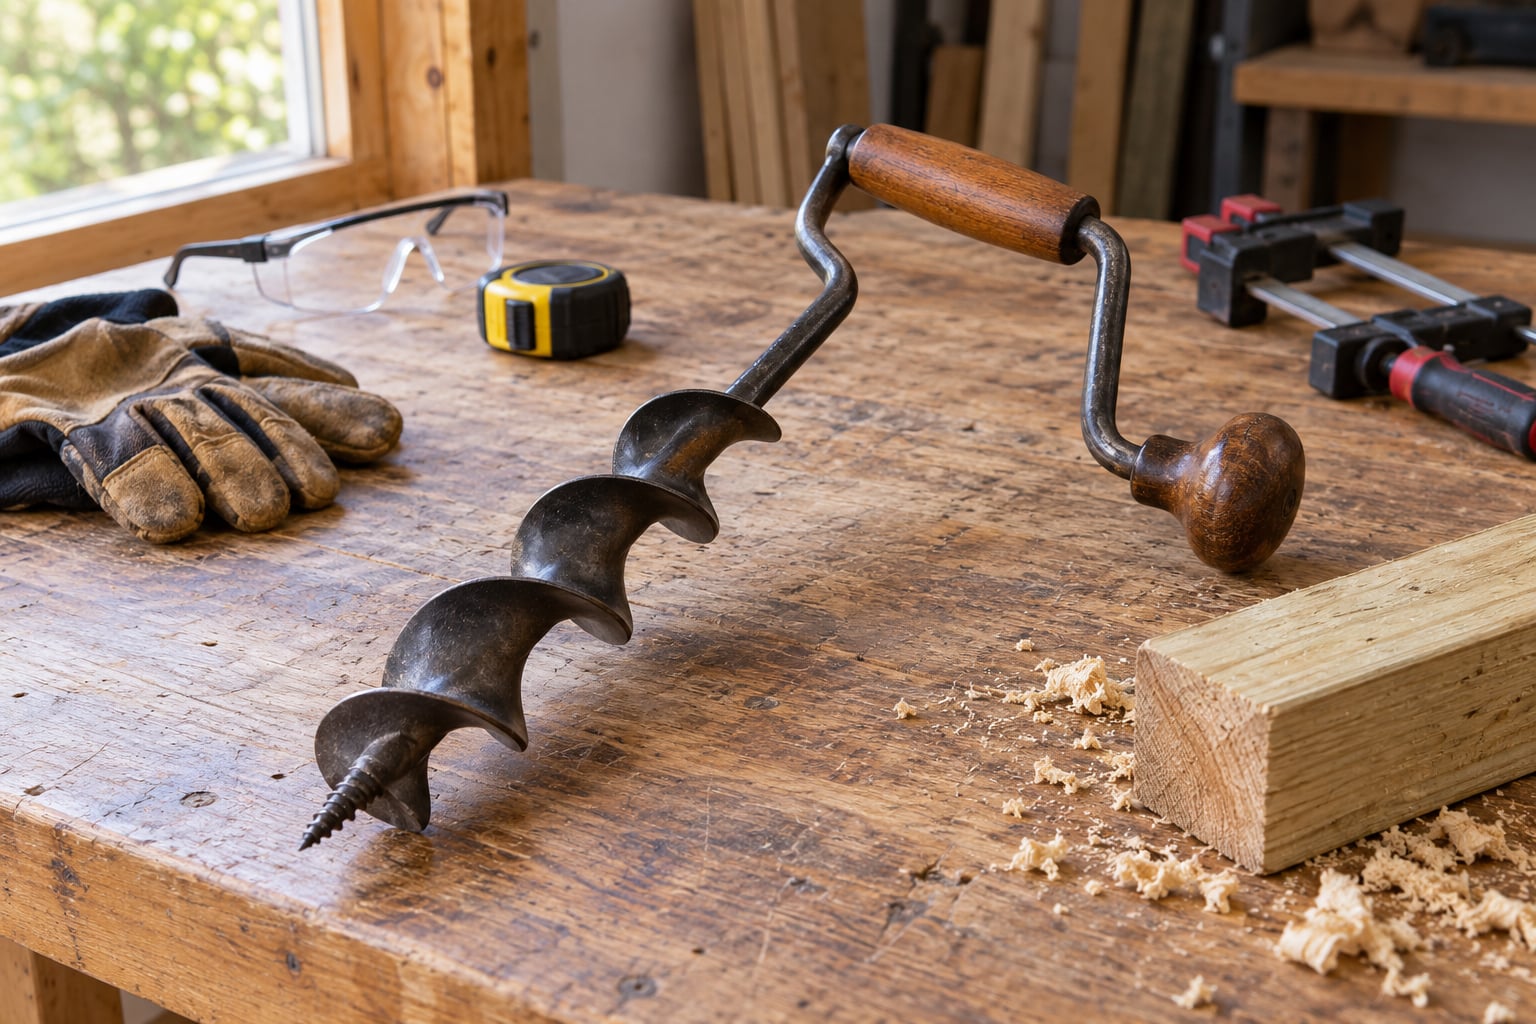
- The auger. A curved-blade hand auger is the standard for ice because the spiral lifts chips upward out of the hole. Flat blades cut faster but push debris down, where it packs into the hole and binds the shaft.
- A handle you can use with two hands. An offset handle gives you real leverage on hard material. A straight in-line handle spins faster but puts your wrist at the wrong angle after a few minutes.
- The right bit for the material. A soil auger bit, a wood auger bit, or an ice blade. These are not interchangeable.
- Something to hold the material still. Clamps, a vise, sandbags, a heavy boot, or a second pair of hands.
- A tape measure or a marked stick. You need to know how deep you are going before you start.
- Gloves and eye protection. The handle can kick back hard when a blade catches, and ice chips fly sideways.
- A scoop or brush for slush. Small for ice, a hand trowel for soil.
If you fish ice, add a spud bar for checking thickness, and a plastic scoop rather than a metal one, since a metal scoop on the bottom of a hole makes noise that travels a long way through ice.
On hole size for ice fishing, 6 inches handles panfish, perch and crappie. Walleye usually get 8 to 10 inches, and lake trout or pike want 10 to 12 because of the size of their mouths and how fast they move.
Step-by-Step: How to Drill a Hole With a Hand Auger
1. Identify the Material and Choose the Right Bit
Match the bit to the material before anything else, because this is where most failures happen. A soil auger bit has a pointed tip, a spiral shaft and a helical cutting edge designed to lift dirt out of the hole as it turns. It works in soil, clay and loose ground, and it will not touch ice, stone or buried rock without blunting itself.
A wood auger bit is a different animal. It has no pointed tip, usually has a central screw point for starting, and a pair of cutting lips around the perimeter. Those lips bore into the side of the hole rather than lifting material out, so on wood you want to back the bit out every few turns and knock the chips clear.
An ice blade is a curved, serrated stainless edge on a spiral shaft, and the spiral is what carries chips to the surface. On ice the material is hard but thin, and the whole design is about shaving rather than boring.
How do I know which one I have? Look at the bottom. A point and a spiral means soil. Two cutting lips and a screw point means wood. A single curved serrated blade means ice.
2. Mark the Hole and Secure the Workpiece
Mark the exact centre of the hole first. A pencil cross, a nail, or a small dab of paint. On ice, mark the spot before you clear snow, or you will lose it.
Set your depth on the shaft with the tape measure and a piece of tape, or scratch a ring around the spiral with a marker. On soil, depth usually means a post hole 12 to 18 inches deep for a fence post. On wood, mark the depth with a pencil line on the bit itself, because the depth you need is measured from the entry face.
Secure the material so the auger cannot twist or pull sideways. On a workbench, clamp it. On the ground, stand on either side of the spot or drive a stake and lean the piece against it. On ice, nothing holds the workpiece, which is one reason ice drilling is easier than it sounds.
You want firm enough that the piece does not move, loose enough that it does not fly apart when the bit breaks through the far side.
3. Start the Bit Straight and Apply Light Pressure
Set the point on your mark and hold the handle so the bit sits as close to vertical as you can manage. Get this right now, because a hole started at an angle stays at that angle all the way down and comes out oval and frustrating.
Begin with shallow rotations. A few light turns, lift the bit out, knock the chips off the point, put it back, turn again. Starting a soil or ice hole this way gives the point a clean bite instead of letting it skate sideways.
Put light downward pressure on the handle and let the cutting teeth or flute do the work. This is the advice experienced users repeat most often. Pressing down hard on a hand auger forces the tip into material faster than the spiral can clear it, and the hole binds. On wood, hold the screw point to start and let the lips do the cutting once it is in.
How do you know the start worked? The auger should be sinking on its own with barely any pressure from you. If it is skating across the surface or wobbling, stop and start over at the mark.
4. Turn the Auger While Controlling the Drill
Keep a steady rhythm. Turn, feel the bite, turn again. Rushing produces a sudden catch, and a sudden catch is what twists wrists. On ice, a full turn every second or two is plenty; there is no benefit to spinning as fast as you can.
Watch for binding. Binding shows up as the handle suddenly getting heavy, the auger stopping mid-turn, or a grinding feel instead of a cutting feel. When it happens, stop turning, lift the auger straight up a few inches, clear the chips, and drop it back in. Do not try to power through a bind. Binding in a hand auger comes from packed debris or a dull blade, and both get worse under force.
Back the bit out every third or fourth turn to clear material. On wood this is essential. On soil it keeps the spiral from packing a solid column of dirt against the bit. On ice it keeps the chips from filling the hole and wedging the shaft.
Keep the auger vertical the whole way down, and use your body rather than your wrist. Push down with your legs and core, turn with your arms and shoulders, and keep the handle moving. A hand auger that has been twisted to the point where your wrist aches is an auger that will eventually slip and take your forearm with it.
5. Check Depth and Finish the Hole
Measure as you go rather than guessing. Check the depth mark every few turns, especially in soil where the hole can deepen faster than expected. Stop at your mark, not past it.
If you are near a depth where something underneath matters, like a water line, a septic field or buried wire, stop short and look before you go further. In soil, hit something hard and the auger will suddenly stop or veer, and that is the moment people break handles.
Back the bit out slowly to finish. Lift it straight up, do not tilt it, because a tilted shaft catches the top edge of the hole and can snap a wooden handle. Clear slush from the hole with a scoop, brushing the walls as you go. On ice this is the moment that matters, because a hole full of chips plugs itself shut in a breeze.
Finally, look at the hole. Check that it is round, that the walls are clean, and that the bottom is open. Look at your auger too, run a finger along the cutting edge, and note any dull spots while they are fresh. Then clear the area around the hole before you set your gear down.
Common Mistakes
Almost every problem with a hand auger comes down to pressure, angle or an unsecured piece. Here is what goes wrong and what to do about it.
Forcing the handle. This is the big one, and it is the leading cause of the wrist and shoulder injuries people report from hand augers. Pushing down hard does not make the hole go faster, it makes the spiral pack with debris and bind. The fix is to add almost no downward pressure at all and let the teeth cut.
Drilling at an angle. Once a hole leans, every later turn widens the lean. The fix is to start with three or four shallow turns before adding depth, and to keep looking at the shaft from the side rather than from above.
Using the wrong bit. A soil bit on ice will skate and chip. A wood bit in soil will pack the hole solid. A flat ice blade buried in slushy early ice will clog instead of cutting. Match the bit to the material and the job gets easier by half.
Failing to secure the workpiece. If the piece moves, the bit grabs and the handle kicks. Clamp it, weigh it down, or hold it. If it starts to split, stop rather than leaning on it harder.
Ignoring a bind. A heavy handle means chips have packed in. The fix is to lift and clear, then resume with lighter pressure. If a bind keeps coming back, the blade is dull and that is the real problem.
Skipping eye protection. Ice chips and soil clods come off the bit fast and flat. Gloves are not enough; wear eye protection.
Overdrilling the depth. Going past the mark is how you punch into buried rock or wire. Measure, and stop.
A few safety habits cover most of the rest. Check ice thickness before you turn the first handle, and stay off ice near sand bars, inlets, points and spring-fed areas where currents thin it out from below. Keep your line of travel back to shore clear, and never drill alone on thin early ice. Carry the auger with the head forward when you walk. And if your shoulder starts to ache, stop. The hole is not going anywhere.
If you drill a lot of holes on the same lake, it is worth knowing that most hand augers can be run with a cordless drill through a conversion adapter, which turns the same blade and spiral into a powered drill. The technique is identical, but a drill needs high torque rather than high speed, so run it slow and steady and keep the same light pressure.
Frequently Asked Questions
Can you use a hand auger to drill wood?
Yes, but you want a wood auger bit rather than an ice blade. A wood bit has cutting lips around the perimeter and usually a screw point for starting, and it bores into the side of the hole instead of lifting chips out. Back the bit out every few turns and knock the chips loose, or the hole glazes and the bit heats and binds. Clamp the wood firmly before you start, and expect far more torque than ice needs.
What bit should I use for a hand auger?
It depends entirely on the material. Soil and clay want a pointed soil auger bit with a helical spiral that lifts dirt out. Wood wants a wood auger bit with a screw point and cutting lips. Ice wants a curved serrated blade on a spiral shaft so chips ride up and out. The quick check is to look at the tip: a point plus spiral is soil, paired cutting lips are wood, and a single curved serrated blade is ice.
How do I keep a hand auger from binding?
Binding comes from packed debris, not from the ice or soil being too hard. Clear the hole every third or fourth turn, add very little downward pressure so the spiral is not overfilled, and stop the moment the handle feels heavy instead of forcing through it. A bind that keeps returning usually means a dull blade, so check the cutting edge before you blame the technique.
How deep can I drill with a hand auger?
With a hand auger, depth is limited by your arms and your patience rather than a hard limit. Most people comfortably drill through 8 to 12 inches of ice, and thicker ice gets slow fast. In soil, 12 to 18 inches for a post hole is comfortable, and a shovel takes over below that. Mark your depth on the shaft before you start so you are working to a measurement rather than a guess.
Can a hand auger be used for ice fishing?
Yes, it is the traditional ice fishing tool and it is still the right choice on early, thin ice where a power auger is overkill. A hand auger is quiet, needs no batteries or fuel, carries easily on a sled, and lets you move between holes freely. Check the ice thickness with a spud bar before you drill, and expect a 6 inch hole for panfish and a 10 to 12 inch hole for lake trout and pike.
What should I do if the auger gets stuck?
Stop turning and lift straight up, then clear the chips and try again with less pressure. Never tilt the shaft to pull it out, because the head can catch the wall and snap a wooden handle. If the auger is wedged below a frozen slush layer, warm the top of the shaft with bare hands or pour a little warm water down the hole. If it still will not move, you are better off abandoning that hole and drilling a new one nearby.
Conclusion
How to drill a hole with a hand auger comes down to five things: pick the bit that matches the material, secure the workpiece, start straight with light pressure, turn in a steady rhythm and clear debris often, and stop the moment the handle feels heavy. Start with a shallow test hole a foot from your mark, and once that comes out round and clean, you know the setup is right before you commit to the real one.