Getting started ice fishing takes one clear afternoon of prep and a half day on a frozen lake. You need safe ice, a short rod, a hand auger or ice chisel, a bucket, warm layers, and one person who knows how to test ice. That is genuinely the whole beginner list. Everything else is a nice-to-have you can add after a few trips.
I say that plainly because the sport has an overbuying problem. New anglers walk into a shop, come out with a sonar unit and a portable shelter, and still do not know how to find fish or check ice. Borrow gear, start with panfish on a small lake close to home, and build from there.
A realistic first outing is three to four hours: walk in, drill two or three holes, jig for an hour, eat something warm, and head back before your hands stop working. Difficulty is low if you stay within walking distance of a vehicle. Respect for the ice is the hard part.
Table of Contents
- 1What You Need
- 2Step-by-Step
- 3Choose a Safe First Fishing Spot
- 4Check the Ice and Weather
- 5Carry and Arrange Your Gear
- 6Drill the Fishing Hole
- 7Set Up a Beginner Rig
- 8Start Fishing and Read the Hole
- 9Land and Handle Your Catch
- 10Pack Out and Finish the Trip
- 11Common Mistakes
- 12Frequently Asked Questions
- 13What is the safest ice thickness for a beginner ice-fishing trip?
- 14Do I need an ice-fishing shelter for my first outing?
- 15What is the easiest gear for someone new to ice fishing?
- 16What bait should beginners use for their first catch?
- 17Can beginners ice fish alone, or should they go with someone?
- 18How long should a first ice-fishing trip last?
What You Need
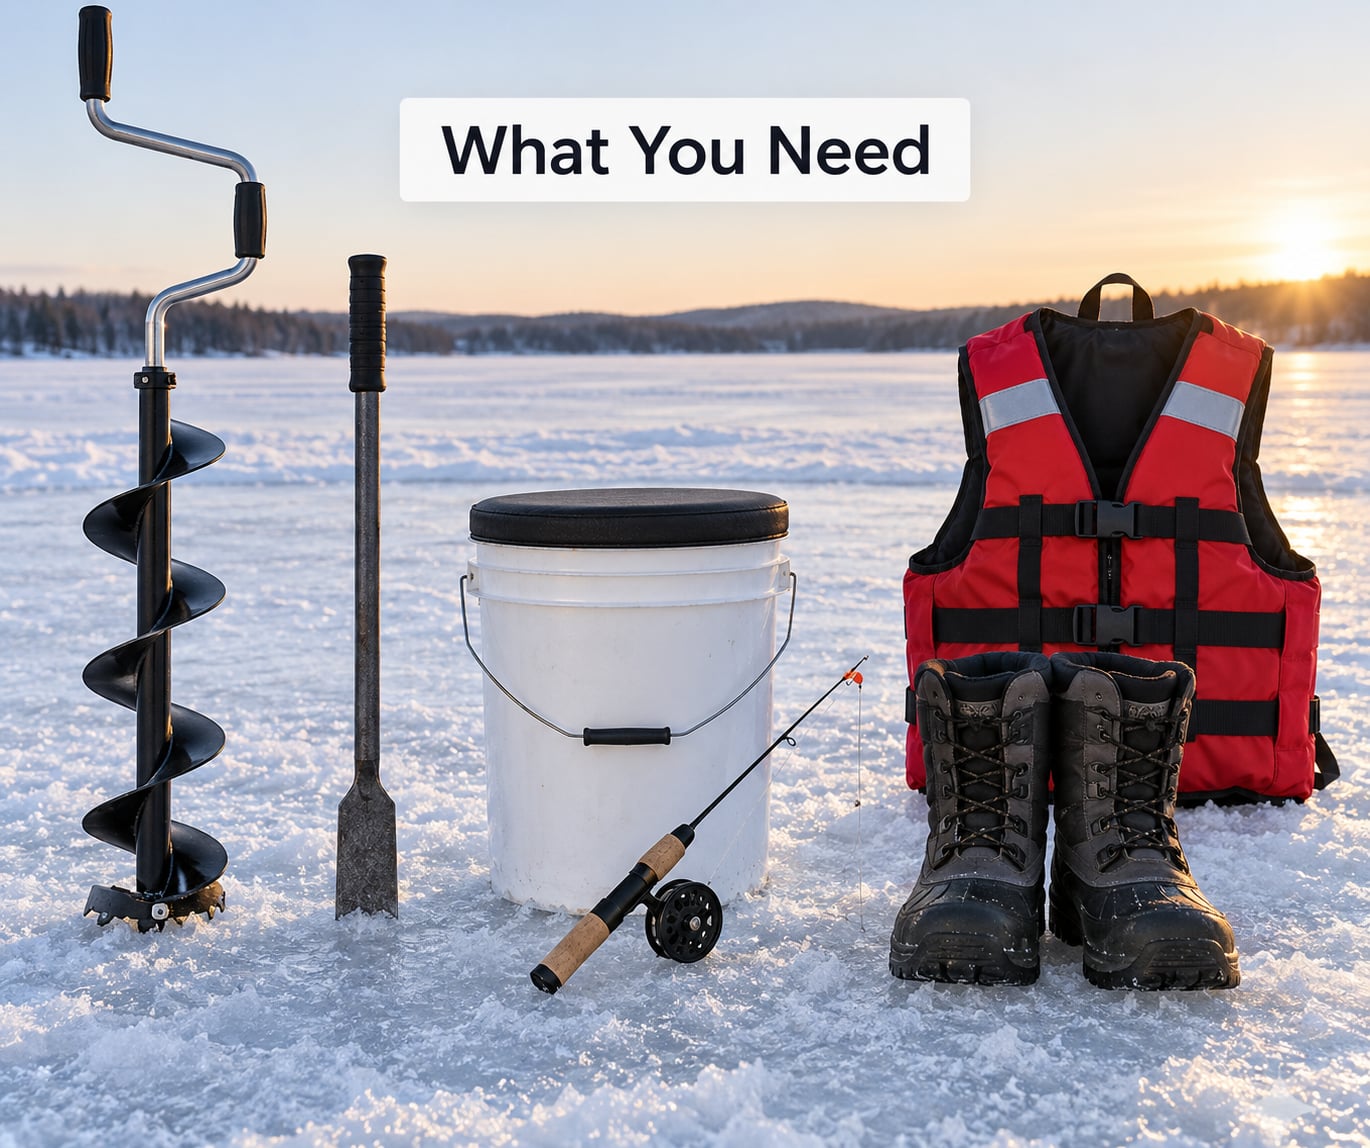
Eight items cover almost every first trip. Bring these, and everything else is optional for now.
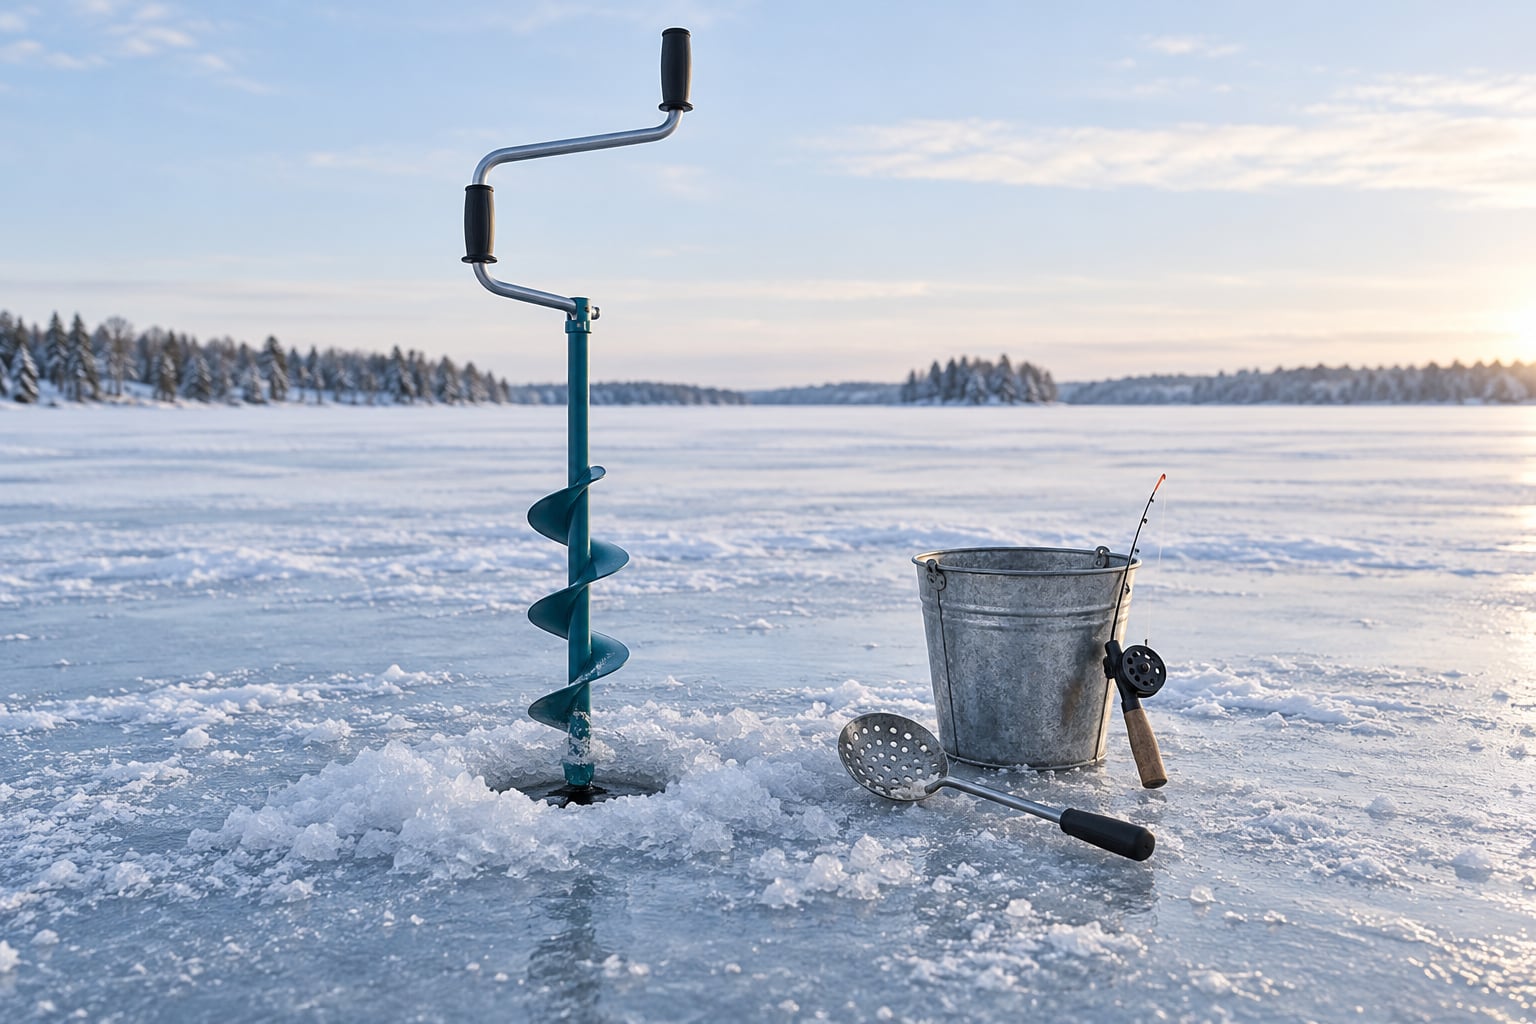
- An ice auger or ice chisel. A hand auger with a 6 to 8 inch blade cuts clean holes and is the easiest thing to learn. A gas auger is faster but needs more care around slush and your own boots.
- A short ice fishing rod and reel. Look for 24 to 32 inch ultralight or light power with an inline reel. You never cast with this rod, so length buys you nothing. A cheap combo from a big-box store works fine for panfish.
- Line. 2 to 4 pound test for bluegill, crappie and perch. Move up to 6 or 8 pound test for walleye, trout and pike.
- An ice scoop or slush ladle. Slush closes a hole faster than you expect and stops your line from running.
- A five-gallon bucket. Seat, tackle container and fish holder in one. It is the most underrated item you will own.
- Ice picks and a spud bar. Picks ride around your neck for self-rescue. A spud bar tells you how thick the ice actually is instead of guessing.
- A headlamp, a charged phone and a whistle. Phone in a sealed bag so cold does not kill the battery. Plan on being back before dark.
- Warm layers, waterproof boots and a spare pair of gloves. Merino or synthetic base, fleece mid layer, waterproof shell and bib or snow pants.
Skip the sonar, the ice shelter and the full rod locker for season one. They matter later. Borrow or rent a shelter for one trip if you want to see how much you like standing still in the cold.
Step-by-Step
Choose a Safe First Fishing Spot
Pick a small lake within a twenty-minute drive of home. Proximity matters more than fish density: if you feel uncomfortable, you leave, and you want that option.
Beginners do well on lakes stocked with bluegill, crappie and yellow perch, because panfish bite in a few minutes rather than a few hours. Look for a public access point with a flat shoreline, no stairs to negotiate, and room to park.
Skip crowded ramps and bays that get hammered by other anglers. Fish move away from constant noise and light at the ice. Fish holding structure is different: weed edges, rocky points, sunken creek channels and the drop-offs beside them all produce.
Check local ice reports the morning you plan to go. Your state or county conservation office, the local bait shop and the plowed road crews on Facebook are more useful than a general weather app.
Check the Ice and Weather
At least 4 inches of clear solid ice is the widely accepted minimum for walking on it. That number doubles for white ice, which holds less strength per inch because of trapped air bubbles.
Test where you plan to stand with a spud bar. Push down hard with the tip, then jab downward repeatedly. It should travel a couple of inches per jab and ring solid under the strike. If it punches through with one hard shove, that is not fishing ice.
Be suspicious near springs, river mouths, inlets, old refrozen drill holes, along pressure cracks and seams, and beside snow-covered areas where an airstream warms thin ice from below. Wind-driven white ice is weaker than clear black ice of the same thickness.
Dress for standing still, not for walking. Overdressing is the classic beginner mistake: you sweat on the walk in, then sit damp for three hours. Open a coat or two while moving, close everything once you stop.
If the forecast has wind above about 20 mph, a fast temperature drop, or rain freezing on the surface, postpone. Bad weather on good ice beats good weather on bad ice, but neither is worth pushing through.
Carry and Arrange Your Gear
Load a sled or plastic totes, not a single heavy bag. A typical first load runs 25 to 40 pounds including the auger, and a sled keeps your hands free and your back intact over a long walk.
Pack the heaviest items closest to the sled handles and the auger blade last so you do not swing it into your legs. Sharp ice picks ride clipped at your chest, never loose in a pocket.
Bring more food than you think you need. A thermos of soup, sandwiches, and a second pair of dry gloves matter more than any lure choice. Add a hand warmer, sunscreen for the glare off the ice, and a small first-aid kit.
Before you walk away from the vehicle, tell one person not at the lake your spot, your party size and the hour you expect back. A location drop in your phone’s offline maps covers you even when you have no bars.
Drill the Fishing Hole
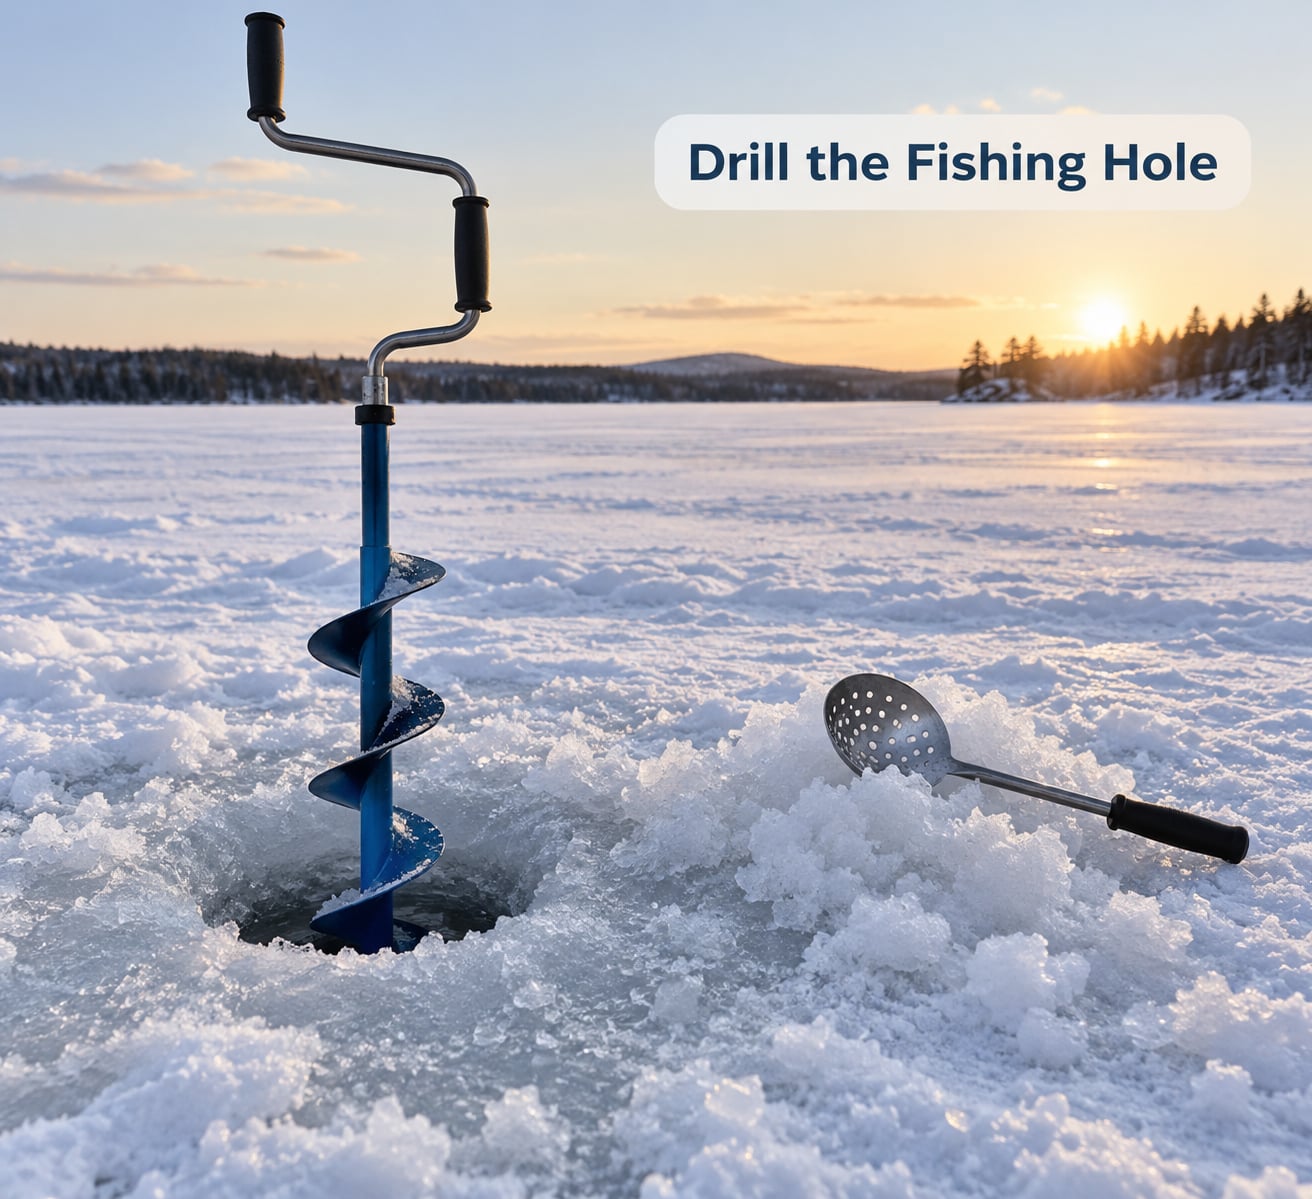
Shovel the snow away from your drilling spot first. It slows the auger, clogs the blade and leaves you standing in slush with ice underneath.
Set the auger blade, crank smoothly and keep it vertical. Augers tip sideways under load, and a leaning blade walks toward your boot. Clear the chips as you drill so the hole opens at full width.
Keep drilling until the handle turns with almost no resistance and the slush coming up turns from white to wet and dark. That is the bottom of the hole.
Scoop the slush out and set it a few feet away. Slush piles beside a hole refreeze into a wet, unstable apron, and walking on that is how people fall through good ice.
Drill two or three holes in a loose triangle rather than a straight line. A staggered pattern keeps you from drilling into the same slush puddle every move, and it spreads your chances across slightly different depth and structure.
Never auger directly at your feet. Turn the handle so the blade travels away from you, and clear the area of loose gear before you start.
Set Up a Beginner Rig
Start simple: rod, line, a size 4 to 8 hook or a small Swedish Pimple, and a nightcrawler or a wax worm. Hook the crawler through the head with the hook point coming out near the tail, leaving the body free to swim.
Drop the rig to the bottom and watch the line. When the line stops paying out, lift it back six to twelve inches and drop again. That lift-off-the-bottom number is the whole trick, and it is how you find the depth where panfish are holding.
Jigging means lifting the bait a foot or two, dropping it, and letting it settle for a few seconds before lifting again. A steady rhythm of a few seconds up and a few seconds down tends to attract curious fish.
Cold hands make line handling miserable. Tie your knots at home if you can, use a knot like the Palomar or surgeon’s knot, and trim the tag end with nail clippers rather than teeth. Give the line one hard snap with a wet finger afterward so the knot seats properly.
If you are using a tip-up instead, set the bait the same way: bottom, lift six to twelve inches, then add roughly eight more inches so the bait hangs above the ice when the line is fully extended.
Start Fishing and Read the Hole
The first ten minutes at a hole decide whether beginners quit. Work the top of the water column first, dropping down through each few feet until you find bottom or stop getting anything.
Watch your line instead of your rod tip. A line that twitches, twitches again, or starts drifting sideways is a fish, a wind current, or both. Keep jigging and stay calm, because panfish commit quickly and then quit as fast.
Be patient in short stretches. Put a tip-up or a second rod down and let a bait sit undisturbed; plenty of walleye and trout are caught on motionless bait rather than constant movement.
Change something every twenty minutes or so, one variable at a time. Move a foot or two, raise or lower the bait, switch from a crawler to a minnow, or change jig color from white to chartreuse.
Switch to a heavier jig in deeper, colder water where the light fades fast. A 1/16 ounce jig works in shallow water near the ice for bluegill; drop to a 1/8 ounce, and later a 1/4 ounce, when you are over 20 feet of dark water. Move past half an ounce only when you are chasing pike or lake trout in deep water or heavy current.
If two holes and three bait changes produce nothing after about an hour, drill somewhere new. Structure beats patience when you are new at this.
Land and Handle Your Catch
Land fish quickly and with as little thrashing as possible. A fish that fights on the ice is a fish you will lose, and a fish you lose is a fish you cannot release.
Grip the jaw, remove the hook with pliers or hemostat-style forceps, and keep your fingers away from anything venomous. If the hook is deep or a bait is snagged badly, cut the line and leave the hook. Fish survive more often from a missed meal than from a mangled mouth.
Measure the fish and note the species before you decide to keep it. Many lakes limit panfish, walleye or trout by count or inches, and slot limits protect the largest spawners, so check your state regulations before the season rather than at the hole.
For fish you keep, bleed and cool them fast on ice. For fish you release, keep it in water as long as possible and revive it in a slotted scoop or a bucket of lake water before letting it go.
Pack Out and Finish the Trip
Scoop your slush holes shut so nobody walks into a half-open hole later in the day. Spreading slush back over the area is even better: it slows refreezing for everyone who fished there.
Bring every piece of line, wrapper and bait container off the ice. Cut sticks, discarded bait and leftover pieces of fish are the debris that makes anglers look careless, and it is a two-minute fix.
Secure the auger, spikes and spud bar before you move them, then take a final look at your route back. Pack gear in the reverse order you unpacked it, with the sharp items handled last.
Check in with the person who knows your plan, and report obviously dangerous ice to your local conservation office. A single call about a bad spot protects the whole area, including beginners who will be on it next week.
Common Mistakes
Going out alone. This is the one that turns a mistake into an emergency. Ice fishing is a buddy sport for a reason, and the person beside you is your rescue.
Buying gear before you know the sport. A sonar unit will not tell you where the fish are if you picked the wrong lake. Borrow a rod and reel, borrow an auger, and spend your first real money on good gloves and a sled.
Overdressing while walking in. You will be warm in ten minutes and soaked through in twenty. Manage layers while you move instead of buttoning up the whole outfit at the truck.
Rushing a tip-up flag. Wait for the flag to fully stop moving before you pick up the rod. Startling a fish while it is still working the bait loses the catch every time.
Drilling too many holes. Every hole creates a slush puddle and strips cover from the spot. Two or three holes, spaced apart, will do more than ten.
Standing over your hole in heavy boots. Slush ice underfoot looks solid and is not. Spread weight by shuffling with flat feet, and keep a push stick or spare auger handle within reach.
Wearing cotton. Wet cotton loses its insulating ability and takes hours to dry. Choose merino wool or a synthetic wicking base layer instead.
Fishing too noisy. Crashing sleds, hammering the auger and shouting at the hole all push fish away. Arrive at a hole quietly and approach from the downwind side so your shadow does not fall across the water.
Frequently Asked Questions
What is the safest ice thickness for a beginner ice-fishing trip?
Plan on at least 4 inches of clear solid ice for walking, and double that for white ice, which is weaker because of trapped air bubbles. Test where you stand with a spud bar: it should travel a couple of inches per hard jab. Treat any spot near a spring, river mouth, inlet, pressure crack or old refrozen hole as suspect no matter how thick the surrounding ice reads.
Do I need an ice-fishing shelter for my first outing?
No, not for a first trip. A portable shelter helps most in wind, and many beginners wear a flotation suit and a hard jacket instead. Wait to buy one until you know you will fish in bad weather. If you want to test the idea, rent one for a single outing before committing.
What is the easiest gear for someone new to ice fishing?
A 24 to 32 inch ultralight or light power ice rod with an inline reel, 2 to 4 pound test line, a hand auger with a 6 to 8 inch blade, an ice scoop, a five-gallon bucket and ice picks. That covers a whole first day. Borrow the auger if you can, and put your own money into warm gloves and waterproof boots.
What bait should beginners use for their first catch?
A nightcrawler hooked through the head with the point near the tail works for bluegill, crappie and perch. Wax worms and small jigs catch the same fish when the bite is slow. Move to a fathead minnow or a small golden shiner once you are targeting walleye. Start with live bait, then experiment once you are catching consistently.
Can beginners ice fish alone, or should they go with someone?
You can physically do it alone, but a buddy is the single strongest safety habit in the sport. Most rescue reports on ice involve one person. If you must fish solo, wear a flotation suit, carry ice picks, leave your route and return time with someone, drill within sight of your vehicle and check in when you get back.
How long should a first ice-fishing trip last?
Three to four hours is the right length. Give yourself an hour to walk in, drill and set up, two hours of fishing, and time to pack out before your hands and feet quit. Longer trips only help once you have somewhere proven to fish. Plan to be off the ice well before dark.
Start by doing one thing this week: pick a buddy and a lake within twenty minutes of your house that is known for panfish. Check the local ice report the morning you go, borrow an auger and a rod if you can, and give yourself three hours. Everything else, including a shelter, sonar and a full rod locker, can wait for trip number four.