To store food in a cooler for three days, pre-chill the cooler overnight, freeze your food solid before you leave, and pack it tight with roughly two pounds of ice for every pound of food. Keep the coldest items at the bottom, drinks and ready-to-eat meals on top, and open the lid as rarely as you can. That combination is what separates a safe 72-hour cooler from a cooler full of lukewarm containers.
It takes about 20 minutes of active work and almost no attention after that, as long as you check the temperature once a day and stay out of direct sun. Anglers and boaters usually get away with a 45-quart cooler for a long weekend. Families heading out for three days usually need 70 quarts or two coolers.
Table of Contents
- 1What You Need
- 2How big a cooler do you need for a three-day trip?
- 3Step-by-Step: How to Store Food in a Cooler for Three Days
- 4Step 1: Pre-Chill the Cooler and Choose the Right Food
- 5Step 2: Chill Food Before Packing
- 6Step 3: Pack in the Right Order
- 7Step 4: Keep Food Cold in a Cooler for Three Days at 40 Degrees or Below
- 8Step 5: Plan What to Eat Each Day
- 9Step 6: Check and Clean Up During the Trip
- 10Common Mistakes
- 11Frequently Asked Questions
- 12How long is it safe to keep food in a cooler?
- 13Will ice last in a cooler for 2 days?
- 14What kind of cooler can hold ice for three days?
- 15Do I need dry ice for a 3 day camping trip?
- 16What can I do without a thermometer in the cooler?
- 17Conclusion
What You Need
You do not need a powered fridge-freezer to get three days out of an ice cooler. You do need the right cooler, more ice than you think, and containers that do not leak when they sit in meltwater.
- An insulated cooler. A rotomolded hard cooler with a gasket seal holds ice far longer than a soft-sided or plastic grocery cooler. Fiberglass and steel coolers also do well.
- Ice. Plan on about two pounds per pound of food, per day. Block ice, frozen water bottles, and reusable ice packs all count.
- Leak-proof containers. Zip-top freezer bags, hard plastic containers with latching lids, or vacuum-sealed bags. Skip anything that was packed in thin cardboard or a loosely tied deli bag.
- A cooler thermometer. A cheap dial or digital thermometer is the only reliable way to know you are still under 40°F.
- Drinking water. Frozen water bottles double as ice and as a drink once they thaw, which saves you from opening the cooler through the afternoon.
- A cooler map. A note or photo of the layout on your phone so you are not digging blind every morning.
- A trash bag or basin. Keep meltwater from turning the bottom of the cooler into a swamp that touches everything.
How big a cooler do you need for a three-day trip?
Bigger is only better if you can keep it closed. A cooler you keep shut beats a larger one you raid for snacks all afternoon.
| Cooler size | Best trip length | Good for |
|---|---|---|
| 20 to 25 quarts | 1 to 2 days | One or two people, or one day of fishing plus an overnight |
| 35 to 45 quarts | 2 to 3 days | Two people, or one angler bringing in fish |
| 55 to 70 quarts | 3 to 4 days | A family of four or a group running the cooler by boat |
| Two coolers, 35 and 55 quarts | 3 to 5 days | Anyone who drinks a lot of cold water during the day |
A secondary small cooler is the single best upgrade most families skip. Pull a day of food into it in the morning, leave the big cooler shut in the shade, and open only the small one all day.
Step-by-Step: How to Store Food in a Cooler for Three Days
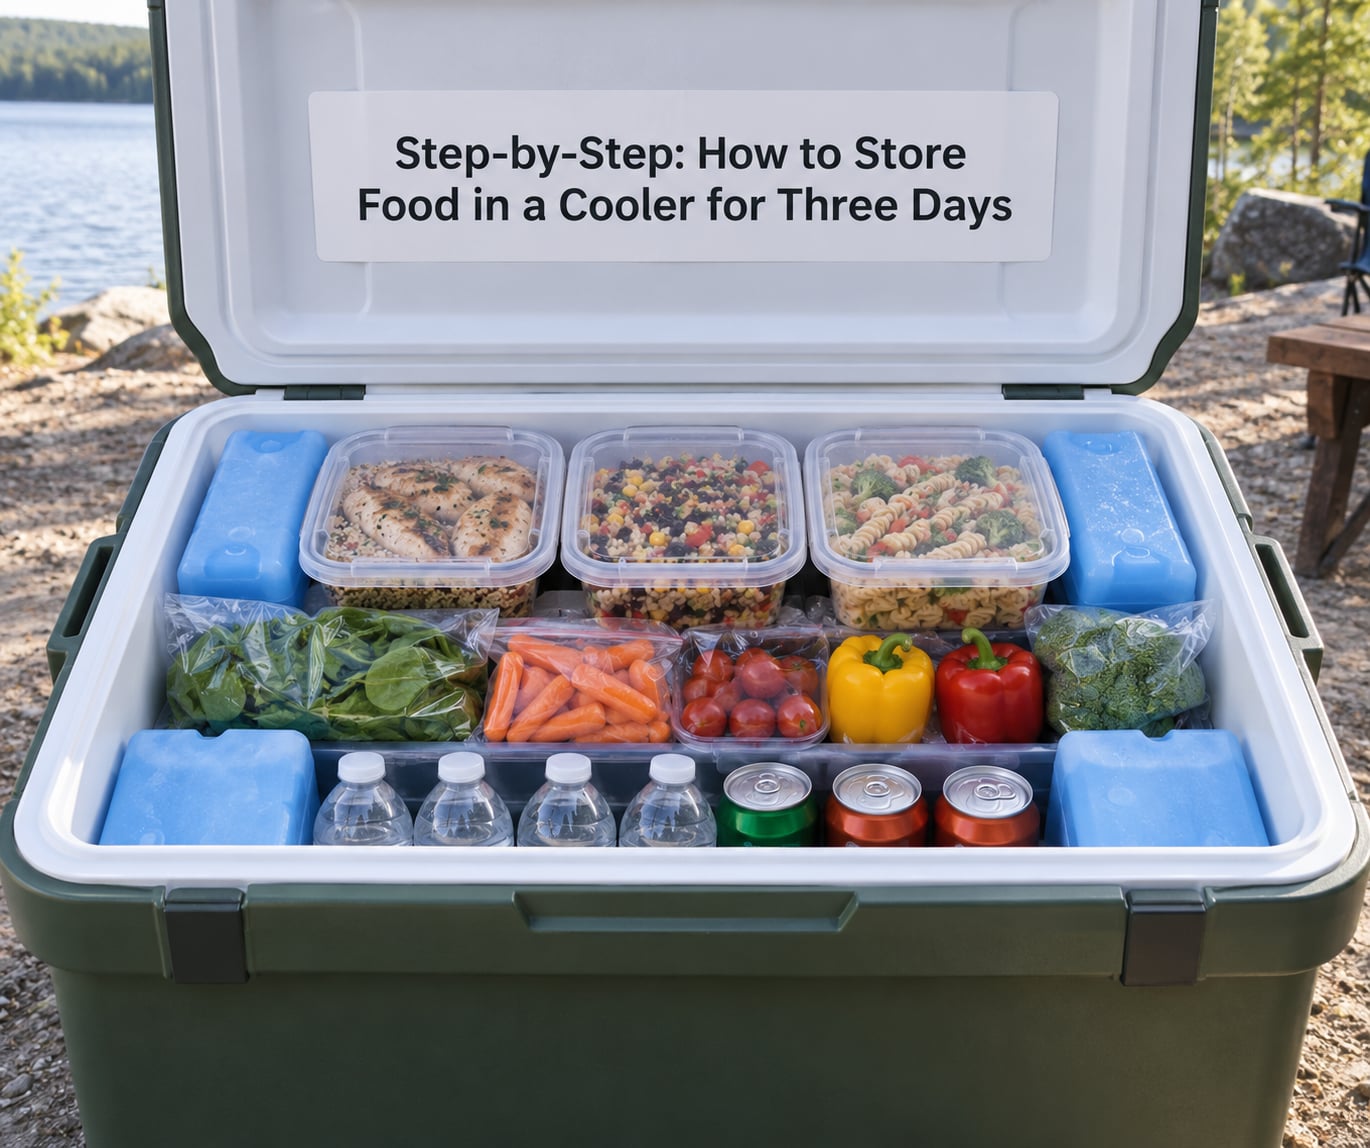
Step 1: Pre-Chill the Cooler and Choose the Right Food
Start the night before. Put the cooler in a walk-in freezer, or load it with sacrificial ice, and leave it there overnight so the walls and the lid reach refrigerator temperature before your food goes in. A room-temperature cooler starts the fight against the ice already behind, and a warm cooler can eat a surprising share of your ice load on day one.
Choose food that travels well. Frozen proteins, pre-cooked meals, cheese, butter, hard eggs, whole fruit, and sturdy vegetables like carrots and apples all hold up. Cut produce and dairy go first. Raw meat goes in last, in a sealed bag inside a second bag, sitting on the ice at the very bottom of the cooler.
Most cold-chain advice is simpler than people make it. Freeze as much as you can, pre-cook and portion meals into sealed bags, and lean on shelf-stable food as the backbone of the trip rather than the backup.
Step 2: Chill Food Before Packing
Never pack food straight out of the fridge while the cooler is still cold and empty. Cooked food needs to cool quickly in shallow containers, get covered, and go into the coldest part of your refrigerator until the last possible moment before you load up.
Freeze what you can. A frozen lasagna portion or a sealed bag of chicken holds its own temperature far longer than the same food chilled, because it has to warm up before bacteria get going. Freeze water bottles solid overnight; they become a cold mass you pack around everything else and a drink on day two.
Get the commercial packaging off. Decant soap, condiments, and dry goods into small containers you can reach without unpacking the whole cooler. Cardboard and thin plastic bags soak through and leak whatever they were holding into the rest of the food.
Step 3: Pack in the Right Order
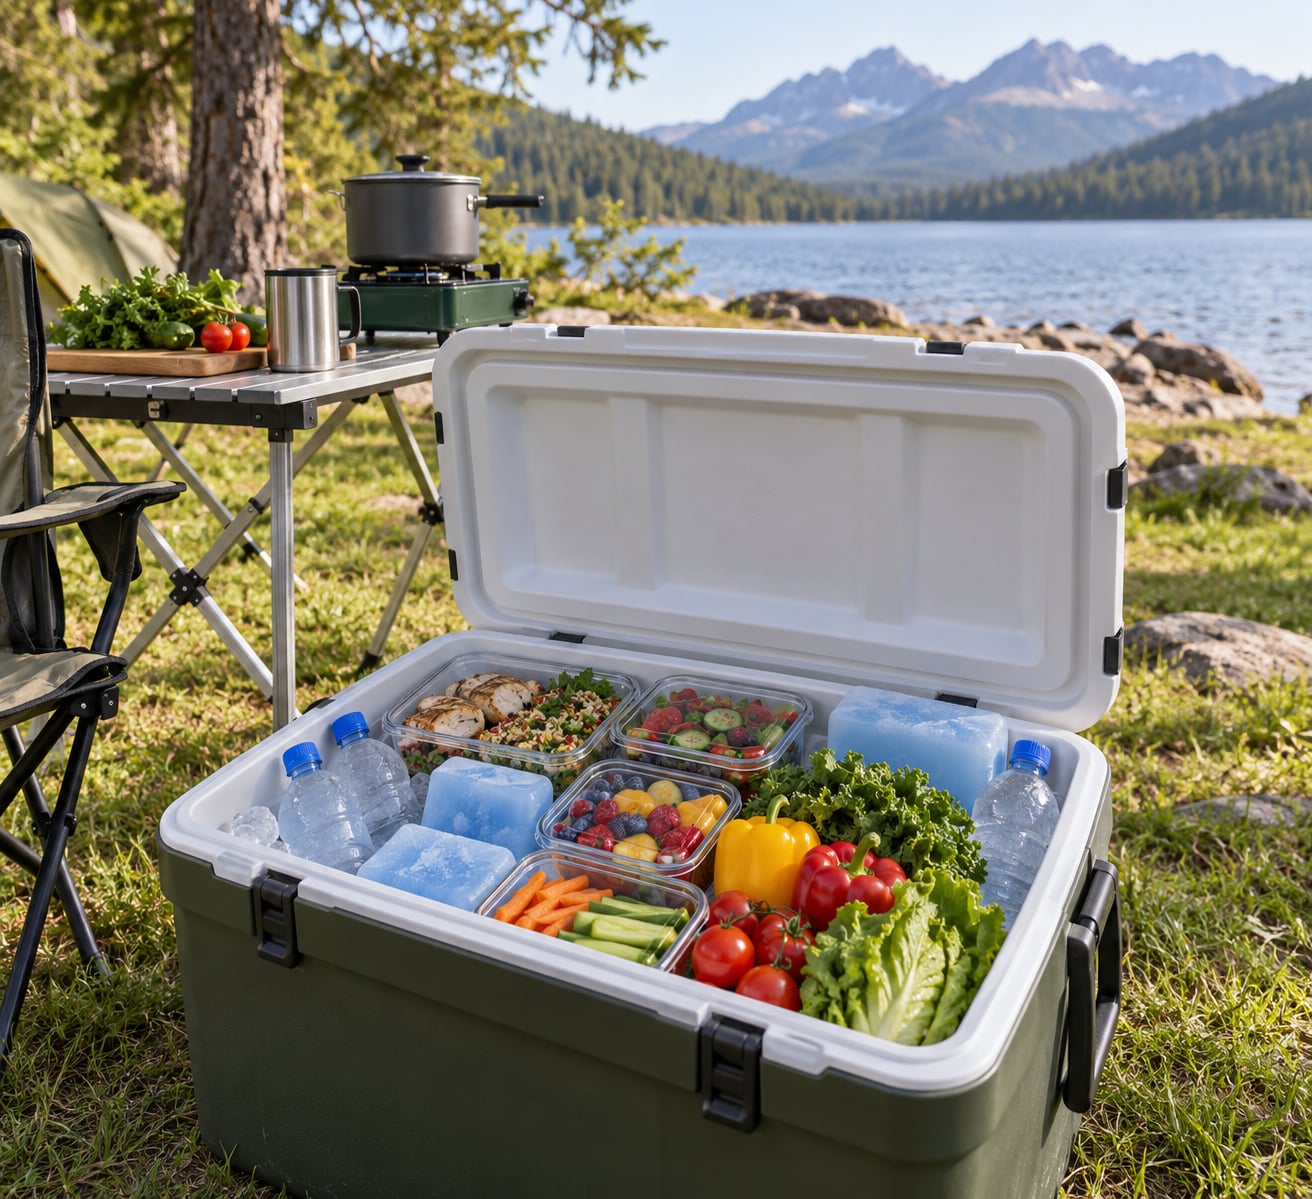
Load from the bottom up, and treat the ice as part of the structure rather than as filler.
- Bottom layer: block ice or the coldest frozen items, directly on the cooler floor.
- Second layer: heavily chilled food, packed in sealed bags, pressed into the ice so it makes contact on all sides.
- Middle layer: frozen meals, laid flat so they act like thermal mass for everything above them.
- Top layer: ready-to-eat food, drinks, and anything you want often, so you can get it without digging.
Pack with almost no air space. Gaps are where warm air sits and where heat conducts into the ice faster than the walls can hold it. Fill empty corners with a towel, a sweatshirt, or a soft bag, and stand frozen water bottles upright like a shelf so the delicate stuff above them does not get crushed.
Keep raw meat in a sealed bag at the very bottom, on the ice, away from everything else. That single step prevents most cross-contamination, and it matters more on day three than day one because thawed juices are the mess you do not want to find.
Step 4: Keep Food Cold in a Cooler for Three Days at 40 Degrees or Below
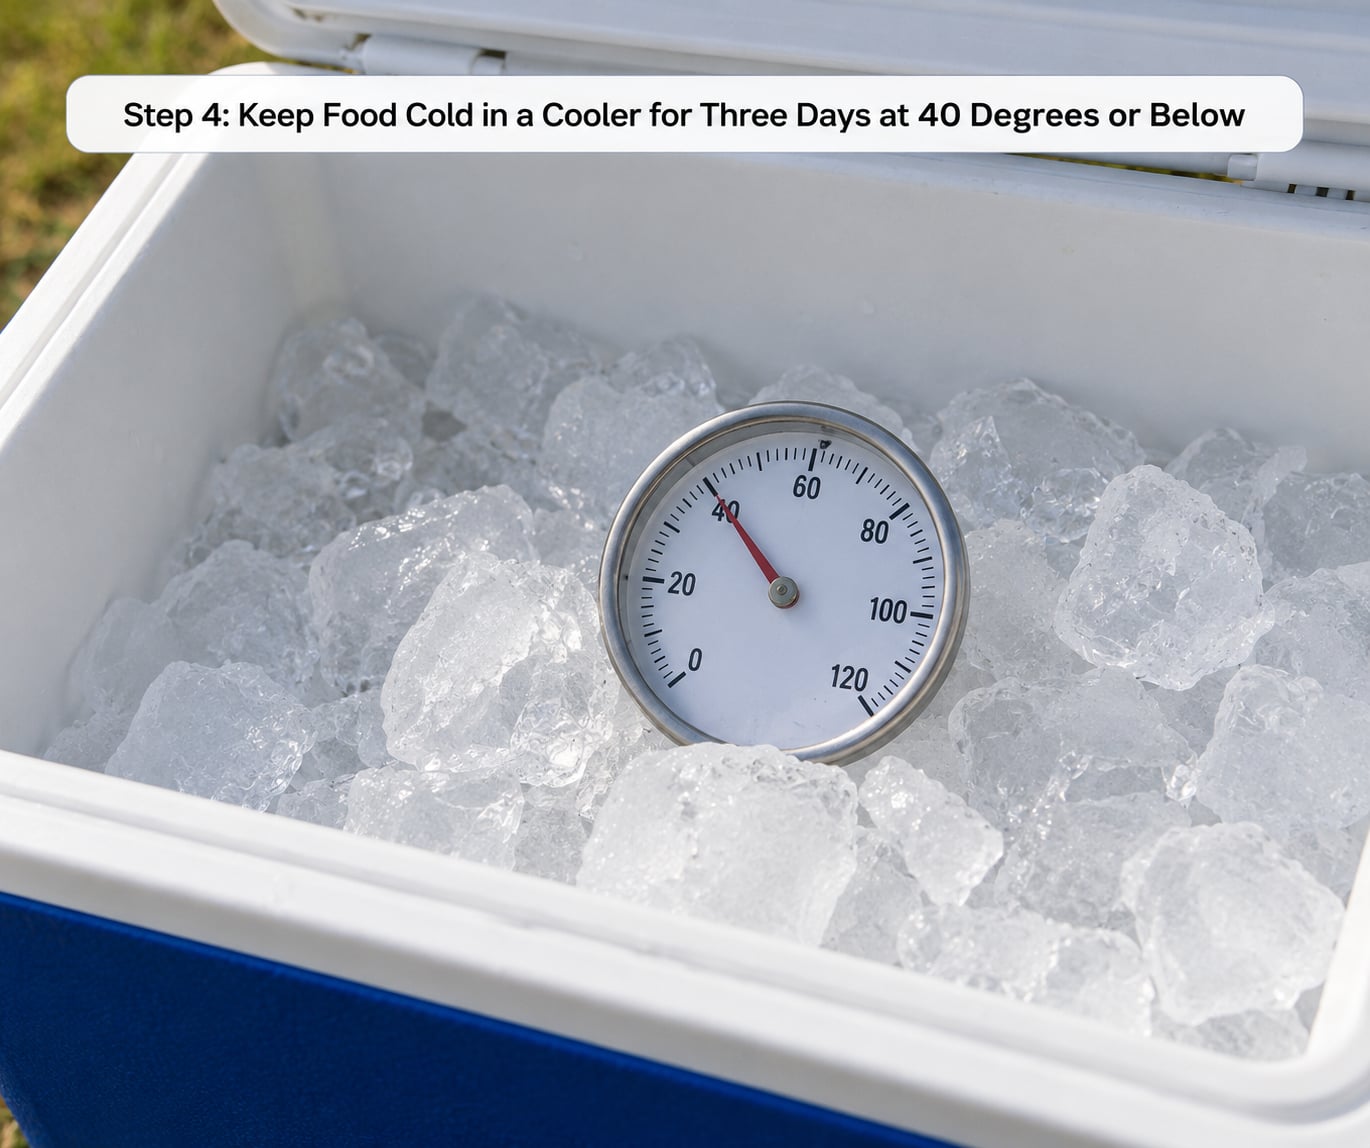
Food is unsafe above 40°F, and bacteria multiply fast between 40°F and 140°F. If a perishable item sits in that range for more than two hours, or one hour in 90°F-plus heat, throw it out. You cannot taste or smell the problem.
Put the thermometer in the cooler, resting on top of the food, not buried under ice where it reads low. Open the lid, check, close the lid. Once a morning is enough: open the main cooler one time a day, pull what you need for that day, and leave the rest alone.
The other half is keeping the cooler itself cold. A lid left unlatched in a stiff breeze “leaks” cold air. Push down hard on the corners of the lid before you leave. Keep the cooler out of the sun, in the shade of the truck bed canopy or under the boat’s T-top, and never leave it in a hot parked vehicle. Nothing in the packaging list survives a sun-baked lid.
Two habits help in hot weather. A wet burlap or mesh bag draped over the cooler drops the internal temperature as water evaporates. And a thin layer of salt in the meltwater pulls the freezing point of the water below 32°F, buying a little more time once the ice has melted down to a puddle.
Know which ice to bring before you go:
| Ice type | Holds cold | Best use | Watch out for |
|---|---|---|---|
| Block ice | Longest | Bottom of the cooler, drink cooler | Does not conform to shapes; heavy to haul |
| Loose ice | Short | Filling gaps and making contact around food | Melts fast and leaves a lot of meltwater |
| Frozen water bottles | Long | Dual-purpose ice and drinking water | Heavier than cubes; no ice left to drink later unless you planned it |
| Reusable ice packs | Medium | Top layer, keeping drinks and produce cold | Weak if the freezer is only at refrigerator temperature |
| Dry ice | Freezing | Ice cream, frozen treats, keeping seafood solid | Never airtight; gloves; carbon dioxide gas; can freeze and burst cans |
If you want popsicles or ice cream to stay frozen for three days without dry ice, put them in a small cooler that you keep closed and rely on the remaining frozen mass, not on the ambient ice. Dry ice is the reliable option, and it must never go in a sealed cooler. Wrap it in newspaper, ventilate, keep it away from bare skin, and expect the soda cans next to it to freeze solid.
Step 5: Plan What to Eat Each Day
This is the part most guides skip, and it is where three-day trips fall apart. Food planned for one day and packed for three turns into day three’s problem: everything is thawed, half-eaten, and warm in the middle.
Eat down from the top. Day one takes the top layer, the ready-to-eat stuff. Day two takes the second layer. Day three comes from the frozen reserve still sitting on ice at the bottom, so it starts colder than everything else.
| Day | Open the cooler | What to eat | What to do with the ice |
|---|---|---|---|
| Day 1 | Once, in the morning | Top layer, plus anything you want cold in the heat of the afternoon | Top off around the food with loose ice or an ice pack |
| Day 2 | Once, in the morning | Second layer and part of the frozen middle stock | Dump meltwater, add block ice or frozen bottles to the bottom |
| Day 3 | Once, in the morning | The frozen reserve, which has stayed cold the longest | What is left of the ice, plus whatever you kept frozen at home for the drive home |
Put your perishable meals early in the trip. Whatever you cook on day one from frozen meat gets eaten before the day it would get risky. Save dairy, cut fruit, and anything cooked fresh for the same day.
How much food to bring depends on who is coming. A rough starting point is about one pound of food per person per day, less for lightweight campers and more for people hauling firewood or working all day:
| Group | Three-day food weight | Three-day ice weight | Cooler |
|---|---|---|---|
| One person | About 3 pounds | 6 to 8 pounds | 25 to 35 quarts |
| Two people | About 6 pounds | 12 to 16 pounds | 45 to 55 quarts |
| Family of four | About 12 pounds | 24 to 30 pounds | 70 quarts or two coolers |
There are two ways to sort a cooler for three days, and the second one wins on most trips. A fridge cooler holds food at refrigerator temperature, which is all you need for day-to-day meals. A freezer cooler keeps things frozen solid, which protects the reserve and the raw fish. Split the difference: put most of the food in the fridge cooler, keep the frozen reserve and the raw meat in a freezer cooler or well-iced section, and pack the drinks somewhere else entirely so the food cooler can stay shut.
If you only have one cooler, the drinks are the problem. Open it all afternoon for a cold water and you will lose your ice. A small separate drink cooler, or a wide-mouth jug of cold water kept in the shade outside the main cooler, solves it.
Step 6: Check and Clean Up During the Trip
Morning check: open, read the thermometer, look at the food, close. If the reading is above 40°F, add ice, move the most perishable items to the coldest spot, and plan to eat those items first.
If the cooler has warmed up badly and you have no ice left, you have options. Meltwater below 40°F is still good cold storage, so keep the food in it and stop using it for anything else. Fish, milk, meat, and cut produce that have been warm for more than two hours go in the trash, even if they smell fine. Eating them risks a rough night that outweighs the meal. If you are near a marina or a store, a bag of ice and a bag of shelf-stable food are cheaper than a hospital visit.
Keep raw meat separate from the rest until you are cooking it, and wipe the container with a separate cloth. Wash hands and utensils with soap and water, not the meltwater in the cooler. Keep cans and bottles dry and above the meltwater puddle if you can.
After the trip, drain the cooler, wash the inside with hot water and a drop of dish soap, and let the lid open and the body air-dry completely. Leaving a cooler wet and closed for a week is how you get a mold smell that never comes out, and that smell follows the cooler into every trip after it.
Common Mistakes
Packing food that is still warm. Warm food packs down warmer than the ice can handle, and it can thaw the ice touching it. The fix: cool cooked food in shallow containers, cover it, and load the cooler at the last minute. A cooler that has already been sitting empty and cold can hold a warm meal; a room-temperature cooler cannot.
Putting all the ice on top. Ice on top melts first and does nothing for the food underneath. The fix: put the coldest food at the bottom and the ice around and beneath it, then load the ice-heavy top layer last.
Opening it every time someone wants a drink. This is the mistake that costs more ice than every packing trick combined. Warm, humid air enters, the cold air escapes, and your ice budget disappears before lunch. The fix: the once-a-day pull rule, plus a separate drink cooler or a jug in the shade.
Trusting a soft-sided or thin plastic cooler for three days. Thin walls and a lid with no gasket lose heat faster than any amount of technique can replace. The fix: use an insulated cooler with a seal, or stop relying on the cooler for perishable food and eat shelf-stable meals.
Leaving perishables in the danger zone. Two hours between 40°F and 140°F, one hour above 90°F, is the line. The fix: use a thermometer, eat the oldest and most delicate food first, and throw away anything questionable rather than gambling on it.
Packing raw chicken next to everything else. A leak means the whole cooler is contaminated, not just the bag. The fix: double-bag in zip-top freezer bags, set it on the ice at the bottom, and wipe the container after.
Forgetting dry ice is not ice. It is colder, it sublimates faster, and the carbon dioxide it releases builds pressure in a closed container. The fix: never seal it in, ventilate the vehicle, handle it with gloves, and keep it away from anything that can burst.
Frequently Asked Questions
How long is it safe to keep food in a cooler?
Perishable food stays safe in a cooler while it is held at 40 degrees Fahrenheit or below. Above that, and up to 140 degrees, bacteria multiply quickly, so two hours in the danger zone is the limit, or one hour when it is above 90 degrees outside. Check with a thermometer rather than guessing, eat your oldest and most delicate meals first, and throw away anything that has been warm past those limits.
Will ice last in a cooler for 2 days?
In a good insulated cooler packed tight, kept shaded, and opened once a day, block ice or frozen water bottles usually hold for two days without a problem. Loose cubes in a cheap cooler in hot sun can be gone by the second afternoon. Budget about two pounds of ice per pound of food per day, drain meltwater once a day, and top up around the food rather than on top of it.
What kind of cooler can hold ice for three days?
A rotomolded hard cooler with a gasket seal and a thick insulated lid holds ice for three days reliably. Fiberglass and steel coolers do well too. Soft-sided coolers and thin plastic grocery coolers struggle past two days in warm weather. Size matters as much as build: 45 quarts for two people, 70 quarts or two coolers for a family of four over three days.
Do I need dry ice for a 3 day camping trip?
No, unless you want frozen items frozen solid, like ice cream, popsicles, or fresh fish you plan to fillet later. Regular ice keeps food safely cold for three days with good packing. If you do use dry ice, never put it in an airtight cooler, handle it with gloves, ventilate the vehicle, and expect nearby cans to freeze solid and sometimes burst.
What can I do without a thermometer in the cooler?
You are guessing, which is workable in cool weather but risky in the heat. Put a cheap dial thermometer on top of the food, not under the ice, where it reads colder than the food actually is. Without one, keep raw meat and dairy on the ice at the bottom, eat them earliest in the trip, and if the ice has melted down to a puddle for hours, discard the perishables.
Conclusion
Start with the cooler, not the food. Put the cooler in the freezer the night before, freeze your meals and your water bottles solid, and repack everything into sealed containers with the packaging stripped off. Load the ice at the bottom and around the food, leave drinks somewhere else, and check the thermometer once a morning.
Keep it at 40 degrees or below for all 72 hours, and you will have food that tastes like food on the last night of the trip, not a science experiment.