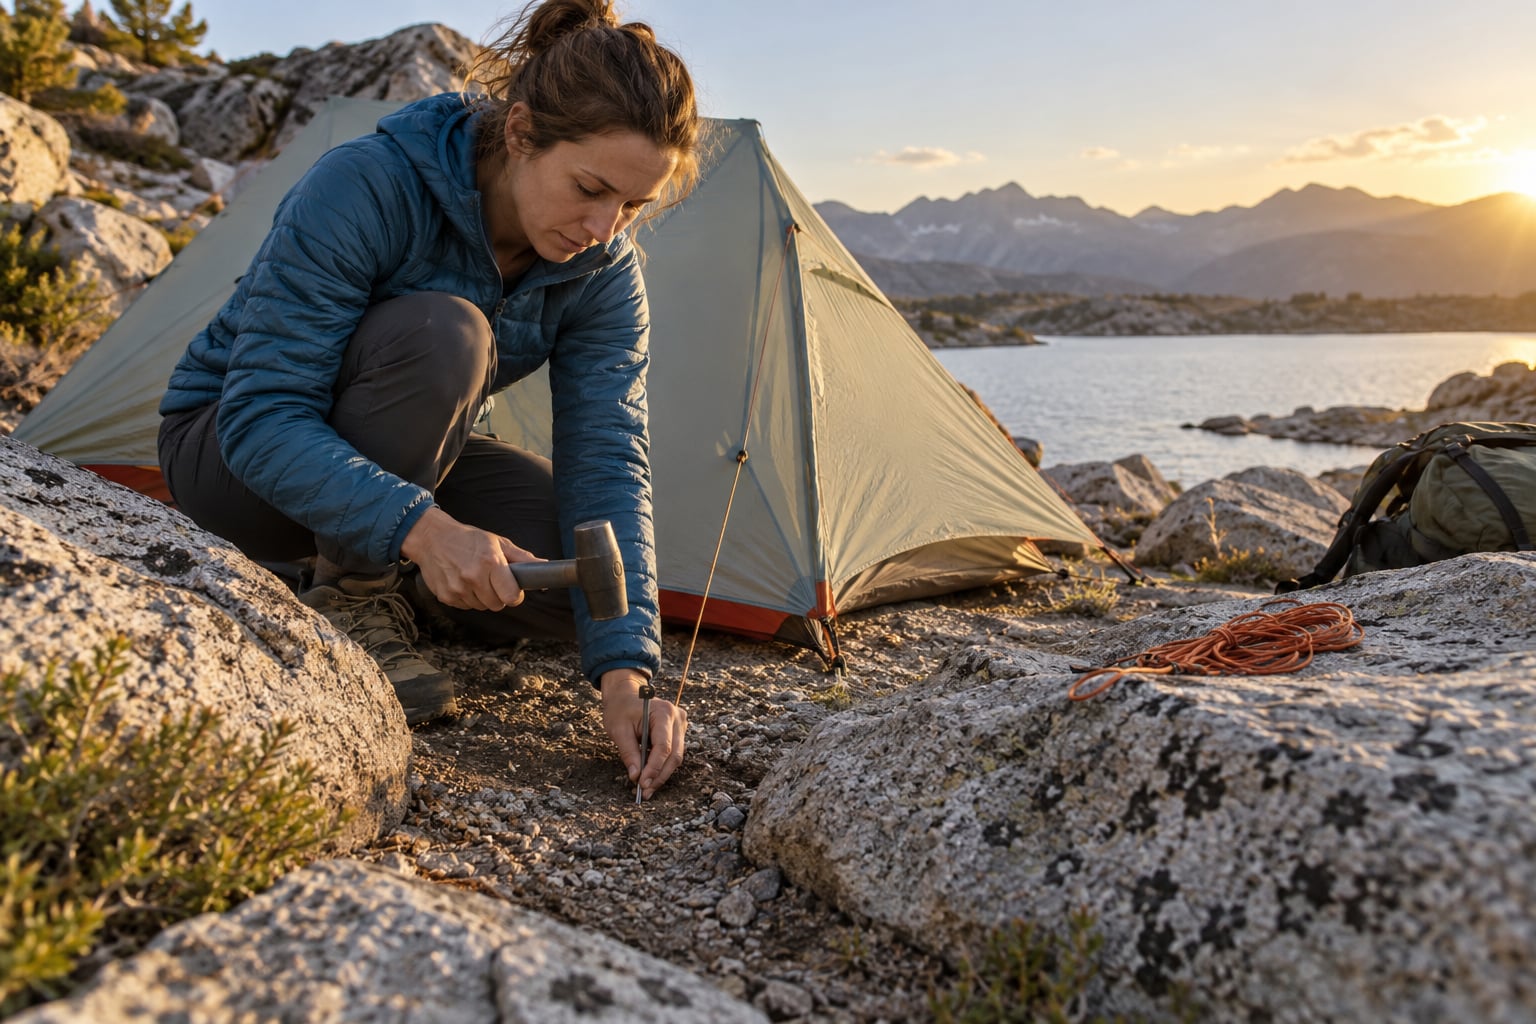
You cannot reliably drive a tent stake into rock, so you stop trying and anchor to something that already holds: a wedged stone, a crack or soil pocket, a stick buried as a deadman, or a stake seated shallow with a rock on its head. The fast version is the big rock, little rock method — slide a loop in the guy line, wedge a fist-sized stone through it, pull the line taut, then park a heavier rock in front of the little one so it cannot roll free. Learning how to stake a tent in rocky ground comes down to that shift in thinking, from forcing hardware into stone to reading what the ground will give you. It takes about five minutes per guy line, and it holds in weather that pulls loose stakes out of good soil.
Most tent failures on rocky ground are not fabric failures. They are anchor failures — a stake that stopped 3 inches into gravel, a line tied to a loose talus rock that moved at 2 a.m., a corner guyed out while the opposite side went slack. Get the anchors right and the rest of the pitch is ordinary.
Table of Contents
- 1What You Need
- 2How to Stake a Tent in Rocky Ground Step by Step
- 31. Choose a safe, sheltered site
- 42. Check the ground before pitching
- 53. Pitch the tent and mark every anchor point
- 64. Test for a reliable anchor
- 75. Drive each stake at the correct angle
- 86. Tension corners and guy lines gradually
- 97. Test the finished pitch and reinforce weak points
- 10Common Mistakes While You Stake
- 11Hammering straight down on every stake
- 12Striking a hidden stone
- 13Tying off to loose rock
- 14Re-tightening a line after moving the tensioner
- 15Pinching the groundsheet
- 16Leaving without looking
- 17Common Mistakes and Field Fixes
- 18Frequently Asked Questions
- 19Can you use rocks instead of stakes on rocky ground?
- 20What type of tent stakes are best for rocky ground?
- 21Should tent stakes always be driven in at a 45-degree angle?
- 22How deep should a tent stake be in hard or rocky soil?
- 23What should I do if the campsite will not accept stakes?
- 24Conclusion
What You Need
The gear list for rocky ground is short, and most of it you can improvise from the campsite itself.
- Stakes — a mix. Y-section or Groundhog-style aluminum for normal soil pockets, plus something tougher for the hard spots.
- A hammer — a standard camp hammer, or a short 4 lb sledge for dead ground. On the r/SpringbarTents thread on staking down a tent, several campers name a 4 lb sledge as the difference between a usable pitch and no pitch at all.
- A fist-sized rock — your backup pounder when you have no hammer. Flat-sided works best.
- Gloves — both for grip on the hammer and because rock edges will find your fingers.
- A trowel or small digging tool — for finding soil pockets, clearing duff, and digging out a deadman.
- A peg puller or a pair of pliers — see the pack-up notes at the end, because extracting stakes from hard ground is the part everybody underestimates.
- Your tent’s setup instructions — stake count and guy-out points vary a lot by model.
Three things change what you carry. Tent age matters, because older tents often come with flimsy J-stakes that bend on the first pebble. Soil type matters, because loose gravel and packed hardpack want opposite hardware. Ground conditions matter most: on a boulder field you may need nothing but cord and rocks, and on a lakeside bench with thin soil over gravel, long steel stakes are worth the extra weight.
If you carry one upgrade for rocky terrain, make it titanium nail stakes. They are the shape serious alpine parties use because they wedge into cracks and, unlike aluminum, they deform rather than snap.
How to Stake a Tent in Rocky Ground Step by Step
1. Choose a safe, sheltered site
Skip rockfall zones, flash-flood channels, exposed ridges, unstable slopes and dead branches overhead. Wind is the enemy here — on a ridge the wind can be steady enough that no anchor method helps.
Look for a reasonably level pitching area within a safe zone, then let the anchors follow the terrain instead of fighting it. Pitching on a slope is fine as long as you know the door will not end up downhill.
2. Check the ground before pitching
Walk the site and press your thumb into a dozen spots. Soft soil between rocks is a gift; gravel that closes on the stake after 2 inches is not. Roots, thin duff and buried rocks all cause the same failure — the stake stops early and you assume it is seated.
This is the step that decides whether learning how to stake a tent in rocky ground takes ten minutes or an hour. Most bad anchors are stakes driven into a spot nobody tested. Find the pockets: seams between boulders where soil collects, the lee side of a rock where grit has drifted, and the strip just below a slope break.
3. Pitch the tent and mark every anchor point
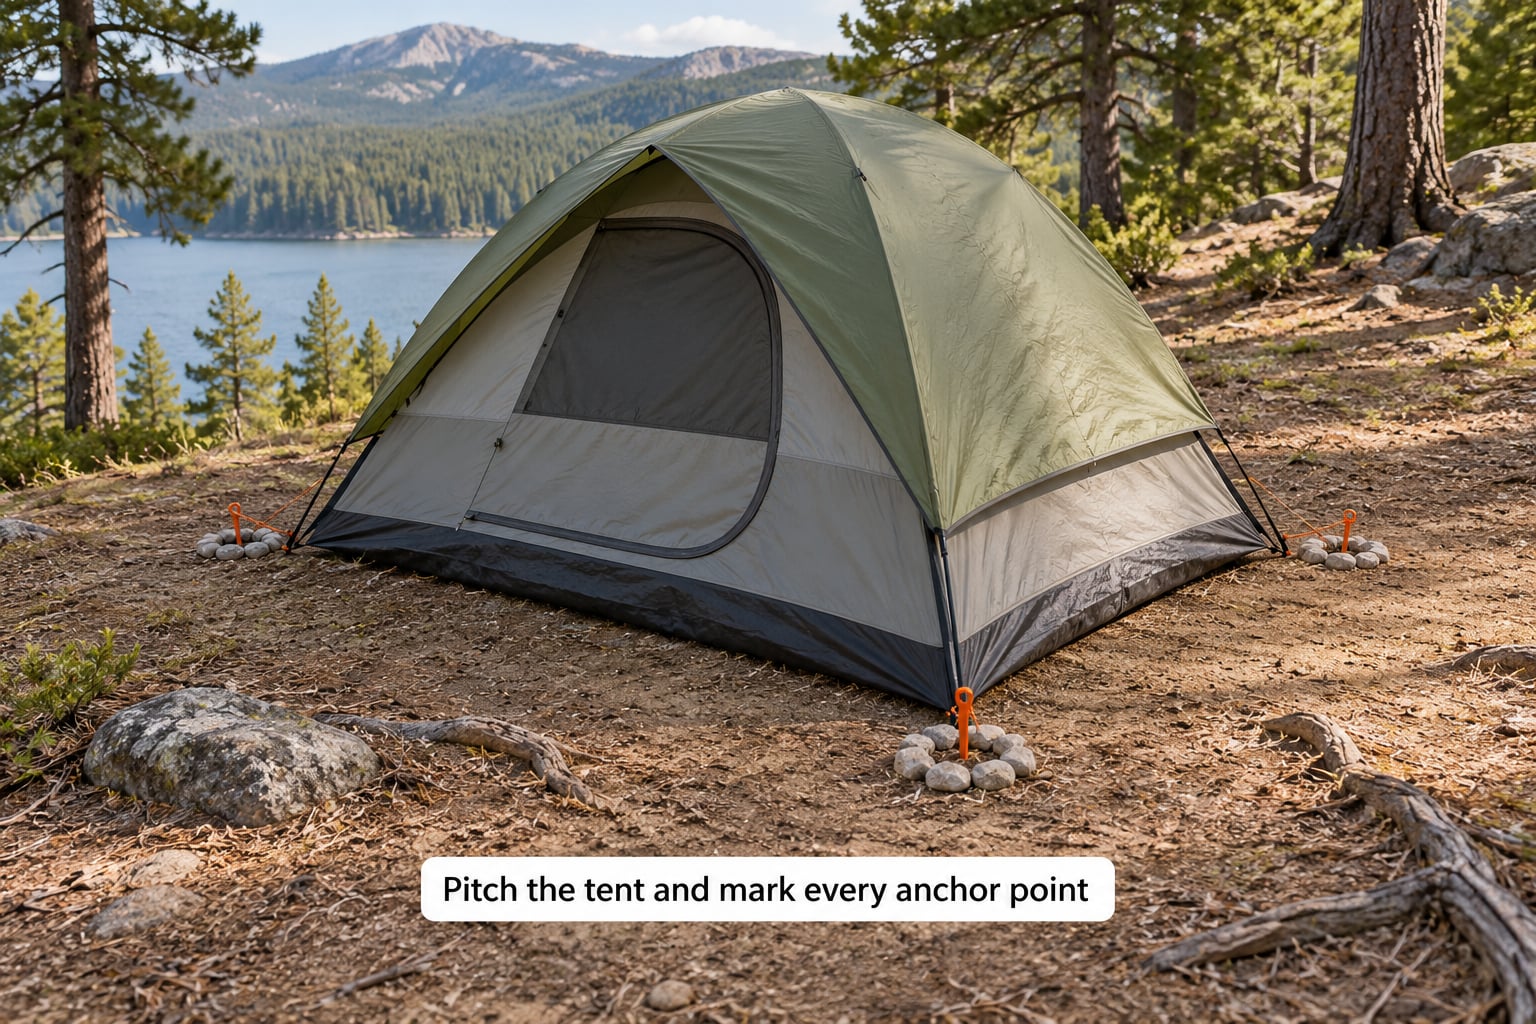
Lay out the footprint first so you can see where the corners actually sit. Point doors away from the prevailing weather, and match stake locations to your tent’s instructions rather than guessing.
Mark every point before you drive anything — a stick, a pile of gravel, or a stake laid flat. Once one corner is tight, the other three positions are no longer where they were, and unmarked lines get missed in the dark.
4. Test for a reliable anchor
Push a finger or a spare stake into several nearby points. Depth matters more than feel: if it will not go 4 inches with one hand, plan around it.
Soft soil is not automatically good either. A loose pocket under a rock can crumble when it takes load. When a point fails, move the corner, switch to a different guy-out point like a reinforced webbing loop or the hem, or swap in a longer or heavier anchor.
5. Drive each stake at the correct angle
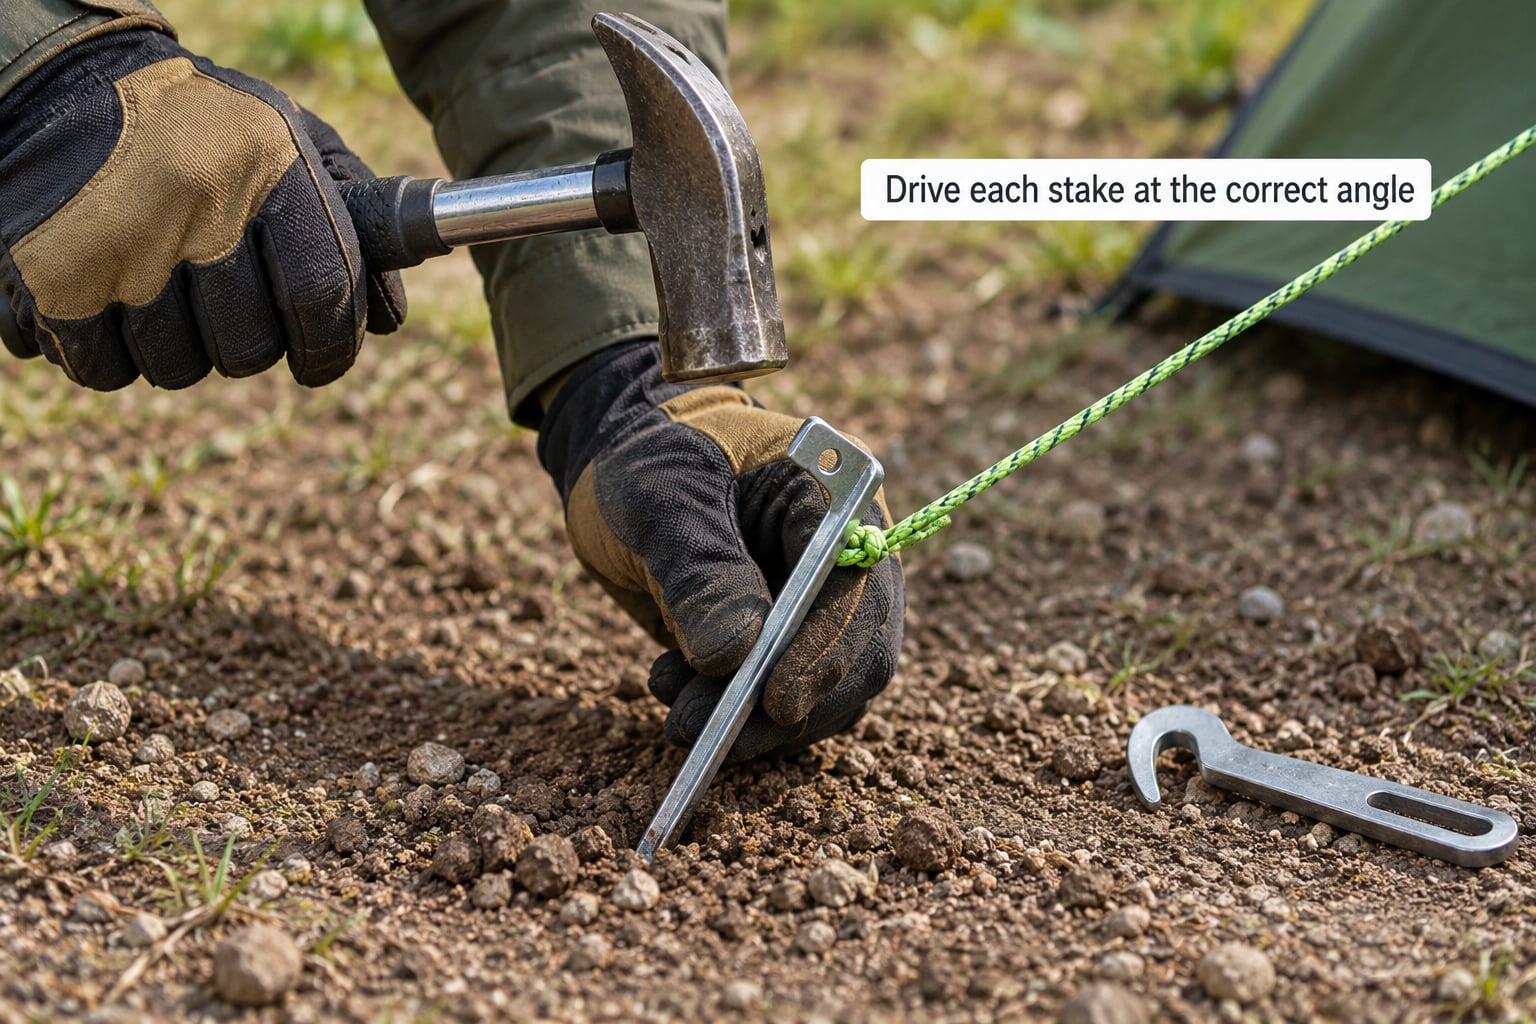
Angle corner stakes roughly 45 degrees away from the tent where the design and manual call for it, with the hook or notch staying above ground. Stake the windward side first, then the opposite corners, then the middles.
Use controlled strikes. Swing like you mean it but do not swing like you are angry — a bent stake is a bent stake. Experienced hikers describe taking whatever angle gets the stake fully into the ground, because rocky soil gives far less surface contact to work with.
6. Tension corners and guy lines gradually
Add tension in small increments, alternating from one side of the tent to the other. Even tension keeps the frame square and the fabric flat.
Pulling one point hard will lift or twist another corner and put a bend into the pole. Stop when the line is snug and the fabric is taut, not when the line sings. Use the tent’s tensioner rings or line loc as your cue, and follow the setup instructions for your specific frame.
7. Test the finished pitch and reinforce weak points
Push the shelter firmly with one hand and watch every stake and tie-off. Anything that moves gets attention now, not in the wind. Add a spare guyline where the load is highest, and check that you can still see daylight under the edges and reach the door without crawling over a taut line.
Re-check tension after rain, after a wind shift, and before you go to sleep. Guy lines that were tight at 4 p.m. are often slack by 10 p.m.
Common Mistakes While You Stake
Hammering straight down on every stake
Vertical is right for some designs and wrong for corner stakes in most tents. Check the manual, then angle away from the tent where it applies.
Striking a hidden stone
Aluminum and J-stakes get destroyed by the first rock they meet. Probe with a finger, change the spot, or move to the big rock, little rock method.
Tying off to loose rock
Talus and scree look solid and move as a unit. Test the rock first — if it shifts under your boot heel, it is not an anchor.
Re-tightening a line after moving the tensioner
Changing one line changes the load everywhere else. Walk the whole tent again after any adjustment.
Pinching the groundsheet
Stakes driven through the floor tear it. Anchor at the corners, hem loops and guy-out points instead.
Leaving without looking
Walk the pitch once more at dawn. Overnight dew and gusting wind work at anything that was already marginal.
Common Mistakes and Field Fixes
Here are the failures that actually bring tents down on rocky ground, what each one causes, and what to do about it in the moment.
- Picking the site first, testing the soil second. Stakes stop short and the tent leans before the wind arrives. Walk the site, thumb-test a dozen points, then pitch where several pass.
- Forcing a stake into a rock seam. The stake bends or shears and you get no holding power for the effort. Change the point or switch to a rock anchor.
- Tying to a loose boulder. The anchor walks or rolls and the whole corner follows. Load-test it with your full weight before trusting it.
- Overtightening one corner. The opposite corner lifts, poles bend and the fabric distorts. Release and re-tension evenly around the tent.
- No hammer in the pack. Stakes cannot be seated at all. Improvise a pounder from a fist-sized flat rock.
- Forgetting to re-check after rain. Wet soil loosens and slack lines let the frame work. Walk the pitch and re-tension every line.
Situational notes worth carrying in your head:
- Wet soil packs tighter and holds more, but clay that has been soaked and dried twice will crust over the top and cut holding power in half.
- Hard freeze is rock-hard work. In below-freezing conditions the honest options are a rock anchor, moving camp, or accepting a shorter night’s pitch and taking the tent down early.
- Large gravel gives a stake almost no surface contact. Bury it deeper than feels reasonable and add a rock on the head.
- Windy ridges are where stake-free anchoring stops being clever. If the site is exposed, moving to shelter beats any technique.
- Campsites that prohibit stakes — usually near beaches, dunes or fragile alpine vegetation — are exactly the places big rock, little rock is needed. Cord and stone weight the tent from inside; no holes, nothing to plug.
One thing nobody writes down: removing anchors. A bent stake buried 8 inches in hard ground is genuinely miserable to extract, which is why some campers carry a 4 lb sledge in the first place. Bring a peg puller, lever the soil away with the blade first, then pull. Leaving bent aluminum stakes in a campsite is litter, so if one snaps, pack the pieces out with you.
Frequently Asked Questions
Can you use rocks instead of stakes on rocky ground?
Yes, and on solid rock it is the only reliable option. The method is called the big rock, little rock tie-off: slide a loop into the guy line, wedge a fist-sized stone through it, pull the line taut, then set a heavier rock in front of the small one so it cannot roll out. Always load-test the anchor with your body weight first. Loose talus and scree look solid but move as a unit and will fail in wind.
What type of tent stakes are best for rocky ground?
Y-section and Groundhog-style aluminum stakes are the best general choice, because their broad profile resists bending and bites into firm soil. Steel or rebar stakes hold hardest but are heavy and can rust. Titanium nail stakes are the specialist option for cracks and thin soil over rock, since they deform rather than snap. Carry a mix, and length matters more than brand on stony ground.
Should tent stakes always be driven in at a 45-degree angle?
No, and treating 45 degrees as a rule causes its own problems. Angle corner stakes away from the tent when the tent design and manual call for it, since that increases holding power. In loose gravel or sand, bury them deeper instead of steeper. If a stone blocks the angled path, take whatever angle seats the stake fully, because partial burial is the real problem.
How deep should a tent stake be in hard or rocky soil?
Most guides call for 4 to 6 inches of burial in firm soil, and rocky ground needs closer to the upper end of that range. In loose gravel or sand, go deeper, around 8 to 10 inches, because you are replacing missing surface contact with length. If you cannot get at least 4 inches, treat that point as unusable and move the anchor rather than forcing it.
What should I do if the campsite will not accept stakes?
Switch to stake-free anchoring entirely. Tie the guy lines to wedged stones with the big rock, little rock method, or weight the tent from inside with stones placed in the corners and along the edges. On sand or dunes, bury the guy lines flat in shallow trenches and pile stones on the bury points. Never dig in near fragile alpine vegetation or marsh edge, where anchors and closures both cause lasting damage.
Conclusion
Start by testing the ground before you pitch — thumb a dozen spots, find the soil pockets between rocks, and only stake where you can get real depth. From there, drive the stake at the angle your tent calls for, tension every line evenly, and use big rock, little rock where rock wins. Getting a handle on how to stake a tent in rocky ground is mostly about knowing when to stop hammering and start tying off.