How to follow a trail without getting lost comes down to three habits: know the route before you start, carry at least two independent ways to navigate, and check your position on a fixed rhythm instead of when you start to feel uneasy. Most people who wander off a trail did not make one big mistake. They drifted a quarter mile at a time because nobody confirmed a direction.
The system below is what I teach on day hikes near the lake and on longer backcountry routes. Eight steps, gear that earns its weight, and a short list of the errors that cause nearly every search and rescue call. Budget two hours of preparation and the whole thing runs on autopilot once your feet start moving.
Table of Contents
- 1What You Need
- 2How to carry navigation gear without wasting weight
- 3Step-by-Step: How to Follow a Trail Without Getting Lost
- 41. Plan the route before leaving home
- 52. Download maps and test navigation offline
- 63. Learn the route signs and symbols
- 74. Check the compass heading and follow the correct path
- 85. Pause at every junction and checkpoint
- 96. Track progress instead of estimating by distance
- 107. Use weather, daylight, and energy as stop signs
- 118. Turn back or get help without creating a second crisis
- 12Common Mistakes That Lead to Getting Lost
- 13Quick Tips for Staying Oriented
- 14Frequently Asked Questions
- 15What should I do if I lose phone service while hiking?
- 16How do I know if I am following the wrong trail blaze?
- 17Should I backtrack if I realize I took a wrong turn?
- 18Can I follow a trail without a paper map or compass?
- 19What information should I give emergency services when I am lost?
- 20How can I keep an inexperienced hiking companion on route?
- 21Conclusion: Know Your Route Before You Go
What You Need
A route plan is the one item with no substitute. Write down your start point, intended destination, route name or number, and the time you expect to be back. If a storm hits at the wrong hour, that expected return time is what tells the person at home whether to call for help.
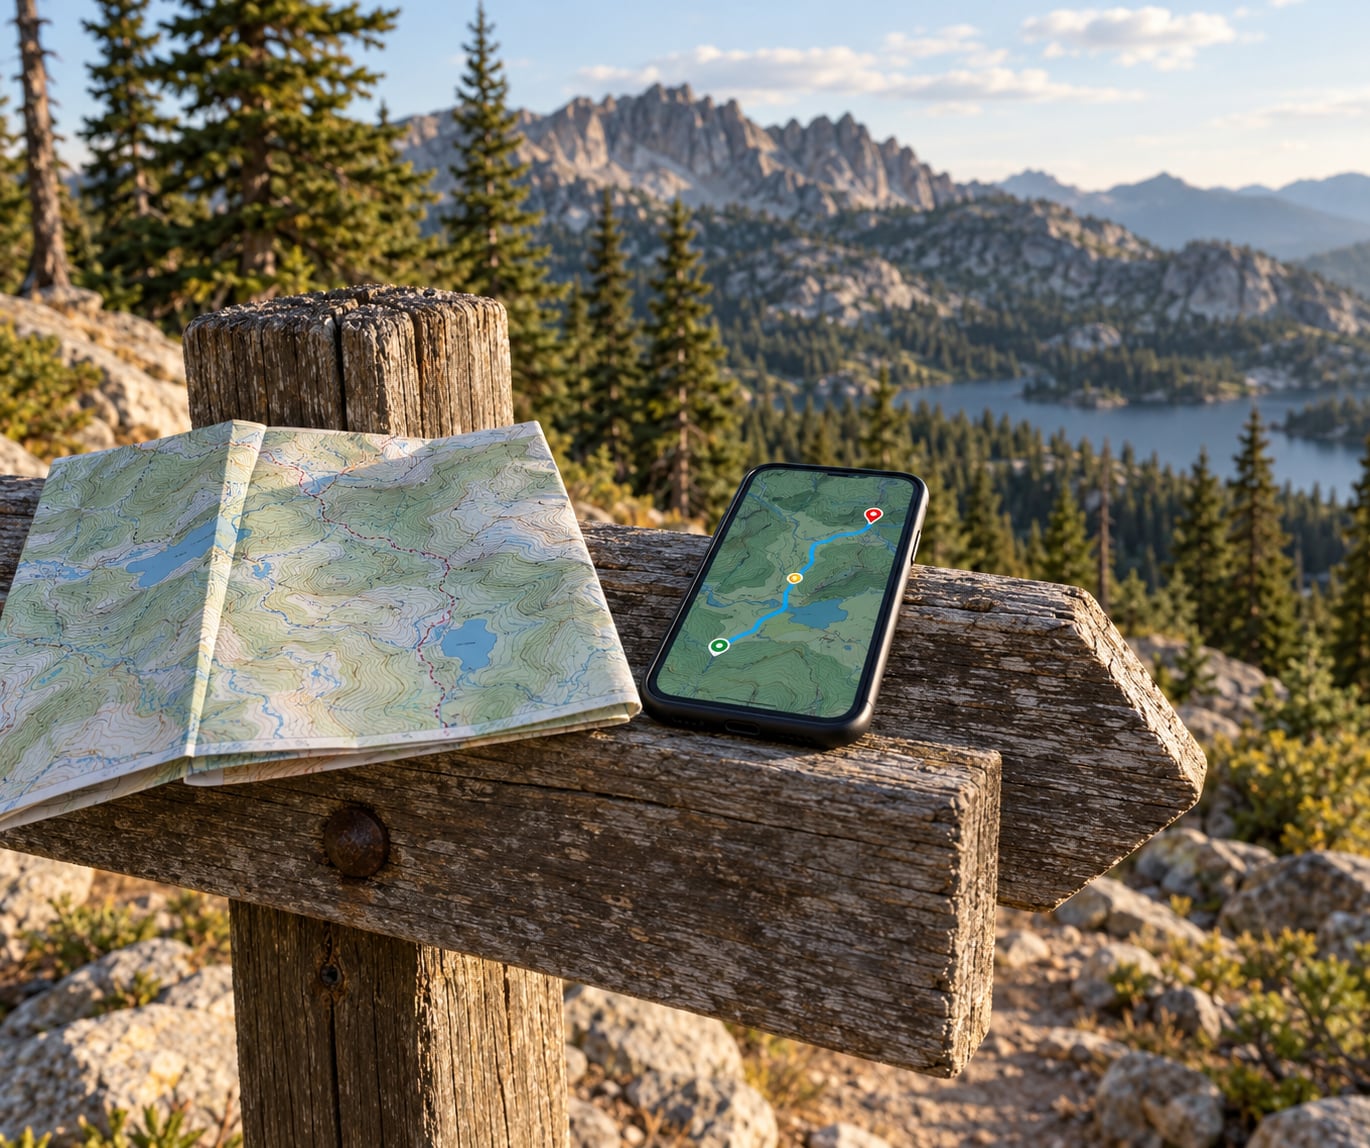
A waterproof paper topographic map covers the case where your phone dies, cracks, or soaks. Put it in a zip bag or map case, and mark the trailhead, your destination, your turnaround point, and your bailout routes before you leave. A paper map you have never opened in the field is close to useless, so read it once at the kitchen table.
A baseplate compass is for when the map is out and the phone is dead. A phone with downloaded offline maps handles the flat terrain, the wide views, and the “which of these three drainages is mine” problem better than anything else you can carry. A battery bank keeps that phone alive through a full day of screen checks.
Add a whistle, a headlamp, identification, a first aid kit, water, and a layer that keeps rain off. The whistle is the cheapest safety gear in this whole list, since sound carries far farther than voice and it costs no battery.
For routes with no cell coverage, a satellite messenger or a personal locator beacon adds a layer that talks to the sky rather than a tower. It is not a substitute for navigation skill, only a way out when skill is not enough.
How to carry navigation gear without wasting weight
A dozen unused apps on a phone is not redundancy, it is the same tool four times. What matters is that your layers fail for different reasons, which is why the paper map, the compass, and the offline phone all stay in the pack even though two of them are imperfect.
| Tool | What it does well | Where it fails |
|---|---|---|
| Paper topographic map | Works with no power, no light, and no signal | Slow without practice, useless in fog without contour reading |
| Baseplate compass | Instant bearing, no battery, works in the dark | Declination errors, and it says nothing about where you are |
| Phone with offline maps | Shows your position, route, and elevation profile live | Battery drain, GPS drift under tree cover, cold reduces life |
| Satellite messenger or PLB | Two-way help and a distress button with no cell service | Expensive, needs sky view, useless for routine navigation |
Put the compass on a lanyard so it is in your hand, not in a side pocket. Keep the phone in airplane mode with GPS on, since a searching phone burns power for a signal it will never find.
Step-by-Step: How to Follow a Trail Without Getting Lost
1. Plan the route before leaving home
Choose a trail that matches your worst day, not your best one. Look at the distance, the elevation gain, the surface, and the access points, then read recent trail reports for closures, washouts, or bridge work.
Decide your turnaround time before you pack, and write it down. A route that works in six hours is not a route you finish at eight, no matter how pretty the summit looks. Most trail networks also have alternate access points, so note one bailout you could reach in an hour.
You can tell someone the plan in thirty seconds: route, start time, car description and location, expected return. If you are solo, send it to a person who will actually notice if you do not answer.
2. Download maps and test navigation offline
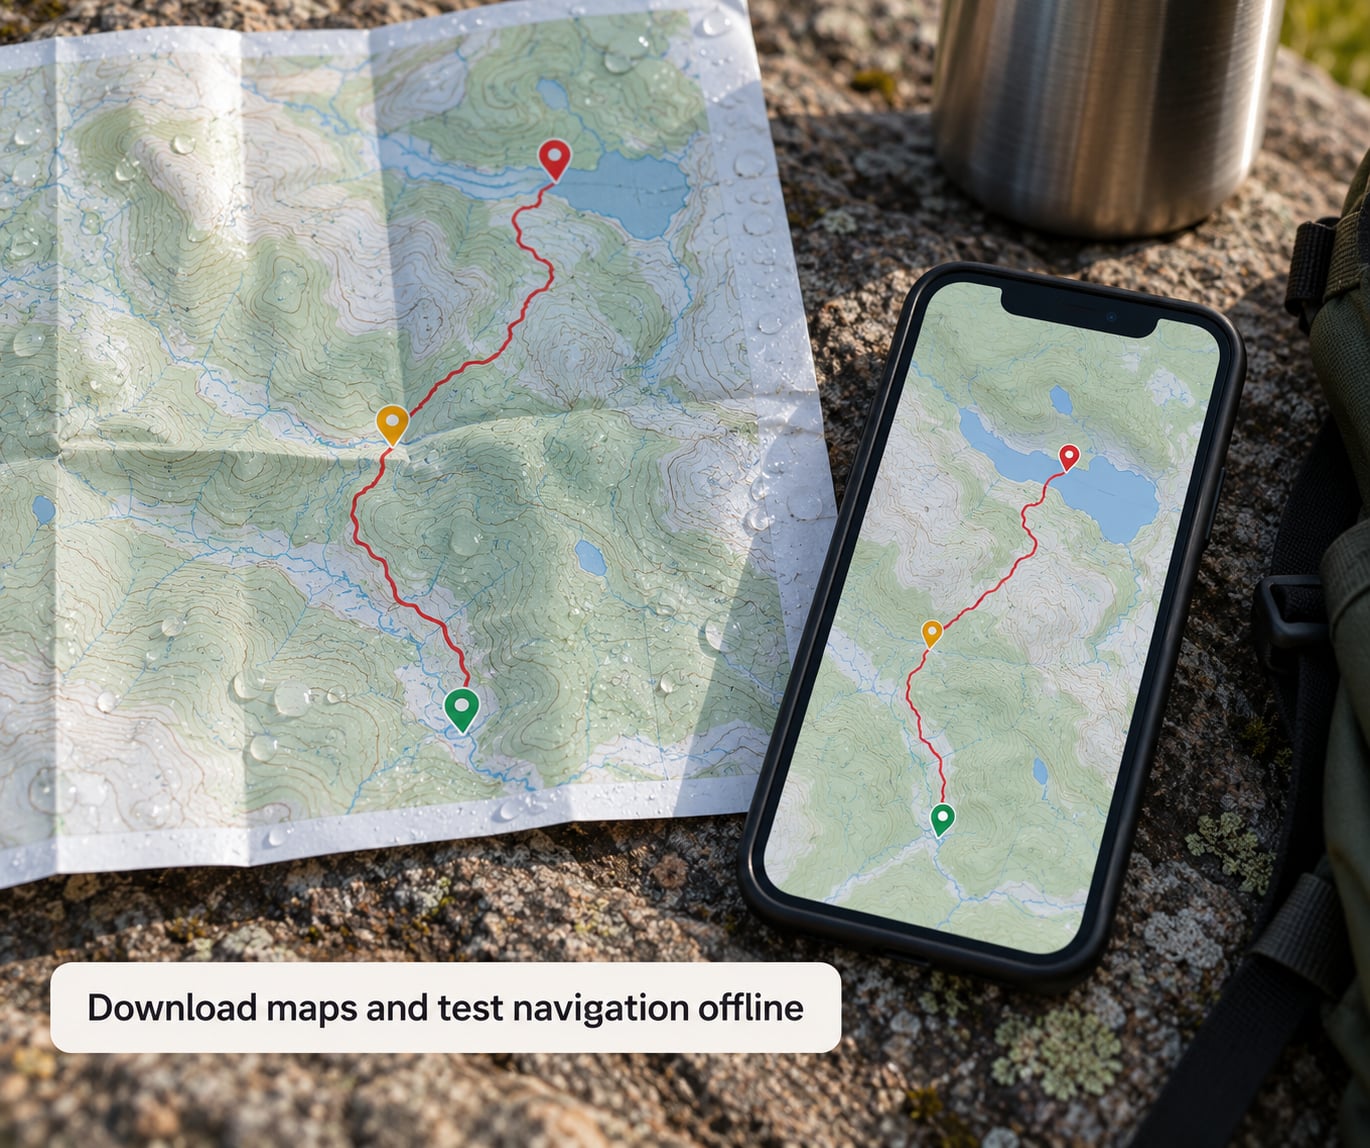
Download the whole area before you leave the house, not the trail corridor. Once you cross a ridge, the app tries to fetch tiles you did not download, and that is exactly when a network request fails.
Open the map in airplane mode at the trailhead. Confirm the trailhead marker, place a marker on your destination, and place one on the first junction or pass you will cross. Screenshot the junction so you have something to compare against when the trees close in.
Zoom in far enough that the trail line is visible with your thumb over the bottom half of the screen, since that is how you will actually be holding it. Set the map to show your track and the direction of travel, not just your dot.
Switch off location-based screenshots, streaming, and any app that polls in the background. Brightness down, airplane mode on, GPS left on. A phone in airplane mode is still a GPS receiver, which surprises a lot of people.
3. Learn the route signs and symbols
Blazes are paint marks on trees, rocks, or posts, and their color and shape are chosen by whoever built the trail. There is no universal color code, so never assume that a blue blaze means a water trail or a red blaze means a right fork. Read the sign at the trailhead, where the color system for that trail is usually stated.
Here is what you will actually meet on a trail.
| Marker | What it looks like | How to use it |
|---|---|---|
| Paint blaze | A painted stripe, triangle, or dot on a tree at eye height | Follow the sequence, not the shape; a gap means you probably passed one |
| Cairn | A stack of rocks, taller than knee height | Points the safe line in open terrain where paint would not show |
| Trail post | A wooden post with a routed or painted arrow, letter, or number | Read it at the junction, then photograph it |
| Flagging tape | Faded pink or orange ribbon on brush or branches | Short-term route flagging, often near recent trail work |
| Carved blaze | A notch or carved shape in bark or rock | Oldest system in North America, and easy to miss at a distance |
| Junction board | A sign listing destinations and walking or driving times | The single most useful sign on the trail; note the times |
Stacks of loose rock are a different thing. Some land managers ask hikers not to build or dismantle cairns, since moving one can send a later hiker the wrong way. Leave them alone and look for paint or a post instead.
When a blaze is missing, do not assume you have gone wrong. Blazes fade, get cut down, or sit behind tree trunks that grew since the trail was built. Walk forward a short distance and look for the next one before you change anything.
4. Check the compass heading and follow the correct path
Most compass mistakes come from one number: declination, the angle between magnetic north and true north. In most of the US that difference is roughly 10 to 15 degrees, which is enough to send you a few hundred yards off after a mile of walking.
To get a bearing, lay the map flat, line the long edge of the compass with your direction of travel, rotate the housing until the orienting lines match north on the map, and read the number at the lubber line. Add declination for east or subtract for west, depending on whether the magnetic reading is ahead of or behind true north.
Set that heading, then walk it. Every fifteen minutes or so, look at your map, find the next two landmarks in order, then find the same two landmarks in front of you. That is triangulation, and it works far better than trying to match a whole hillside to a drawing.
If the direction you are facing disagrees with the direction you think you are walking, the trail may be switchbacking. A switchback turns your path every hundred yards while the slope keeps going straight up, so read the map for the contour pattern rather than the compass alone. A benchmark or a rock summit near the intended bearing is a stronger check than a guess.
5. Pause at every junction and checkpoint
Momentum is the real danger at a junction. You are walking, the sign appears, and the path you are already on keeps going straight, so you keep going straight.
Use a four-part junction protocol. Stop fully. Read the sign and match the destination name to your map. Confirm the map, the compass, and the sign all point the same way. Photograph the sign, then move.
Do the same at stream crossings, saddles, trailheads you pass, and anywhere the trail briefly joins a road or another trail. These are the places where a wrong turn is cheapest to fix, because a single track is still there to walk back until the paths diverge.
Look behind you at every major junction too. The view back is the view you will have if you need to reverse, and recognizing it in daylight is worth more than any app alert later.
6. Track progress instead of estimating by distance
Distance alone lies. Three miles of gentle switchbacks takes an hour; one mile of scramble takes three. Watch elapsed time against the plan instead, and check the phone’s track at the same moments you would check the map.
Note three things each time you stop: where you are, the time, and the next landmark you expect. Write them down if you are solo. A hiker two hours late with a written note at 40 percent of the route has a problem, and a hiker two hours late with no note has a search.
Use the elevation profile as a progress bar. If you are at the final climb earlier than planned, you gain room. If you are still below the pass when the profile says you should be over it, you turn around now rather than at dusk.
7. Use weather, daylight, and energy as stop signs
Set a hard rule in advance and write it down. Common ones: stop at the first thunderhead, turn back at a set time regardless of distance, and stop the descent when the light goes flat and gray.
Darkness is the enemy, not distance. Headlamps let you move but they do not let you read terrain, spot washouts, or judge a slope. If you would need a headlamp to reach the next waypoint, that waypoint is your turnaround.
Rain is the second one. Once water runs across the trail, the tread turns to mud and the erosion channels beside it start to look exactly like the path. A hiker once told the story of walking an eroded ditch for a good distance before noticing, and then dropping a phone into the stream on the way back. Wet terrain plus no service is when you stop and reassess rather than push.
Third is your own condition. Blisters, a rolled ankle, and a headache do not improve with distance. The turnaround you set at the trailhead is not a suggestion, and neither is the one you set here.
8. Turn back or get help without creating a second crisis
Stop where you are. Standing still is nearly always better than walking a direction you cannot justify, because each step adds a new landmark to ground you will soon have to search.
Work through the STOP sequence: Stop, Think, Observe, Plan. Stop means feet planted. Think means asking what you actually know, not what you hope. Observe covers the ground around you, your map, your compass, the phone, and the sun. Plan means choosing the single next action, which is usually a backtrack to the last confirmed point.
Backtracking is safe when you can identify the trail you came from and the distance is short. Walk in the direction that has the least ground to explain, look for your own markers, and stop at every junction again. If you cannot point to the last confirmed place, staying put is usually the better decision.
Call for help when the situation is more than a navigation problem: injury, an unplanned night out, weather you cannot outlast, or no way to reach the trailhead before dark. Give the dispatcher your coordinates from the phone, your elevation, the nearest trail name, the direction of travel, your group size, and what you have with you. Vague locations cost hours; coordinates cost minutes.
Common Mistakes That Lead to Getting Lost
Relying on the phone alone. Phones fail in cold, in water, and at exactly the moment the trail stops being obvious. The fix is not a better app; it is a paper map and a compass you have actually used once.
Carrying tools you cannot operate. Plenty of hikers own a compass and have never taken a bearing. Before a trip, find a known line such as a road or a fence, take the bearing, walk it, and check yourself. Ten minutes at a park fixes a year of carrying dead weight.
Following a phone alert over the ground. GPS drifts badly under thick canopy, in canyons, and beside water. The blue dot is a tool, not a verdict, and it should never override a sign or a bearing.
Continuing past a sign that disagrees with your plan. A sign pointing somewhere you did not plan is information, not an obstacle. Stopping costs two minutes; being on the wrong trail costs hours.
Ignoring time. A late start, a slow pace, and a long lunch turn a four-hour route into an eight-hour one. Check the clock at the same times you check the map, not only when something feels off.
Skipping the gear because the trail is short. A short trail near a road and a short trail in a drainage behave nothing alike. The gear list should match the terrain, not the drive.
Letting the group follow the person who is also unsure. Groups in the field follow whoever looks most confident, and confidence is not the same as knowing where the trail goes. Assign one navigator and make it their job to say out loud what they see.
Quick Tips for Staying Oriented
- Check your position every 15 to 20 minutes, on a timer, not on a feeling.
- Photograph the trailhead sign and every junction sign, so you have the text even if you miss the sign.
- Read the trail report the morning you go, and again if the weather changed overnight.
- Run a trail app in airplane mode with brightness low, and carry a bank for the phone you will drain.
- Keep the compass on a lanyard so a bearing takes five seconds instead of a pack excavation.
- Three whistles means stop; one whistle means where are you.
- Take one break at a time, not several, so the sun has not moved far when you restart.
- Use natural cues as backup, not primary: water runs downhill, ridgelines connect, and the sun sits in the south at midday in the northern hemisphere.
- Tell someone your route and your expected return time, and give that conversation a real deadline.
Frequently Asked Questions
What should I do if I lose phone service while hiking?
Nothing changes, and that is the point. Offline maps, a paper map, and a compass keep working with no signal at all, which is why you download the whole area before leaving. If you have no paper map, stay where you are or backtrack along the trail you can see, and use the sun, water flow, and ridgelines to keep your sense of direction. Save a satellite messenger for the case where you need to talk to someone, not for ordinary navigation.
How do I know if I am following the wrong trail blaze?
Blaze color and shape mean different things on different trail systems, so the color itself tells you little. The signs are real when a blaze leads to a junction board naming your destination, when the blazes run continuously at a consistent height, and when the trail on your map matches the ground around you. If a blaze vanishes for a long stretch or the direction contradicts your map, stop, check the map, and treat the missing blaze as a question rather than proof that you have gone wrong.
Should I backtrack if I realize I took a wrong turn?
Usually yes, as long as the trail you came from is still identifiable and the distance is short. Walk back in the direction with the least ground to explain, check the map at each junction, and stop if the trail is no longer clear. Backtracking is a poor choice in fog, in failing light, or when the injury that slowed you down makes walking rough ground risky. In those cases, stay put and call for help instead of adding a second mistake to the first one.
Can I follow a trail without a paper map or compass?
You can follow a well-marked, well-signed trail without them, especially with offline maps downloaded and a clear junction board at every fork. You cannot recover from a mistake without them, and that is the difference worth thinking about. A phone covers a lot of ground but it is one device with one battery and one failure mode. Paper and compass cost little, weigh almost nothing, and never need charging.
What information should I give emergency services when I am lost?
Give your coordinates from the phone first, then your elevation, the nearest trail or road name, the direction you were traveling, the time of your last known position, how many people are with you, and what supplies you have. Say what color you are wearing and describe any vehicle at the trailhead. Dispatchers repeat your location back to confirm it, so wait for that confirmation. A description of the terrain and any water you can hear or see helps them search wider.
How can I keep an inexperienced hiking companion on route?
Set the pace so the least experienced person is comfortable, and have them carry the navigation rather than follow along behind it. Slow hikers who are also responsible for the map start noticing the blazes and the junctions instead of watching the ground. Agree on the turnaround time before the trailhead, check position at the same moments everyone, and stop at every junction together. Confidence is contagious in both directions, so a group that hesitates together hesitates long.
Conclusion: Know Your Route Before You Go
Knowing how to follow a trail without getting lost is four actions in the right order. Pick a route that matches your fitness and the weather, and write down your turnaround time. Save the whole area offline and carry a waterproof paper map and a compass with it, so no single failure ends the trip.
Then confirm the ground instead of trusting a feeling: read every junction sign, photograph it, check your position every fifteen to twenty minutes, and track time rather than distance. If you need a headlamp to reach the next waypoint, that waypoint is where you turn around.
Prepare those three things and the trail takes care of itself most days.